
Hartson’s Bacon – Boiled [Amazingly Simple and Quick]
I remember one particularly chaotic Sunday morning. My family was ravenous, and the smell of frying bacon usually brought a sense of calm. But that day, the grease splatters were relentless, the smoke alarm was blaring, and the bacon was either burnt to a crisp or still flabby. It was a bacon disaster. That’s when I stumbled upon this technique – boiling bacon first. Skeptical as I was, the results were revolutionary: perfectly cooked, crispy bacon with minimal mess and a surprisingly clean taste. Now, this is my go-to method for stress-free weekend breakfasts.
Recipe Overview
- Prep Time: 2 minutes
- Cook Time: 16 minutes
- Total Time: 18 minutes
- Servings: 2
- Yield: 6 slices bacon
- Dietary Type: Varies based on Bacon Type
Ingredients
- 6 slices bacon (more if your pan allows)
- ½ cup water
Equipment Needed
- Deep skillet or pan
- Tongs or spatula
- Paper towels
Instructions
- Place 6 slices of uncooked bacon into a deep skillet or pan. Make sure your pan is large enough to accommodate the bacon slices without overcrowding.
- Add ½ cup of water to the pan, ensuring the water covers the bacon. You may need to add slightly more or less water depending on the size and shape of your pan – the key is to have enough water to just cover the bacon. The bacon should be easily movable with your fingers to position them next to each other.
- Turn the burner to a high setting and bring the water to a rapid boil. Keep a close eye on the pan, as the water will evaporate quickly.
- Once the water is boiling rapidly, reduce the heat to medium-high. Continue cooking until the water has boiled away from the pan. This step renders a lot of the fat out of the bacon.
- After the water has evaporated, reduce the heat to medium-low. This is where the bacon begins to crisp up in its own rendered fat.
- After about 5 minutes, flip the bacon slices. For uniform cooking, rotate the outer pieces of bacon towards the middle of the pan and the middle pieces to the outside, as the center tends to be hotter.
- Continue to flip the bacon occasionally, cooking to your desired level of crispiness. Keep a close watch, as the bacon can go from perfectly crispy to burnt very quickly.
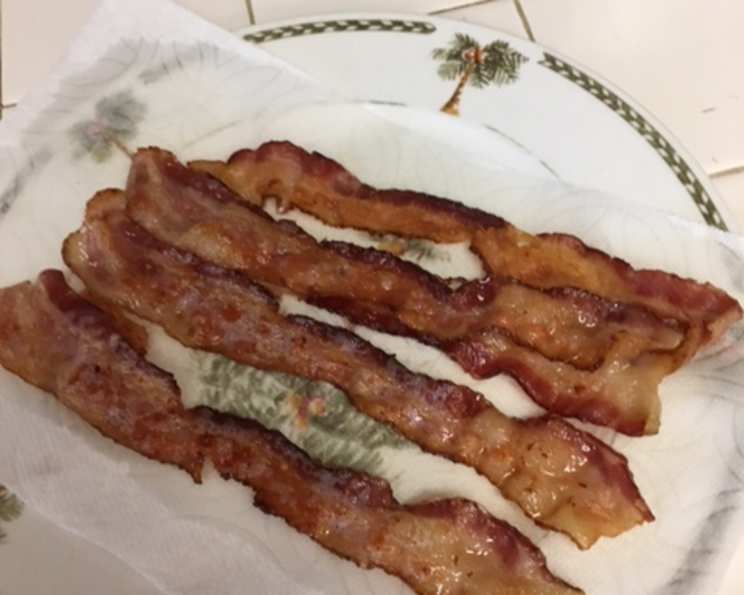
- Once the bacon has reached your desired crispiness, remove it from the pan and place it on a plate lined with paper towels to drain excess grease.
- Serve immediately and enjoy.
Expert Tips & Tricks
- Don’t overcrowd the pan: Overcrowding will steam the bacon instead of allowing it to crisp. Cook in batches if necessary.
- Adjust the water: The amount of water needed will depend on the thickness of your bacon and the size of your pan. You want enough water to just cover the bacon initially.
- Monitor the heat: Adjust the heat throughout the cooking process to prevent burning or uneven cooking. Starting high to boil the water quickly, then lowering it to medium-high and finally medium-low, allows the bacon to render and crisp properly.
- Crispiness control: The amount of time you cook the bacon after the water evaporates will determine the crispiness. Keep a close eye on it, especially during the last few minutes.
- Save the bacon fat: Don’t discard the rendered bacon fat! Strain it and store it in the refrigerator for use in other dishes like roasted vegetables, cornbread, or even eggs.
- Consistent flipping: Flipping the bacon regularly after the water has evaporated ensures even cooking and prevents burning.
Serving & Storage Suggestions
Serve the bacon immediately while it’s hot and crispy. It’s delicious on its own, as a side with eggs, in sandwiches, or crumbled over salads.
Leftover bacon can be stored in an airtight container in the refrigerator for up to 3-4 days. To reheat, you can microwave it for a few seconds, bake it in the oven at 350°F (175°C) for a few minutes, or pan-fry it until warmed through and crispy. Microwaving will result in slightly softer bacon, while oven baking or pan-frying will help it retain its crispness.
Freezing cooked bacon is also an option. Arrange the cooked and cooled bacon slices in a single layer on a baking sheet lined with parchment paper. Freeze for about 30 minutes until solid, then transfer to a freezer-safe bag or container. This prevents the slices from sticking together. Frozen cooked bacon can be stored for up to 2-3 months. Reheat directly from frozen using any of the methods mentioned above.
Nutritional Information
Please note that the nutritional information is an estimate and may vary based on the type of bacon used.
| Nutrient | Amount per Serving | % Daily Value |
|---|---|---|
| Calories | 200 kcal | 10% |
| Total Fat | 16g | 25% |
| Saturated Fat | 6g | 30% |
| Cholesterol | 30mg | 10% |
| Sodium | 400mg | 17% |
| Total Carbohydrate | 1g | 0% |
| Dietary Fiber | 0g | 0% |
| Sugars | 0g | 0% |
| Protein | 12g | 24% |
Variations & Substitutions
- Different types of bacon: This method works well with various types of bacon, including thick-cut, center-cut, turkey bacon, and even plant-based bacon alternatives. Adjust cooking times as needed based on the thickness and fat content of the bacon.
- Smoked bacon: Use smoked bacon for a more intense smoky flavor.
- Sweet and spicy bacon: Before cooking, sprinkle the bacon with a mixture of brown sugar and cayenne pepper for a sweet and spicy kick.
- Herb-infused bacon: Add a few sprigs of fresh rosemary or thyme to the pan while cooking for an herbaceous flavor.
- Maple-glazed bacon: Brush the cooked bacon with maple syrup during the last minute of cooking for a caramelized glaze.
- Peppered bacon: Sprinkle freshly ground black pepper on the bacon before or after cooking.
FAQs (Frequently Asked Questions)
Q: Why boil the bacon first?
A: Boiling the bacon first helps to render out excess fat and prevent it from becoming overly salty. It also ensures that the bacon cooks evenly and crisps up nicely.
Q: Does boiling the bacon make it soggy?
A: No, boiling the bacon doesn’t make it soggy. The water evaporates during the cooking process, leaving the bacon to crisp up in its own rendered fat.
Q: Can I use this method with thick-cut bacon?
A: Yes, this method works well with thick-cut bacon. You may need to adjust the cooking time slightly to ensure it’s cooked through and crispy.
Q: Can I use this method in the oven?
A: While this recipe is specifically for stovetop cooking, you can adapt it for the oven. Place the bacon and water in an oven-safe skillet, bake at 400°F (200°C) until the water evaporates, then continue baking until crispy.
Q: Is this method healthier than frying bacon?
A: By rendering out excess fat during the boiling process, this method can be slightly healthier than traditional frying. However, bacon is still a processed meat and should be consumed in moderation.
Final Thoughts
So, ditch the splattering grease and unpredictable results. Give this boiled bacon method a try and experience the joy of consistently crispy, perfectly cooked bacon every time. It’s a game-changer for busy mornings or any time you crave that satisfying crunch. Don’t be afraid to experiment with different variations and share your creations with friends and family. And, of course, let me know what you think! Is there a better way? I’m always eager to hear your tips and tricks in the kitchen.