
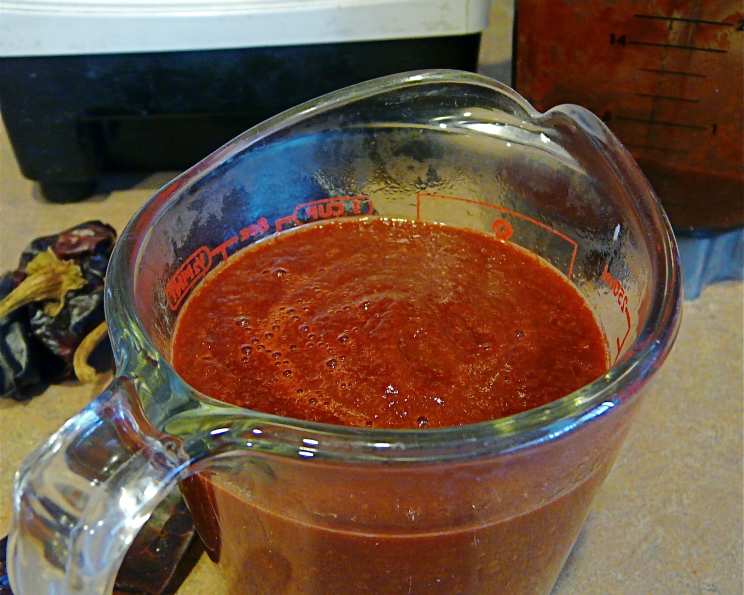
Hatch Red Chili Sauce: A Taste of New Mexico
The scent of roasting chiles always transports me back to my grandmother’s kitchen in Santa Fe. Every fall, the air would be thick with that smoky, earthy aroma as she prepared her signature red chili sauce. It wasn’t just a condiment; it was a tradition, a taste of home that warmed us from the inside out during the crisp autumn months. The vibrant red color, the subtle heat, and the rich, complex flavor made every dish she touched unforgettable. This Hatch red chili sauce is an ode to her, and to all the wonderful flavors of New Mexico.
Recipe Overview
- Prep Time: 20 minutes
- Cook Time: 30 minutes
- Total Time: 50 minutes
- Yields: Approximately 2 cups
- Dietary Type: Vegan, Gluten-Free
Ingredients
- 12 dried Hatch chiles, medium (Mesilla Valley) or 12 dried Hatch chiles, hot (Mesilla Valley)
- 3 1/2 cups water
- 2 garlic cloves, whole
- 2 teaspoons salt
- 2 tablespoons oil
- 1 tablespoon flour
- 1 teaspoon dried oregano leaves, crushed
Equipment Needed
- Large saucepan
- Blender
- Large skillet
Instructions
- Begin by rinsing the dried chile pods. Remove the stems and seeds. This is where you control the heat level. Removing more seeds results in a milder sauce. Wear gloves if you have sensitive skin, as the oils from the chiles can be irritating.
- In a large saucepan, combine the water and the chile pods. Bring the mixture to a boil over high heat.
- Once boiling, reduce the heat to low and allow the chiles to simmer gently until the pods are softened and pulpy. This should take approximately 20 minutes. Keep an eye on the water level and add more if necessary to keep the chiles submerged.
- Carefully remove the softened chile pods from the saucepan, using a slotted spoon or tongs, and transfer them to a blender. Reserve the cooking liquid; you’ll need it later.
- Add the salt, garlic cloves, and crushed oregano to the blender along with the chile pods. These ingredients will infuse the sauce with their distinctive flavors.
- Blend the mixture until it forms a smooth paste. You may need to scrape down the sides of the blender a few times to ensure everything is fully incorporated.
- In a large skillet, heat the oil over medium heat.
- Add the flour to the hot oil and brown lightly, stirring constantly with a whisk to prevent lumps from forming. This creates a roux, which will help to thicken the sauce.
- Remove the skillet from the heat. Carefully add the chile paste to the flour mixture, stirring continuously until all lumps are dissolved and the mixture is smooth. The mixture will thicken quickly.
- Return the skillet to medium heat. Gradually add enough of the reserved cooking liquid to the skillet, stirring constantly, to achieve a gravy-like consistency. The amount of liquid you need will depend on the desired thickness of the sauce. Start with about a cup and add more until you reach the perfect consistency.
- Simmer the sauce for about 10 minutes, stirring occasionally, allowing the flavors to meld together. This step is crucial for developing the rich, complex flavor of the chili sauce.
Expert Tips & Tricks
- Roast the chiles first: For a deeper, smokier flavor, roast the dried chiles in a dry skillet or oven before rehydrating them. Be careful not to burn them, as this will make the sauce bitter.
- Adjust the heat: The heat level of the sauce depends on the type of chiles used and the number of seeds removed. Start with medium chiles and remove most of the seeds for a milder sauce. For a spicier sauce, use hot chiles and leave some of the seeds intact.
- Use fresh garlic: While the recipe calls for whole garlic cloves, using freshly minced garlic can enhance the flavor even further. Add it to the skillet just before adding the chile paste.
- Deglaze with broth: For a richer, more complex flavor, deglaze the skillet with vegetable or chicken broth instead of water.
- Adjust the consistency: If the sauce is too thick, add more cooking liquid or broth. If it’s too thin, simmer it for a longer period to allow it to reduce.
Serving & Storage Suggestions
Hatch red chili sauce is incredibly versatile. Serve it as a topping for enchiladas, burritos, tacos, or tamales. Use it as a base for stews and soups, or as a flavorful addition to chili. It’s also delicious served with eggs, potatoes, or grilled meats.
Allow the sauce to cool completely before storing it in an airtight container. It can be stored in the refrigerator for up to one week or in the freezer for up to three months. To reheat, simply warm the sauce in a saucepan over low heat, stirring occasionally, until heated through.
Nutritional Information
Note: These values are estimates and may vary based on specific ingredients and portion sizes.
| Nutrient | Amount per Serving | % Daily Value |
|---|---|---|
| Calories | 249.3 kcal | N/A |
| Calories from Fat | 128 g | 51% |
| Total Fat | 14.2 g | 21% |
| Saturated Fat | 1.8 g | 9% |
| Cholesterol | 0 mg | 0% |
| Sodium | 2357.6 mg | 98% |
| Total Carbohydrate | 30.1 g | 10% |
| Dietary Fiber | 4.6 g | 18% |
| Sugars | 13.8 g | 55% |
| Protein | 6.1 g | 12% |
Variations & Substitutions
- Ancho Chiles: For a milder, fruitier flavor, substitute some of the Hatch chiles with ancho chiles.
- Smoked Paprika: Add a teaspoon of smoked paprika to enhance the smoky flavor of the sauce.
- Vinegar: A splash of apple cider vinegar or red wine vinegar can add a touch of acidity and balance the flavors.
- Vegetarian Option: Ensure the broth used, if deglazing the pan, is vegetarian.
FAQs (Frequently Asked Questions)
Q: Can I use fresh Hatch chiles instead of dried?
A: Yes, you can! Roast the fresh chiles until the skin is blackened, then peel, seed, and blend them into a paste before adding them to the recipe. You will need to adjust the water content accordingly.
Q: How can I make this sauce less spicy?
A: Remove all the seeds from the chiles before rehydrating them. You can also use a milder variety of chile, such as ancho or New Mexico chiles.
Q: Can I use a different type of oil?
A: Yes, any neutral-flavored oil, such as canola or vegetable oil, will work. Olive oil can also be used, but it will impart a slightly different flavor to the sauce.
Q: How long will this sauce last in the freezer?
A: Hatch red chili sauce can be stored in the freezer for up to three months. Be sure to store it in an airtight container to prevent freezer burn.
Q: Can I add other spices to this sauce?
A: Absolutely! Feel free to experiment with other spices, such as cumin, coriander, or chili powder, to create your own unique flavor profile.
Final Thoughts
This Hatch red chili sauce is more than just a recipe; it’s a journey to the heart of New Mexico. It’s an invitation to experience the vibrant flavors and rich traditions of the Southwest. So, gather your ingredients, embrace the aroma of roasting chiles, and create a sauce that will transport you to the land of enchantment with every bite. I encourage you to try this recipe, experiment with your favorite variations, and share your feedback. Enjoy your culinary adventure!