
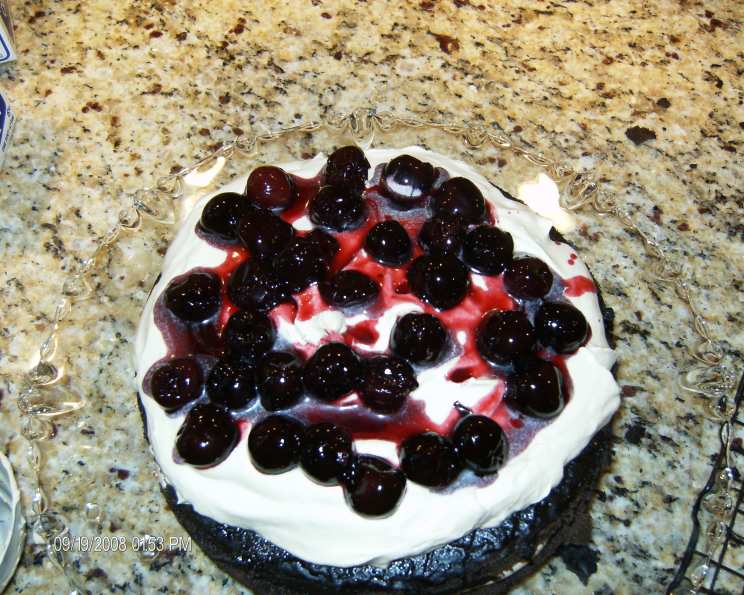
Haunted Black Forest Layer Cake – Martha Stewart Halloween 2007
The memory is so vivid, I can almost taste the kirsch. It was Halloween night, and the crisp autumn air carried the scent of burning leaves and the excited squeals of trick-or-treaters. My grandmother, a woman whose baking skills were legendary, unveiled a towering Black Forest cake draped in a sinister cloak of dark chocolate ganache. The glistening cherries, nestled amongst the espresso-infused whipped cream, looked almost blood-red in the dim candlelight. It was a masterpiece of gothic deliciousness, and one bite was all it took to cement this cake as my all-time favorite Halloween treat.
Recipe Overview
- Prep Time: 1 hour
- Cook Time: 15 minutes
- Total Time: 1 hour 45 minutes
- Servings: 15
- Yield: One 9-inch layer cake
- Dietary Type: Not specified
Ingredients
For Chocolate Genoise:
- 1 1/3 cups sifted cake flour
- 2 pinches salt
- 1/3 cup unsweetened dutch cocoa, plus more unsweetened dutch cocoa for pans
- 6 large eggs
- 4 large egg yolks
- 1 cup granulated sugar
- 1/2 cup unsalted butter, melted and cooled, plus more unsalted butter for pans
For Kirsch Simple Syrup:
- 1/2 cup granulated sugar
- 1/2 cup water
- 1/3 cup kirsch
For Cherry Filling:
- 2 lbs frozen black cherries, thawed and drained, juice reserved
- 1/2 cup sugar
- 3 tablespoons kirsch
- 2 tablespoons cornstarch
For Ganache:
- 1/2 cup heavy cream
- 3 ounces semisweet chocolate, finely chopped
For Espresso Whipped Cream:
- 3 cups cold heavy cream
- 1/2 cup confectioners’ sugar
- 2 tablespoons good quality instant espresso powder, dissolved in 2 teaspoons of water
Equipment Needed
- Two 9-inch round cake pans
- Parchment paper
- Electric mixer (stand or hand-held)
- Heatproof bowl
- Rubber spatula
- Wire rack
- Small saucepan
- Medium bowl
- Slotted spoon
- Cake stand
Instructions
-
Make the genoise: Preheat oven to 400 degrees F (200 degrees C), with rack in lower third. Butter two 9-inch round cake pans. Line with parchment paper; butter the parchment. Dust with cocoa powder, tapping out excess. The cocoa powder will prevent the cake from sticking and add a deep chocolate flavor to the edges.
-
Whisk together flour, salt, and cocoa powder in a bowl. Sifting ensures a light and airy genoise.
-
Put eggs, egg yolks, and granulated sugar in the heatproof bowl of an electric mixer. Set over (not touching) a pan of simmering water, and whisk until sugar has dissolved and mixture is warm to the touch. This helps create a stable meringue.
-
Attach bowl to mixer fitted with whisk attachment. Beat on medium-high speed for 2 minutes. Raise speed to high. Beat until mixture is pale and thick, about 4 minutes more. The mixture should roughly triple in volume and form a ribbon when drizzled from the whisk. This is a crucial step for achieving the genoise’s signature lightness.
-
Remove bowl from mixer. Sift flour mixture over the top; using large rubber spatula, carefully fold into egg mixture, cutting through middle and lifting gently over sides. Be gentle! Overmixing will deflate the batter and result in a dense cake.
-
When almost incorporated, pour melted butter down side of bowl; gently fold in to incorporate. Make sure the butter isn’t too hot or it could cook the eggs. Folding it in last helps to keep the batter light.
-
Divide batter evenly between prepared pans. Bake until centers spring back when lightly touched, about 15 minutes. A toothpick inserted into the center should come out clean, though a few moist crumbs are acceptable.
-
Let cool in pans on a wire rack for 15 minutes. Run a knife around sides of pan. Invert onto rack; remove parchment, and turn right side up on rack. Allowing the cakes to cool slightly in the pans helps prevent them from collapsing.
-
Make the Kirsch simple syrup: Heat sugar and water in a small saucepan over medium-high heat, stirring frequently, until sugar has dissolved. Bring to a boil. Remove from heat and stir in kirsch. (The syrup can be refrigerated in an airtight container for up to 1 month). This syrup is essential for adding moisture and a boozy cherry flavor to the cake.
-
Make the cherry filling: Whisk reserved cherry juice, sugar, kirsch, and cornstarch in a small saucepan until smooth. Cornstarch acts as a thickener, creating a glossy cherry sauce.
-
Cook over medium heat, stirring constantly, until mixture is thick enough to coat the back of a spoon, about 8 minutes. This ensures the filling won’t be too runny.
-
Let cool slightly. Combine syrup and cherries in a medium bowl. Cover and refrigerate until ready to use, up to 2 days. Chilling the filling allows the flavors to meld and the mixture to thicken further.
-
Make the ganache: Bring cream to a boil in a small saucepan over medium heat. Pour over chocolate in a bowl. Let stand 5 minutes. This allows the heat from the cream to melt the chocolate.
-
Slowly whisk until smooth. Let cool completely, stirring often with a rubber spatula. Stirring prevents a skin from forming on the surface. The ganache should be thick but still spreadable.
-
Make the espresso whipped cream: Beat cream until soft peaks form. Adding espresso powder elevates the cake to another level, complementing the chocolate and cherry beautifully.
-
Add sugar and espresso powder, and beat until soft peaks return. Be careful not to overwhip, or the cream will become grainy.
-
Assemble the cake: Slice each cake in half horizontally. Use a serrated knife for clean, even slices.
-
Place one cake layer, cut side up, on a cake stand. Brush top with 1/4 cup kirsch syrup. Be generous with the syrup, as it’s what keeps the cake moist and flavorful.
-
Spread with 2 cups whipped cream, leaving a 1/2 inch border. The border will allow the cherry filling to be contained within the cake.
-
Remove cherries from filling syrup with slotted spoon, and transfer to medium bowl. Scatter 1 1/4 cup cherries evenly over whipped cream. Drizzle with 2 tablespoons filling syrup. Distributing the cherries evenly ensures that every bite is bursting with flavor.
-
Repeat 2 times.
-
Place final cake layer, cut side down, on top, and spread with ganache.
-
Serve immediately.
Expert Tips & Tricks
- For an even more intense chocolate flavor, use dark chocolate (70% cacao or higher) in the ganache.
- If you don’t have kirsch, you can substitute with cherry juice or brandy, though the flavor will be slightly different.
- To prevent the cake layers from sliding, you can dab a small amount of whipped cream onto the cake stand before placing the first layer.
- For a Halloween-themed presentation, decorate the cake with chocolate shavings, candy spiders, or gummy worms.
Serving & Storage Suggestions
Serve the Haunted Black Forest Layer Cake chilled or at room temperature. To make it even more festive, serve with a scoop of vanilla ice cream or a dollop of extra whipped cream. Leftovers should be stored in an airtight container in the refrigerator for up to 3 days. The cake can also be frozen for longer storage. Wrap tightly in plastic wrap and then in foil. To thaw, let it sit in the refrigerator overnight.
Nutritional Information
| Nutrient | Amount per Serving | % Daily Value |
|---|---|---|
| Calories | 529.5 kcal | N/A |
| Calories from Fat | N/A | 57% |
| Total Fat | 33.3 g | 51% |
| Saturated Fat | 19.8 g | 98% |
| Cholesterol | 232.9 mg | 77% |
| Sodium | 75.3 mg | 3% |
| Total Carbohydrate | 55.7 g | 18% |
| Dietary Fiber | 3.1 g | 12% |
| Sugars | 38.7 g | N/A |
| Protein | 7.3 g | 14% |
Note: Nutritional information is an estimate and may vary based on specific ingredients and preparation methods.
Variations & Substitutions
- Boozy Boost: Infuse the simple syrup with other liquors like rum or bourbon for a different flavor profile.
- Berry Medley: Substitute the black cherries with a mix of raspberries, blueberries, and blackberries for a mixed berry Black Forest Cake.
- Chocolate Cake Base: If you’re short on time, use a store-bought chocolate cake mix as the base.
- Dairy-Free Delight: Replace the heavy cream with coconut cream for a dairy-free whipped topping and use dairy-free chocolate for the ganache.
FAQs (Frequently Asked Questions)
Q: Can I make the cake layers ahead of time?
A: Yes, the cake layers can be baked up to 2 days in advance. Wrap them tightly in plastic wrap and store them at room temperature.
Q: What can I use if I don’t have kirsch?
A: You can substitute with cherry juice, brandy, or even a bit of almond extract, though the flavor will be slightly different.
Q: How do I prevent the cake from drying out?
A: Ensure the cake layers are well-soaked with the kirsch simple syrup. Also, store the assembled cake in an airtight container in the refrigerator.
Q: Can I freeze the assembled cake?
A: Yes, you can freeze the assembled cake, but the texture of the whipped cream may change slightly upon thawing. Wrap it tightly in plastic wrap and then in foil before freezing.
Q: My ganache is too thick. What can I do?
A: If your ganache is too thick, gently warm it in the microwave in 10-second intervals, stirring in between, until it reaches a spreadable consistency.
Final Thoughts
So, there you have it – the Haunted Black Forest Layer Cake, a recipe steeped in nostalgia and guaranteed to be the centerpiece of your Halloween celebration. Don’t be intimidated by the multiple steps; each one is simple and rewarding. Gather your ingredients, put on some spooky tunes, and embark on this culinary adventure. Share your creations and feedback – I’d love to see your haunted masterpieces! Pair with a strong cup of coffee or a chilled glass of dessert wine for the ultimate Halloween indulgence. Happy baking!