
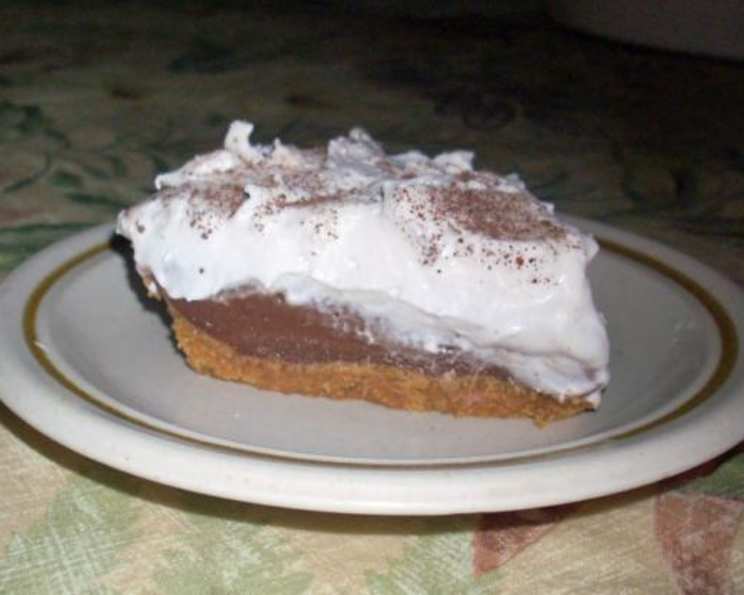
Haupia Chocolate Pie (Lighter Version)
My first taste of Haupia Chocolate Pie was at a potluck in Honolulu, a dizzying swirl of creamy coconut, rich chocolate, and the scent of plumeria hanging heavy in the air. The host, a sweet woman named Leilani, told me it was a family recipe, carefully guarded and passed down through generations. That single slice evoked the breezy beaches and warmth of the Hawaiian sun, and I’ve been chasing that flavour ever since. This lighter version attempts to capture that magical essence without all the guilt, allowing you to indulge in paradise, one delicious bite at a time.
Recipe Overview
- Prep Time: 20 minutes
- Cook Time: 10 minutes
- Chill Time: 2 hours minimum (preferably longer)
- Servings: 8
- Yield: 1 pie
- Dietary Type: Vegetarian (easily adaptable to vegan)
Ingredients
- 1 pie shell (I used an organic honey graham cracker shell for an 8-inch pie)
- 1 (14 ounce) can light coconut milk
- 1/2 cup cornstarch
- 1 cup water
- 7 ounces semi-sweet chocolate chips (mine were grain sweetened)
- 1 1/2 cups light whipped topping (I used Tru Whip All Natural Topping)
- 1 cup ground cacao beans (I use the raw beans)
Equipment Needed
- Oven
- Medium saucepan
- Small saucepan
- Mixing bowl
- Whisk
- Measuring cups and spoons
- Pie dish
- Spatula
Instructions
-
Preheat your oven to 350°F (175°C) and bake the graham cracker crust for 10 minutes. This will help to set the crust and prevent it from becoming soggy. Remove from the oven and allow to chill thoroughly before filling. A completely cooled crust is crucial for a neat and stable pie.
-
In a medium saucepan, pour in the coconut milk and place over medium heat.
-
While the coconut milk is heating, in a separate bowl, whisk together the water and cornstarch until the cornstarch is completely dissolved and the mixture is smooth. This step is crucial to prevent lumps in your haupia filling.
-
Bring the coconut milk to a gentle boil, then immediately reduce the heat to a simmer. Slowly pour in the cornstarch-water mixture while continuously whisking. Continue whisking until the mixture thickens, ensuring that no lumps form. The mixture should become thick enough to coat the back of a spoon.
-
Remove the saucepan from the heat. Divide the thickened coconut mixture in half. Reserve one half in the saucepan and set the other half aside in a separate bowl.
-
In a small saucepan, melt the chocolate chips over low heat, stirring frequently to prevent burning. You can also melt the chocolate in a microwave in 30-second intervals, stirring between each interval, until melted and smooth. Be careful not to overheat the chocolate, as it can seize and become grainy.
-
Once the chocolate is melted, immediately add one half of the reserved coconut mixture to the melted chocolate. Stir until the chocolate and coconut mixture are fully combined and smooth. This will create your chocolate haupia layer.
-
Pour the chocolate coconut mixture into the cooled and pre-baked pie crust, spreading it evenly to create a smooth base layer.
-
Carefully pour the remaining half of the coconut mixture (the plain haupia) on top of the chocolate layer, creating the second layer of the pie.
-
Cover the pie with plastic wrap, pressing it gently onto the surface of the haupia to prevent a skin from forming. Refrigerate the pie for at least 2 hours, or preferably longer, until it is completely chilled and set. The longer it chills, the firmer and more stable the pie will become.
-
Just before serving, top the pie with the light whipped topping, spreading it evenly over the surface. You can also add a dollop to each individual slice if you prefer.
-
Sprinkle the top of the pie generously with the ground cacao beans. The cacao adds a subtle bitter note that balances the sweetness of the chocolate and coconut.
-
Cut into slices and serve chilled. Bon Appetit!
Expert Tips & Tricks
- Preventing a Skin: To prevent a skin from forming on the haupia as it chills, press a piece of plastic wrap directly onto the surface of the filling.
- Melting Chocolate: If you don’t have a double boiler, you can melt the chocolate in a heatproof bowl set over a pot of simmering water. Make sure the bottom of the bowl doesn’t touch the water.
- Even Layers: To ensure even layers, use a spatula to spread the chocolate and haupia fillings smoothly and evenly across the pie crust.
- Graham Cracker Crust Tip: If you prefer a more intense graham cracker flavor, you can lightly toast the graham cracker crust in the oven for a few minutes before filling. Watch it carefully to prevent burning.
- Coconut Milk Consistency: The consistency of coconut milk can vary between brands. If your coconut milk seems very thin, you may need to add a little extra cornstarch to achieve the desired thickness. Start with an extra teaspoon and whisk well.
Serving & Storage Suggestions
Serve the Haupia Chocolate Pie chilled for the best flavour and texture. It is a wonderful dessert on its own, but also pairs well with fresh fruit like strawberries or pineapple.
Store any leftover pie in the refrigerator, covered, for up to 3 days. The whipped topping may soften slightly over time, but the pie will still taste delicious.
Freezing is not recommended, as the texture of the haupia and whipped topping can change upon thawing. It’s best enjoyed fresh!
Nutritional Information
Please note that these values are estimates and may vary based on specific ingredients and portion sizes.
| Nutrient | Amount per Serving | % Daily Value |
|---|---|---|
| Calories | 294 kcal | 15% |
| Total Fat | 16.8g | 25% |
| Saturated Fat | 7.8g | 39% |
| Cholesterol | 0.3mg | 0% |
| Sodium | 131.1mg | 5% |
| Total Carbohydrate | 36.5g | 12% |
| Dietary Fiber | 2.4g | 9% |
| Sugars | 16.9g | 67% |
| Protein | 2.9g | 5% |
Variations & Substitutions
- Vegan Option: To make this pie completely vegan, use a vegan graham cracker crust and ensure that the chocolate chips and whipped topping are also vegan-friendly. There are many excellent vegan chocolate chip and whipped topping options available.
- Gluten-Free: Use a gluten-free pie crust made from gluten-free graham crackers or another gluten-free crust recipe.
- Different Chocolate: Feel free to experiment with different types of chocolate chips, such as dark chocolate, milk chocolate, or even white chocolate. Each will impart a unique flavor to the pie.
- Extracts: Add a teaspoon of vanilla extract or coconut extract to the haupia mixture for an extra layer of flavour.
- Toasted Coconut: Sprinkle the top of the pie with toasted coconut flakes for added texture and flavour.
FAQs (Frequently Asked Questions)
Q: Can I use regular milk instead of coconut milk?
A: While you can, the coconut milk is essential for the authentic haupia flavor and creamy texture. Using regular milk will significantly change the taste and consistency of the pie.
Q: How do I know when the haupia filling is thick enough?
A: The haupia filling should be thick enough to coat the back of a spoon. When you run your finger through the coating on the spoon, the line should remain distinct and not immediately fill back in.
Q: My chocolate layer is grainy. What did I do wrong?
A: Overheating the chocolate can cause it to seize and become grainy. Melt the chocolate over low heat, stirring frequently, or use short intervals in the microwave. If it seizes, try adding a teaspoon of vegetable oil and stirring vigorously to smooth it out.
Q: Can I make this pie ahead of time?
A: Absolutely! In fact, it’s best to make this pie at least a few hours in advance to allow it to chill and set properly. You can even make it a day ahead of time and store it in the refrigerator.
Q: What can I use if I don’t have cacao beans?
A: If you don’t have cacao beans, you can substitute with shaved chocolate, chocolate sprinkles, or even a dusting of cocoa powder. The cacao beans add a unique flavour, but the pie will still be delicious without them.
Final Thoughts
Now that you’ve discovered the secrets to this lighter Haupia Chocolate Pie, I urge you to bring a taste of the islands into your own kitchen. This dessert is not just a recipe; it’s an experience, a memory waiting to be made. Feel free to personalize it with your favourite toppings or variations. And, please, share your creations and feedback – I’d love to hear how you’ve made this recipe your own!