
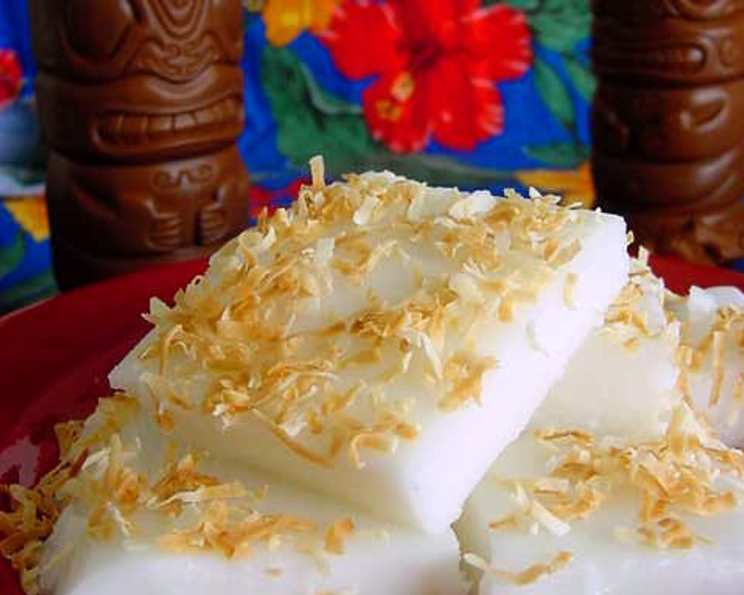
Haupia: A Taste of Hawaiian Paradise
The first time I tasted haupia, I was a wide-eyed child attending my auntie’s luau. The scent of roasting kalua pig filled the air, and the rhythmic strumming of ukuleles set a festive mood. But it was the simple, creamy squares of haupia that truly captivated me. Their delicate coconut flavor and melt-in-your-mouth texture were unlike anything I’d ever experienced. It tasted like sunshine and gentle ocean breezes, a true taste of Hawaiian paradise. From that day on, haupia has always held a special place in my heart, a delicious reminder of family, celebration, and the aloha spirit.
Recipe Overview
- Prep Time: 10 minutes
- Cook Time: 15 minutes
- Total Time: 25 minutes + chilling time
- Servings: 16
- Yield: One 8-inch square pan
- Dietary Type: Vegan, Gluten-Free
Ingredients
- 1 (12 ounce) can coconut milk
- 4-6 tablespoons sugar (adjust to your desired sweetness)
- 4-6 tablespoons cornstarch (adjust depending on how firm you want the haupia)
- ¾ cup water
- ½ teaspoon coconut extract (vanilla or coconut rum can also be used, but may alter the final flavor)
- Toasted coconut, for topping (optional)
Equipment Needed
- Saucepan
- Whisk
- 8-inch square pan
- Measuring cups and spoons
Instructions
-
Begin by pouring the entire can of coconut milk into a medium-sized saucepan. It’s best to use full-fat coconut milk for the richest flavor and creamiest texture.
-
In a separate bowl, combine the sugar and cornstarch. Whisk them together thoroughly until there are no lumps of cornstarch remaining. This step is crucial for preventing a grainy texture in your final haupia.
-
Gradually add the water to the sugar and cornstarch mixture, whisking continuously until everything is well blended and the mixture is smooth and free of lumps. This creates a slurry that will thicken the coconut milk.
-
Pour the cornstarch mixture into the saucepan with the coconut milk.
-
Place the saucepan over low heat. It’s essential to use low heat and stir constantly to prevent the cornstarch from scorching and to ensure even thickening.
-
Continue to cook and stir the mixture with a whisk or spatula. Make sure to scrape the bottom and sides of the saucepan to prevent sticking.
-
As you cook, the mixture will gradually begin to thicken. Continue stirring until it reaches a pudding-like consistency. This should take approximately 10-15 minutes. You’ll know it’s ready when the mixture coats the back of a spoon and leaves a clear line when you run your finger through it.
-
Once the haupia has thickened, remove the saucepan from the heat and stir in the coconut extract. This enhances the coconut flavor and adds a delightful aroma. If you’re using vanilla extract or coconut rum, add it at this stage as well.
-
Pour the hot haupia mixture into an 8-inch square pan. Ensure the pan is clean and dry.
-
Cover the pan with plastic wrap, pressing it directly onto the surface of the haupia to prevent a skin from forming as it cools.
-
Place the covered pan in the refrigerator to chill for at least 4 hours, or preferably overnight, until the haupia is firm.
-
Once the haupia is firm, remove it from the refrigerator and cut it into 2-inch squares.
-
Optionally, garnish the haupia squares with toasted coconut for added flavor and texture.
Expert Tips & Tricks
- For the creamiest haupia, use full-fat coconut milk. Light coconut milk will result in a less rich and less flavorful dessert.
- Adjust the sugar to your liking. Taste the mixture while it’s cooking and add more sugar if needed.
- Prevent lumps by thoroughly whisking the cornstarch mixture. A smooth slurry is key to a smooth haupia.
- Don’t rush the cooking process. Low and slow is the way to go to prevent scorching and ensure even thickening.
- Press plastic wrap directly onto the surface of the haupia while chilling to prevent a skin from forming.
- If your haupia is too thick, whisk in a tablespoon or two of coconut milk until you reach your desired consistency.
- If your haupia is too thin, mix a teaspoon of cornstarch with a tablespoon of cold water and whisk it into the haupia while it simmers over low heat, stirring constantly until thickened.
Serving & Storage Suggestions
Haupia is best served chilled. Arrange the squares on a platter and garnish with toasted coconut for an elegant presentation. It’s a perfect dessert for luaus, potlucks, or any occasion where you want to share a taste of the islands.
Leftover haupia should be stored in an airtight container in the refrigerator. It will keep for up to 3-4 days. Haupia can also be frozen, although the texture may change slightly upon thawing. To freeze, cut the haupia into squares, wrap them individually in plastic wrap, and place them in a freezer-safe container. Thaw in the refrigerator overnight before serving.
Haupia is traditionally served cold, so reheating is not recommended.
Nutritional Information
| Nutrient | Amount per Serving | % Daily Value |
|---|---|---|
| Calories | 62 kcal | – |
| Calories from Fat | 40 kcal | – |
| Total Fat | 4.5 g | 6% |
| Saturated Fat | 4 g | 20% |
| Cholesterol | 0 mg | 0% |
| Sodium | 3.3 mg | 0% |
| Total Carbohydrate | 5.6 g | 1% |
| Dietary Fiber | 0 g | 0% |
| Sugars | 3.1 g | – |
| Protein | 0.4 g | 0% |
Variations & Substitutions
- Chocolate Haupia: Add a tablespoon or two of cocoa powder to the cornstarch mixture for a chocolatey twist.
- Pandan Haupia: Infuse the coconut milk with pandan leaves for a fragrant and vibrant green haupia.
- Taro Haupia: Mix in cooked and mashed taro for a heartier and more traditional Hawaiian dessert.
- Mango Haupia: Swirl in mango puree before chilling for a tropical fruit flavor.
- Use different extracts: Experiment with almond, pineapple, or even a hint of lime extract to create unique flavor profiles.
FAQs (Frequently Asked Questions)
Q: Can I use light coconut milk instead of full-fat coconut milk?
A: While you can, full-fat coconut milk is highly recommended for the best flavor and creamy texture. Light coconut milk will result in a less rich haupia.
Q: How can I prevent lumps in my haupia?
A: Ensure the cornstarch and sugar are thoroughly whisked together before adding the water, and continue whisking constantly while cooking over low heat.
Q: My haupia is too thin. How can I thicken it?
A: Mix a teaspoon of cornstarch with a tablespoon of cold water and whisk it into the haupia while it simmers over low heat, stirring constantly until thickened.
Q: How long does haupia last in the refrigerator?
A: Haupia will keep for up to 3-4 days in an airtight container in the refrigerator.
Q: Can I freeze haupia?
A: Yes, you can freeze haupia, although the texture may change slightly upon thawing. Wrap individual squares in plastic wrap and place them in a freezer-safe container. Thaw in the refrigerator overnight before serving.
Final Thoughts
Now that you have this simple and delicious recipe, I encourage you to try making haupia at home. It’s a wonderful way to experience a taste of Hawaiian culture and share a little bit of paradise with your friends and family. Don’t be afraid to experiment with different variations and flavor combinations to create your own signature haupia. Once you master the basic recipe, the possibilities are endless. And please, let me know how it turns out – I’d love to hear about your haupia adventures! Perhaps you can pair it with a refreshing Mai Tai or a scoop of mango sorbet for the ultimate tropical treat. Aloha!