
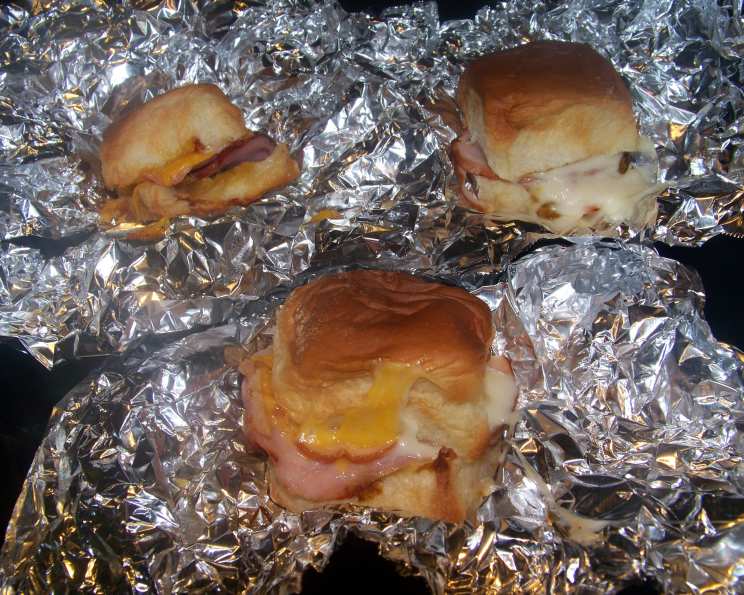
Hawaiian Bread Ham & Cheese Rolls: A Taste of Aloha in Every Bite
The aroma alone transports me back to family gatherings on sun-drenched afternoons. I can almost feel the warm Hawaiian breeze as I remember my Auntie Lei’s kitchen, always filled with laughter and the irresistible scent of baking bread. These Hawaiian Bread Ham & Cheese Rolls were a staple, disappearing faster than she could pull them from the oven. Each sweet, savory, cheesy bite was a little piece of paradise, a reminder of shared meals and happy memories that I cherish to this day.
Recipe Overview
- Prep Time: 15 minutes
- Cook Time: 15 minutes
- Total Time: 30 minutes
- Servings: 24 rolls
- Yield: 24 rolls
- Dietary Type: Not specified
Ingredients
- 2 packages Hawaiian bread dinner rolls (12 rolls per package)
- 1/2 cup butter, softened
- 2 tablespoons prepared yellow mustard
- 2 tablespoons grated onions
- 2 tablespoons poppy seeds
- 1 tablespoon Worcestershire sauce
- 12-15 slices deli ham (more if desired)
- 8-10 slices Swiss cheese (more if desired)
Equipment Needed
- Knife or bread knife
- Mixing bowl
- Spatula or spoon
- Aluminum foil
- Baking sheet (optional, for baking without foil)
Instructions
-
Preheat your oven to 400 degrees Fahrenheit.
-
In a mixing bowl, combine the softened butter, yellow mustard, grated onions, poppy seeds, and Worcestershire sauce. Mix well until you achieve a smooth, spreadable consistency. This is your flavor bomb – don’t skimp on the mixing! Ensure the onions are finely grated to evenly distribute their flavor.
-
Without separating the rolls from the package (keeping the connected form), use a sharp knife or bread knife to slice the entire package of rolls horizontally, creating a top and bottom half. Think of it like creating a giant slider.
-
Generously spread the prepared butter mixture on both the top and bottom halves of the sliced rolls. This is where the magic happens! Make sure to evenly coat the inside surfaces of both the top and bottom pieces of bread. This ensures every bite is packed with that savory-sweet flavor.
-
Layer the deli ham and Swiss cheese on the bottom half of the rolls. You can adjust the amount of ham and cheese according to your preferences. If you like a thicker sandwich, don’t hesitate to add more! Nestle the cheese between layers of ham if you want it to melt extra nicely.
-
Place the top half of the rolls back onto the layered ham and cheese. You should now have a filled, uncut sheet of rolls.
-
Using a sharp knife, carefully cut the sheet of rolls into individual rolls, keeping them together within their original package formation. It is important to keep them together so that when you wrap in foil, it all stays in place.
-
Wrap each package of cut rolls tightly in aluminum foil. This creates a sealed environment for the rolls to bake evenly and retain their moisture.
-
Refrigerate the foil-wrapped rolls until you’re ready to bake. They can be made ahead of time and stored in the refrigerator for up to 24 hours.
-
When ready to bake, place the foil packets directly onto the oven rack. Bake at 400 degrees Fahrenheit for approximately 15 minutes, or until the rolls are heated through and the cheese is melted and gooey.
-
Alternatively, if you prefer not to use foil, you can lightly grease a baking dish with cooking spray (like Pam) and bake the rolls in the dish instead. Baking time should remain the same.
-
Carefully remove the baked rolls from the oven. Let them cool slightly before serving. Be cautious when opening the foil packets, as hot steam may escape.
Expert Tips & Tricks
- For an extra crispy top, uncover the rolls during the last 2-3 minutes of baking. Keep a close eye on them to prevent burning.
- If you’re short on time, you can skip the refrigeration step and bake the rolls immediately after assembling them. However, refrigerating them allows the flavors to meld together more effectively.
- Don’t be afraid to experiment with different cheeses! Provolone, mozzarella, or even pepper jack would be delicious alternatives to Swiss.
- For a little extra flavor, brush the tops of the rolls with melted butter and sprinkle with a little extra poppy seed before baking.
- If your rolls start to brown too quickly, tent the foil over them to prevent burning.
Serving & Storage Suggestions
Serve these Hawaiian Bread Ham & Cheese Rolls warm as an appetizer, a light lunch, or a satisfying snack. They’re perfect for parties, potlucks, or any casual gathering.
Leftover rolls can be stored in an airtight container in the refrigerator for up to 3 days. To reheat, wrap them in foil and bake at 350 degrees Fahrenheit until warmed through, or microwave them in short intervals until heated. They can also be frozen for longer storage (up to 2 months). Thaw them completely before reheating. Room temperature storage is not recommended for more than 2 hours due to the perishable ingredients.
Nutritional Information
| Nutrient | Amount per Serving | % Daily Value |
|---|---|---|
| Calories | 98 kcal | N/A |
| Calories from Fat | 71 kcal | N/A |
| Total Fat | 8 g | 12% |
| Saturated Fat | 4.5 g | 22% |
| Cholesterol | 27 mg | 8% |
| Sodium | 256 mg | 10% |
| Total Carbohydrate | 2 g | 0% |
| Dietary Fiber | 0.4 g | 1% |
| Sugars | 0.3 g | 1% |
| Protein | 5 g | 10% |
Note: Nutritional information is an estimate and may vary based on specific ingredients and portion sizes.
Variations & Substitutions
- For a vegetarian option, substitute the ham with sliced tomatoes, roasted red peppers, or avocado.
- Add a touch of sweetness by incorporating a thin layer of pineapple jam or chutney.
- Spice things up with a pinch of red pepper flakes in the butter mixture.
- Use gluten-free Hawaiian rolls for those with gluten sensitivities.
- Swap the yellow mustard for Dijon mustard for a tangier flavor.
- Experiment with different types of deli meat, such as turkey, roast beef, or salami.
FAQs (Frequently Asked Questions)
Q: Can I make these rolls ahead of time?
A: Absolutely! Assembling the rolls and refrigerating them before baking is a great way to save time. They can be stored in the refrigerator for up to 24 hours.
Q: Can I freeze these rolls?
A: Yes, these rolls freeze well. Wrap them individually in plastic wrap and then place them in a freezer bag. Thaw completely before reheating.
Q: What’s the best way to reheat the rolls?
A: For best results, wrap the rolls in foil and bake at 350 degrees Fahrenheit until warmed through. Microwaving them works in a pinch, but they may become slightly soggy.
Q: Can I use a different type of cheese?
A: Of course! Swiss cheese is a classic choice, but feel free to experiment with other cheeses like provolone, mozzarella, or cheddar.
Q: What if I don’t have poppy seeds?
A: If you don’t have poppy seeds on hand, you can omit them or substitute them with sesame seeds or everything bagel seasoning.
Final Thoughts
So there you have it – a simple yet incredibly delicious recipe for Hawaiian Bread Ham & Cheese Rolls that’s sure to become a family favorite. Whether you’re looking for a quick and easy appetizer or a satisfying snack, these rolls are the perfect choice. Don’t be afraid to get creative with the fillings and seasonings to create your own unique variations. Gather your ingredients, preheat your oven, and prepare to transport yourself to a tropical paradise with every savory-sweet bite. I encourage you to try this recipe and share your feedback. Pair it with a refreshing glass of iced tea or a tropical fruit salad for the complete Hawaiian experience. Aloha and happy baking!