
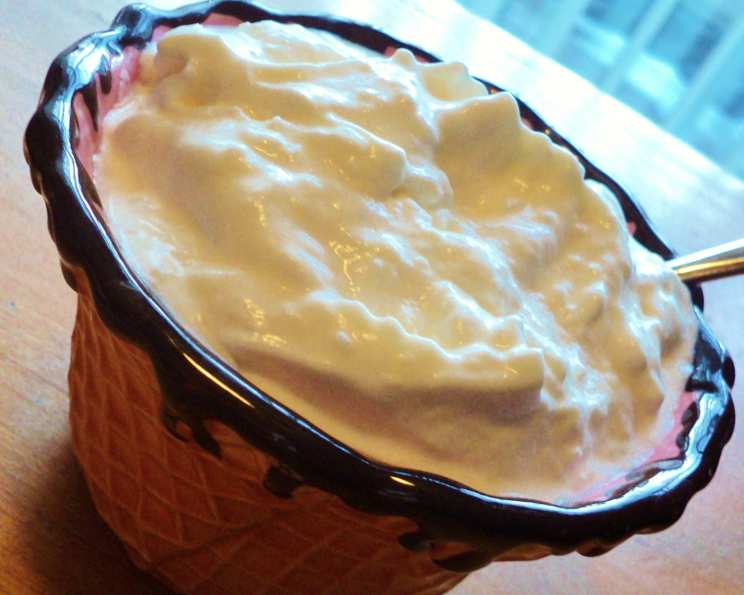
Hawaiian Ice Cream: A Taste of Paradise in Every Scoop
The first time I tasted ice cream that truly transported me, I wasn’t at a fancy gelateria or a trendy ice cream shop. I was on a family vacation in Maui, sitting on a sun-drenched porch, the scent of plumeria heavy in the air. My auntie had whipped up a batch of homemade ice cream using local ingredients – the sweetest pineapple I’d ever tasted, creamy coconut, and just a hint of banana. That ice cream, bursting with tropical flavors, was more than just a dessert; it was a taste of aloha, a tangible representation of the island’s vibrant spirit. This recipe is an homage to that memory, a chance to recreate a little piece of paradise in your own kitchen.
Recipe Overview
- Prep Time: 20 minutes
- Cook Time: None
- Total Time: Several hours for freezing
- Servings: 7
- Yield: Approximately 1 quart
- Dietary Type: Not specified
Ingredients
- 1 cup milk
- ¾ cup sugar
- 2 cups heavy cream
- 1 teaspoon vanilla
- ⅔ cup unsweetened dried shredded coconut
- ½ cup pineapple (cut thin, squeezed dry, and flaked up)
- ¼ cup mashed banana
Equipment Needed
- Whisk
- Blender or food processor
- Ice cream maker
- Freezer-safe container
Instructions
- In a large bowl, whisk together the milk and sugar until the sugar is completely dissolved. Make sure there are no granules remaining, as this will affect the final texture of the ice cream.
- Stir in the heavy cream and vanilla. Combine thoroughly to create a homogenous base for the ice cream.
- Add the unsweetened dried shredded coconut, pineapple, and mashed banana to the mixture.
- Puree the entire mixture in a blender or food processor until it’s still slightly chunky. Don’t over-blend, as you want to retain some texture from the coconut, pineapple, and banana. A slightly chunky texture provides a more authentic, homemade feel.
- Pour the pureed mixture into your ice cream maker and freeze according to the manufacturer’s directions. Every machine is slightly different, so consulting the manual will guarantee the best results. This usually takes around 20-30 minutes, but it can vary based on the model and ambient temperature.
- Once the ice cream has reached a soft-serve consistency in the ice cream maker, transfer it to a freezer-safe container.
- Freeze the ice cream in the freezer until it is completely hard, which will take at least a couple of hours, preferably overnight. This final freezing stage is crucial for achieving the desired scoopable texture.
- Enjoy!
Expert Tips & Tricks
- Pineapple Preparation is Key: The success of this ice cream hinges on the proper preparation of the pineapple. Be sure to cut it very thinly, then squeeze out as much juice as possible. This prevents ice crystals from forming in the final product and ensures a smooth, creamy texture. “Flaking up” the pineapple refers to breaking it into small pieces after squeezing.
- Coconut Toasting: For a more intense coconut flavor, lightly toast the shredded coconut in a dry pan over medium heat until golden brown. Be careful not to burn it! Let it cool completely before adding it to the ice cream mixture.
- Banana Ripeness: Use ripe bananas for the best flavor and sweetness. Overripe bananas, with their dark spots, are perfect for this recipe.
- Chill Everything: For the best results, chill all of your ingredients and the bowl of your ice cream maker before starting. This will help the ice cream freeze faster and more evenly.
- Boozy Boost: For an adult twist, add a tablespoon or two of rum or coconut rum to the mixture before freezing.
- Troubleshooting: If your ice cream is too icy, it could be due to too much water content. Make sure your pineapple is well-drained, and avoid over-blending.
Serving & Storage Suggestions
Serve this Hawaiian ice cream straight from the freezer for the best texture. Let it sit at room temperature for a few minutes to soften slightly before scooping. Garnish with extra shredded coconut, fresh pineapple chunks, or a drizzle of honey. For a truly authentic presentation, serve in a coconut shell!
Store leftover ice cream in an airtight container in the freezer for up to two weeks. After that, the texture may start to degrade. Avoid storing it in the door of the freezer, as the temperature fluctuations can cause ice crystals to form.
Nutritional Information
Note: Nutritional information is an estimate and may vary based on specific ingredients used.
| Nutrient | Amount per Serving | % Daily Value |
|---|---|---|
| Calories | 408 kcal | 20% |
| Total Fat | 32g | 49% |
| Saturated Fat | 21g | 105% |
| Cholesterol | 98mg | 33% |
| Sodium | 46mg | 2% |
| Total Carbohydrate | 30g | 10% |
| Dietary Fiber | 2g | 7% |
| Sugars | 24g | – |
| Protein | 3g | 6% |
Variations & Substitutions
- Dairy-Free: Substitute the milk and heavy cream with coconut milk and coconut cream for a vegan-friendly version. Look for full-fat coconut milk and cream for the best results.
- Pineapple Variations: Try using grilled pineapple for a smoky, caramelized flavor. Just be sure to squeeze out the excess juice after grilling.
- Add Macadamia Nuts: Add a handful of chopped macadamia nuts for a crunchy texture and an even more authentic Hawaiian touch.
- Other Tropical Fruits: Experiment with other tropical fruits, such as mango, papaya, or guava. Adjust the amount of sugar as needed, depending on the sweetness of the fruit.
- Coconut Flakes: Use sweetened coconut flakes for added sweetness. If you do so, reduce the amount of sugar used in the recipe.
FAQs (Frequently Asked Questions)
Q: Can I make this ice cream without an ice cream maker?
A: While an ice cream maker will give you the best results, you can try the “no-churn” method. Freeze the mixture in a freezer-safe container, and then every 30 minutes for the first 2-3 hours, stir vigorously with a fork to break up ice crystals. This will create a creamier texture, but it won’t be quite as smooth as ice cream made in an ice cream maker.
Q: Why is my ice cream icy?
A: Icy ice cream is usually caused by too much water content. Make sure you squeeze as much juice as possible from the pineapple, and avoid over-blending the mixture. Also, ensure your freezer is cold enough.
Q: Can I use fresh coconut instead of dried shredded coconut?
A: Yes, you can use fresh coconut, but it will add more moisture to the ice cream. Toast the fresh coconut lightly before adding it to the mixture to help reduce the moisture content.
Q: How long does this ice cream last in the freezer?
A: Properly stored in an airtight container, this ice cream will last for up to two weeks in the freezer. After that, the texture may start to degrade.
Q: Can I add other spices to this ice cream?
A: Absolutely! A pinch of cinnamon, nutmeg, or even a little bit of ginger can add a warm, complementary flavor to the tropical notes.
Final Thoughts
This Hawaiian Ice Cream is more than just a recipe; it’s an invitation to experience the flavors and spirit of the islands. Whether you’re dreaming of a tropical getaway or simply looking for a delicious and unique dessert, this ice cream is sure to delight. Don’t be afraid to experiment with different fruits and flavors to create your own signature version. I encourage you to try this recipe and share your feedback – I’d love to hear about your tropical ice cream creations! Pair it with some macadamia nut cookies or a refreshing iced tea for the ultimate taste of paradise.