
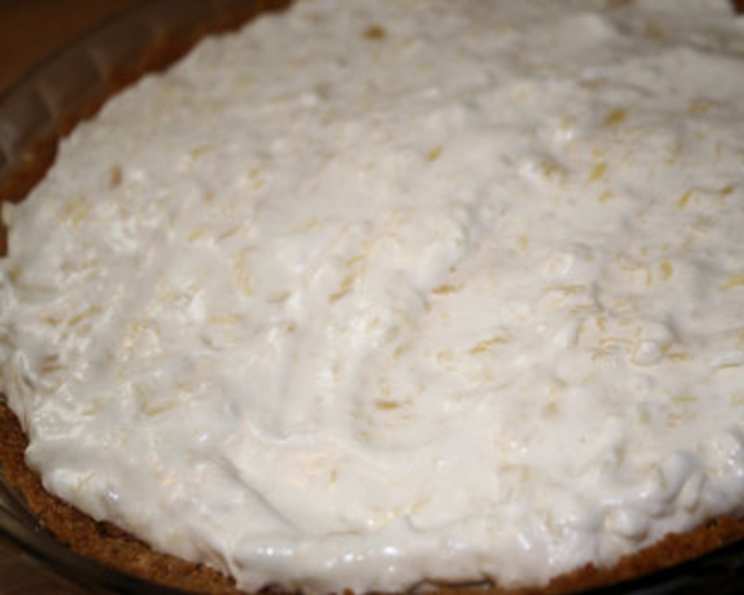
Hawaiian Marshmallow Dessert: A Taste of Paradise
My grandmother, Nana Elsie, had a recipe box overflowing with treasures, but the tattered index card labeled “Hawaiian Cloud Pie” always held a special allure. I remember as a child, the anticipation of watching her assemble this fluffy, sweet dream in her sun-drenched kitchen. The scent of warm graham cracker crust mingling with the tropical aroma of pineapple and the airy sweetness of marshmallow was pure magic. Each bite was a vacation, transporting me to sun-kissed beaches and gentle ocean breezes, a memory I cherish to this day.
Recipe Overview
- Prep Time: 20 minutes
- Cook Time: 8 minutes
- Chill Time: 4 hours 45 minutes
- Total Time: 4 hours 53 minutes
- Servings: 8
- Yield: 1 pie
- Dietary Type: Vegetarian
Ingredients
- 1 1⁄4 cups graham cracker crumbs
- 1⁄4 cup sugar
- 1⁄3 cup melted margarine
- 3 1⁄2 cups mini marshmallows
- 1 (540 g) can crushed pineapple, drained, reserve 1⁄2 cup of the pineapple juice
- 2 cups prepared whipped topping like Dream Whip
Equipment Needed
- 9-inch pie plate or 9×9 inch pan
- Mixing bowl
- Saucepan
- Whisk
- Measuring cups and spoons
Instructions
- Preheat your oven to 350°F (175°C).
- In a mixing bowl, combine the graham cracker crumbs, sugar, and melted margarine. Mix thoroughly until the crumbs are evenly moistened.
- Press the crumb mixture firmly into the bottom and up the sides of a 9-inch pie plate or a 9×9 inch pan to form the crust.
- Bake the crust in the preheated oven for 8 minutes. This will help it set and become slightly golden.
- Remove the crust from the oven and let it cool completely.
- While the crust is cooling, prepare the marshmallow filling. In a saucepan, combine the mini marshmallows with ½ cup of the reserved pineapple juice.
- Cook the marshmallow mixture over low heat, stirring constantly with a whisk, until the marshmallows are completely melted and smooth. Be patient, as this can take a few minutes. Ensure the heat remains low to prevent burning.
- Remove the melted marshmallow mixture from the heat and transfer it to a mixing bowl.
- Place the bowl in the refrigerator and chill until the mixture is slightly thickened. This step is crucial as it allows the filling to set up properly. This should take approximately 45 minutes, and you’ll notice the mixture starts to separate slightly.
- After 45 minutes, remove the partially set marshmallow mixture from the refrigerator.
- Mix the marshmallow mixture well to recombine.
- Gently fold in the drained crushed pineapple and the prepared whipped topping (like Dream Whip) until everything is evenly distributed. Be careful not to overmix, as this can deflate the whipped topping.
- Pour the marshmallow and pineapple filling into the prepared and cooled graham cracker crust.
- Spread the filling evenly over the crust.
- Cover the pie or pan with plastic wrap and chill in the refrigerator for at least 4 hours, or preferably overnight, to allow the filling to fully set.
Expert Tips & Tricks
- Crust Perfection: For a perfectly even crust, use the bottom of a measuring cup to firmly press the crumb mixture into the pie plate or pan.
- Marshmallow Melting: Keep the heat low and stir constantly while melting the marshmallows to prevent scorching. A double boiler can also be used for extra safety.
- Whipped Topping: To ensure your whipped topping stays light and airy, gently fold it into the marshmallow mixture instead of stirring vigorously. Overmixing can deflate the topping, resulting in a less fluffy final product.
- Pineapple Power: Drain the crushed pineapple very well. Excess liquid will make the filling too runny.
- Make-Ahead Magic: The crust can be baked a day in advance. Store it in an airtight container at room temperature until ready to use.
- Marshmallow Mixture Consistency: It’s important to chill the melted marshmallow and pineapple juice mixture until it’s slightly thickened before adding the pineapple and whipped topping. This helps prevent the filling from being too runny and ensures it sets properly.
- Prevent Soggy Crust: Brushing the cooled crust with a thin layer of melted white chocolate can create a moisture barrier and prevent the crust from becoming soggy.
Serving & Storage Suggestions
Serve the Hawaiian Marshmallow Dessert chilled, straight from the refrigerator. You can garnish it with additional whipped topping, a sprinkle of graham cracker crumbs, or a few pineapple chunks for an extra touch of tropical flair.
Leftovers should be stored in an airtight container in the refrigerator. It will last for up to 3 days. Freezing is not recommended as it can alter the texture of the whipped topping. While it’s best enjoyed chilled, it’s recommended to keep refrigerated and not left at room temperature for more than 2 hours.
Nutritional Information
| Nutrient | Amount per Serving | % Daily Value |
|---|---|---|
| Calories | 265.6 kcal | N/A |
| Calories from Fat | 81 g | 31% |
| Total Fat | 9 g | 13% |
| Saturated Fat | 1.5 g | 7% |
| Cholesterol | 0 mg | 0% |
| Sodium | 186.4 mg | 7% |
| Total Carbohydrate | 46.8 g | 15% |
| Dietary Fiber | 1 g | 3% |
| Sugars | 34.2 g | 136% |
| Protein | 1.7 g | 3% |
Note: Nutritional information is an estimate and may vary based on specific ingredients and portion sizes.
Variations & Substitutions
- Gluten-Free Option: Use gluten-free graham crackers to make the crust.
- Dairy-Free Delight: Substitute the margarine with a dairy-free alternative like coconut oil, and use a dairy-free whipped topping option such as coconut whipped cream.
- Tropical Twist: Add shredded coconut to the graham cracker crust or sprinkle it on top of the finished dessert.
- Citrus Zing: Add a teaspoon of lime or lemon zest to the marshmallow mixture for a bright, citrusy flavor.
- Different Fruit: While pineapple is traditional, you could substitute with other tropical fruits like mango or papaya for a unique twist. Ensure you drain any fruit well to avoid a soggy filling.
- Crustless Variation: For a lighter version, skip the crust altogether and serve the marshmallow filling in individual dessert cups.
FAQs (Frequently Asked Questions)
Q: Can I use fresh pineapple instead of canned?
A: While fresh pineapple can be used, canned crushed pineapple is recommended because it is already broken down and has a more consistent texture. Ensure to drain both equally well!
Q: Can I use regular-sized marshmallows instead of mini marshmallows?
A: Yes, you can use regular-sized marshmallows, but you will need to cut them into smaller pieces before melting to ensure they melt evenly.
Q: What if my marshmallow mixture doesn’t thicken after chilling?
A: Ensure that you are using the correct amount of pineapple juice. Too much liquid will prevent the mixture from thickening properly. You can also try placing the bowl in the freezer for a shorter period (around 15-20 minutes) to speed up the process, but watch it carefully to prevent it from freezing solid.
Q: Can I use a different flavor of whipped topping?
A: Yes, you can experiment with different flavors of whipped topping to complement the pineapple. Coconut or vanilla whipped topping would both be delicious options.
Q: Why is it important to chill the pie for at least 4 hours?
A: Chilling the pie allows the marshmallow filling to fully set, creating a stable and enjoyable texture. Shorter chilling times may result in a runny filling.
Final Thoughts
This Hawaiian Marshmallow Dessert is more than just a recipe; it’s a journey back to carefree summer days and the comforting warmth of Nana Elsie’s kitchen. With its simple ingredients and easy-to-follow instructions, you can recreate this taste of paradise in your own home. I encourage you to give it a try, and don’t be afraid to add your own personal touch. Share your creations and experiences – I can’t wait to hear what you think! Perhaps serve it alongside a refreshing glass of iced tea or a tropical cocktail for the full vacation experience.