
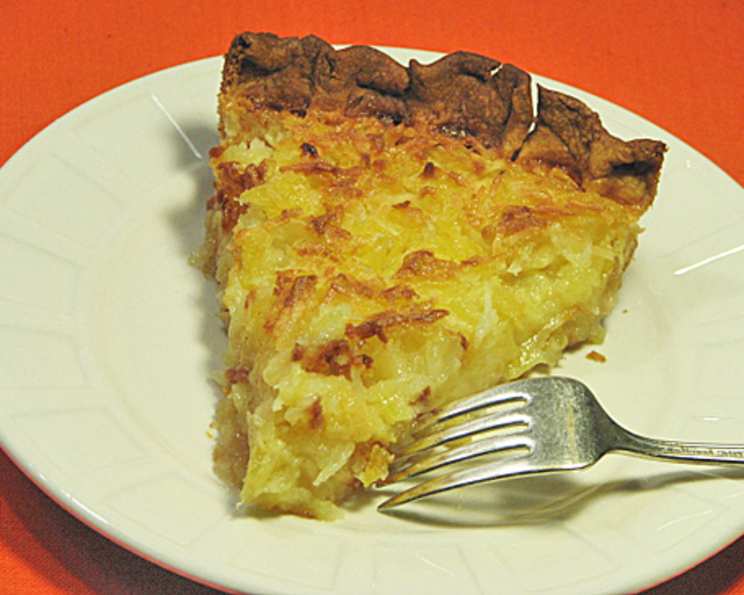
Hawaiian Pineapple Pie: A Taste of Island Sunshine
There’s a scent that instantly transports me back to my childhood summers – the warm, buttery aroma of a freshly baked pie mingling with the sweet, tangy fragrance of pineapple. My grandmother, a woman who could coax magic from the simplest ingredients, always had a pineapple pie cooling on her windowsill. Its golden crust and juicy filling were a promise of sunny days and carefree laughter, a sweet escape from the everyday. This recipe, reminiscent of her creation, brings those cherished memories flooding back with every bite.
Recipe Overview
- Prep Time: 20 minutes
- Cook Time: 45-60 minutes
- Total Time: 1 hour 5 minutes
- Servings: 8
- Yield: 1 pie
- Dietary Type: Not specified
Ingredients
- 3 eggs
- 1 cup light corn syrup
- 1 cup crushed pineapple (with juice)
- 1 cup flaked coconut
- ¾ cup sugar
- 2 teaspoons flour
- ¼ cup melted butter
- 1 unbaked pie shell (10-inch)
Equipment Needed
- Large bowl
- Electric mixer or whisk
- Measuring cups and spoons
- 10-inch pie dish
- Oven
Instructions
-
Begin by preheating your oven to 350°F (175°C). This will ensure even baking and a perfectly golden crust.
-
In a large bowl, beat the 3 eggs until they are light and frothy. This step incorporates air, contributing to the pie’s overall texture.
-
Add 1 cup of light corn syrup to the beaten eggs. Beat the mixture again until it is well blended and smooth. The corn syrup provides sweetness and helps to bind the filling together.
-
Now, introduce the star of the show: 1 cup of crushed pineapple (with its juice). Stir this into the egg and corn syrup mixture. Don’t drain the pineapple; the juice adds moisture and intensifies the tropical flavor.
-
Incorporate 1 cup of flaked coconut, ¾ cup of sugar, and 2 teaspoons of flour into the bowl. The coconut lends a delightful chewiness and subtle nutty flavor, while the sugar adds sweetness, and the flour helps to thicken the filling as it bakes.
-
Pour in ¼ cup of melted butter, adding richness and a luscious mouthfeel to the pie.
-
Thoroughly mix all the ingredients until they are well combined and evenly distributed. Ensure no lumps of flour or sugar remain.
-
Carefully spoon the prepared filling into the 10-inch unbaked pie shell. Distribute the filling evenly to ensure a consistent texture and appearance throughout the pie.
-
Bake the pie in the preheated oven for 45-60 minutes. The baking time may vary depending on your oven.
-
Check for doneness: The crust should be beautifully browned, and the filling should be firm to the touch. If the crust starts to brown too quickly, you can loosely cover it with foil for the last 15-20 minutes of baking. A gentle jiggle in the very center is okay; it will firm up as it cools.
-
Once baked, remove the pie from the oven and allow it to cool completely on a wire rack before serving. This allows the filling to set properly and prevents a soggy crust.
Expert Tips & Tricks
- Toasted Coconut: For an extra layer of flavor, lightly toast the coconut flakes in a dry skillet over medium heat until golden brown before adding them to the filling. Be careful not to burn them!
- Crust Protection: If your pie crust edges are browning too quickly, use a pie shield or strips of foil to cover them during the last part of baking.
- Even Baking: Rotate the pie halfway through the baking time to ensure even browning.
- Room Temperature Butter: Make sure your butter is fully melted and slightly cooled before adding to the filling mixture. This prevents the eggs from cooking prematurely.
Serving & Storage Suggestions
Serve the Hawaiian Pineapple Pie chilled or at room temperature. A dollop of whipped cream or a scoop of vanilla ice cream makes a delightful accompaniment. For a truly tropical experience, garnish with fresh pineapple wedges or a sprinkle of toasted coconut.
Store any leftover pie in the refrigerator, covered, for up to 3 days. The pie is best enjoyed within the first two days, as the crust may soften over time. It’s not recommended to freeze this pie, as the filling can become watery upon thawing.
Nutritional Information
| Nutrient | Amount per Serving | % Daily Value |
|---|---|---|
| Calories | 454.1 kcal | Not Specified |
| Calories from Fat | 162 g | 36% |
| Total Fat | 18.1 g | 27% |
| Saturated Fat | 8.9 g | 44% |
| Cholesterol | 85 mg | 28% |
| Sodium | 251.4 mg | 10% |
| Total Carbohydrate | 72.8 g | 24% |
| Dietary Fiber | 2.1 g | 8% |
| Sugars | 38.6 g | 154% |
| Protein | 4.3 g | 8% |
Note: Nutritional information is an estimate and may vary based on specific ingredients and preparation methods.
Variations & Substitutions
- Gluten-Free: Use a gluten-free pie crust for a gluten-free version of this pie.
- Coconut Milk: For a richer, more intense coconut flavor, substitute half of the light corn syrup with coconut milk.
- Spiced Version: Add a pinch of ground cinnamon or nutmeg to the filling for a warmer, spicier flavor profile.
- Macadamia Nuts: Sprinkle chopped macadamia nuts over the filling before baking for added texture and flavor.
- Brown Sugar: Use brown sugar instead of granulated sugar for a deeper, more molasses-like flavor.
FAQs (Frequently Asked Questions)
Q: Can I use fresh pineapple instead of canned?
A: While you can use fresh pineapple, canned crushed pineapple is recommended as it retains its moisture better during baking. If using fresh, make sure it’s very finely chopped and drain off any excess juice.
Q: How do I prevent the crust from shrinking during baking?
A: To minimize shrinkage, blind-bake the pie crust partially before adding the filling. This involves lining the crust with parchment paper and pie weights (or dried beans) and baking it for about 15 minutes before adding the filling.
Q: What can I use if I don’t have light corn syrup?
A: Light corn syrup helps bind the filling and adds a unique sweetness. As a substitute, you can use honey or a mixture of granulated sugar and water, but the texture and flavor may be slightly different.
Q: How can I tell if the pie is done?
A: The pie is done when the crust is golden brown and the filling is set, with only a slight jiggle in the center. If the crust is browning too quickly, cover it loosely with foil.
Q: Why is my pie filling runny?
A: A runny filling can be caused by not baking the pie long enough or using too much liquid in the filling. Make sure to bake the pie until the filling is set and follow the recipe’s ingredient measurements carefully.
Final Thoughts
This Hawaiian Pineapple Pie is more than just a dessert; it’s a slice of sunshine, a taste of paradise, and a comforting reminder of simple joys. I urge you to try this recipe and experience the magic for yourself. Whether you share it with loved ones or savor it in quiet solitude, I hope it brings a smile to your face and a little bit of island spirit to your day. Let me know what you think, and feel free to experiment with variations to make it your own. Pair it with a tropical iced tea or a refreshing coconut cocktail for the ultimate Hawaiian treat!