
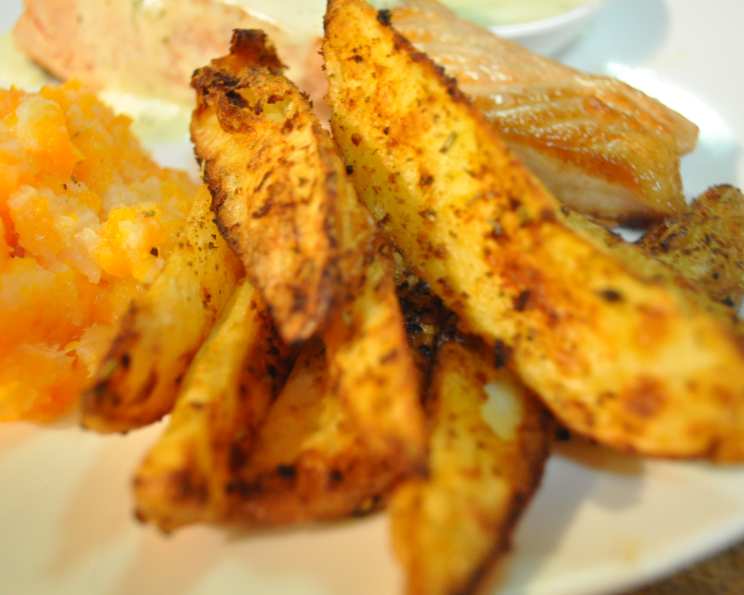
Healthier, Budget-Friendly Oven Fries: Guilt-Free Comfort Food
My earliest memories of French fries are intertwined with family gatherings at my grandmother’s house. The aroma of freshly fried potatoes would fill the air, a siren call to hungry kids like myself. While those fries were undeniably delicious, they were also undeniably heavy on the oil and salt. As a chef, I’ve always strived to recreate that comforting experience without the guilt. This recipe for healthier oven fries does just that – it’s budget-friendly, packed with flavor, and significantly lighter than the deep-fried version, allowing you to indulge without compromising your well-being.
Recipe Overview
- Prep Time: 8 minutes
- Cook Time: 45 minutes
- Total Time: 53 minutes
- Servings: 2
- Dietary Type: Vegan, Gluten-Free, Low-Sodium (adaptable)
Ingredients
- 2 russet potatoes, cut into fries
- 2 tablespoons olive oil
- 2 tablespoons approximate Ms. Dash sodium-free seasoning (or seasoning of choice, no salt)
Equipment Needed
- French fry cutter (optional)
- Large bowl
- Cookie sheet
Instructions
-
Preheat your oven to 350 degrees Fahrenheit (175 degrees Celsius).
-
Cut the russet potatoes into fry shapes. A french fry cutter makes this task quick and uniform, but a sharp knife works just as well. Aim for consistent sizes to ensure even cooking.
-
Place the cut potatoes into a large bowl filled with cold water. Rinse them thoroughly to remove excess starch. This step is crucial for achieving crispy fries. Drain the water completely.
-
Add the 2 tablespoons of olive oil to the bowl of washed potatoes. Mix well, ensuring that all the fries are lightly coated with oil. This can be done by tossing them in the bowl, or getting your hands in there to make sure each fry is coated.
-
Spread the oiled fries in a single layer on a cookie sheet. Avoid overcrowding the pan, as this will steam the fries instead of allowing them to crisp. If necessary, use two cookie sheets.
-
Sprinkle the Ms. Dash sodium-free seasoning (or your chosen salt-free seasoning blend) evenly over the fries.
-
Mix the fries on the cookie sheet thoroughly to ensure even coating of the seasoning.
-
Bake for 45 minutes, flipping halfway through to ensure even browning.
-
Check for doneness after 30 minutes. Cooking times will vary depending on the size and thickness of your fries. Thicker “steak fries” will require longer baking times, while thinner fries will cook faster. The fries are done when they are golden brown and crispy.
-
Remove from oven and serve.
Expert Tips & Tricks
-
Soaking is Key: Don’t skip the step of rinsing the potatoes in cold water. Soaking removes excess starch, which is essential for achieving crispy fries. You can even soak them for a longer period (30 minutes to an hour) for extra crispiness.
-
Don’t Overcrowd the Pan: Overcrowding the cookie sheet will cause the fries to steam instead of bake, resulting in soggy fries. Ensure that the fries are spread in a single layer with enough space between them.
-
Even Cooking: Flipping the fries halfway through the baking process ensures even browning and crispness on all sides.
-
Spice it Up: Don’t be afraid to experiment with different seasonings. Garlic powder, onion powder, paprika, chili powder, or even a touch of smoked paprika can add depth and complexity to the flavor.
-
Crispy Hack: For extra crispy fries, try placing a wire rack on top of the cookie sheet before arranging the fries. This allows for better air circulation and crispier results.
-
The Right Potato: Russet potatoes are the best choice for fries due to their high starch content. However, you can also use Yukon Gold potatoes for a slightly sweeter flavor and creamier texture.
Serving & Storage Suggestions
Serve these healthier oven fries immediately for the best flavor and texture. They make a fantastic side dish for burgers, sandwiches, grilled chicken, or fish. You can also enjoy them as a snack with your favorite dipping sauce, such as ketchup, mustard, or a homemade aioli.
Leftover fries can be stored in an airtight container in the refrigerator for up to 2-3 days. Reheat them in a preheated oven at 350°F (175°C) for about 10-15 minutes, or until heated through and crispy. You can also reheat them in an air fryer for an even quicker and crispier result. Microwaving is not recommended, as it will make the fries soggy.
Nutritional Information
(Estimated per serving. Values may vary based on specific ingredients and portion sizes.)
| Nutrient | Amount per Serving | % Daily Value |
|---|---|---|
| Calories | 283 kcal | 14% |
| Total Fat | 13.7g | 18% |
| Saturated Fat | 1.9g | 9% |
| Cholesterol | 0mg | 0% |
| Sodium | 13.1mg | 1% |
| Total Carbohydrate | 37.2g | 12% |
| Dietary Fiber | 4.7g | 18% |
| Sugars | 1.7g | 3% |
| Protein | 4.3g | 9% |
Variations & Substitutions
-
Sweet Potato Fries: Substitute the russet potatoes with sweet potatoes for a naturally sweeter and more nutritious alternative. The cooking time might need to be adjusted slightly, so keep a close eye on them.
-
Seasoning Variations: Get creative with your seasoning blends. Try using Italian herbs, Cajun spices, smoked paprika, or even a sprinkle of parmesan cheese (if not vegan) for added flavor.
-
Oil Alternatives: While olive oil is a healthy choice, you can also use avocado oil or coconut oil for a slightly different flavor profile.
-
Garlic Fries: Add minced garlic to the olive oil and seasoning mixture for a delicious garlic-infused flavor.
-
Spicy Fries: Incorporate a pinch of cayenne pepper or chili flakes into the seasoning blend for a spicy kick.
FAQs (Frequently Asked Questions)
Q: Why are my oven fries not crispy?
A: The most common reasons for soggy oven fries are overcrowding the pan, not rinsing the potatoes thoroughly, and not using enough oil. Make sure to spread the fries in a single layer, rinse them well to remove excess starch, and coat them evenly with oil.
Q: Can I make these fries ahead of time?
A: While it’s best to serve these fries immediately, you can prepare the potatoes by cutting them into fry shapes and soaking them in water ahead of time. Store them in the refrigerator until you’re ready to bake them.
Q: Can I use frozen fries for this recipe?
A: Yes, you can use frozen fries. However, you may need to adjust the cooking time accordingly. Follow the instructions on the package, but keep a close eye on them to prevent burning.
Q: How can I make these fries even healthier?
A: You can reduce the amount of oil used or use an oil sprayer to lightly coat the fries. You can also experiment with using different seasoning blends that are low in sodium and free of additives.
Q: What dipping sauces go well with these fries?
A: These fries pair well with a variety of dipping sauces, such as ketchup, mustard, mayonnaise, aioli, ranch dressing, or even a homemade spicy dipping sauce.
Final Thoughts
This recipe is a testament to the fact that you can enjoy your favorite comfort foods without sacrificing your health or your budget. These healthier oven fries are incredibly easy to make, customizable to your taste preferences, and significantly lighter than their deep-fried counterparts. So, go ahead, gather your ingredients, and give this recipe a try. I’m confident that you’ll be pleasantly surprised by how delicious and satisfying these guilt-free fries can be. Don’t forget to share your feedback and creative variations – I’m always eager to hear how you make this recipe your own! Perhaps pair them with a light salad or a grilled veggie burger for a complete and balanced meal. Happy cooking!