
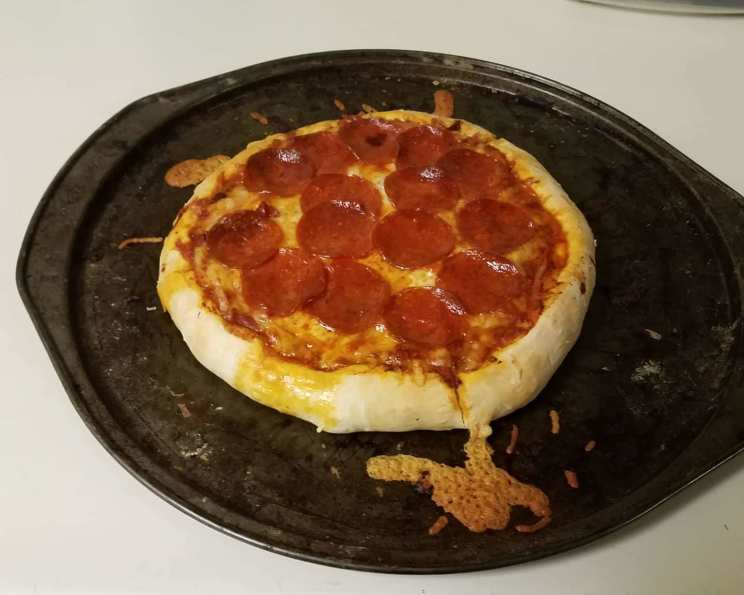
Healthified Easy No-Yeast Thin Pizza Crust
The aroma of freshly baked pizza has been a constant in my life, a comforting scent that evokes memories of boisterous family gatherings around my grandmother’s kitchen table. Her crust was legendary, a labor of love that required hours of rising and kneading. As much as I cherish those memories, life demands efficiency, and I’ve long sought a quick, healthy pizza crust that doesn’t compromise on flavor or texture. After much experimenting, I’m thrilled to share this no-yeast recipe that delivers a crisp, thin crust in a fraction of the time, perfect for weeknight pizza cravings.
Recipe Overview
- Prep Time: 15 minutes
- Cook Time: 28-33 minutes
- Total Time: 43-48 minutes
- Servings: 4-6
- Yield: 1 12-inch pizza crust
- Dietary Type: Vegetarian (easily vegan)
Ingredients
- 1 1/3 cups all-purpose flour
- 1 teaspoon baking powder
- 1/2 teaspoon kosher salt
- 1/2 cup skim milk (can substitute with soymilk, nut milk, water, or vegetable broth for a vegan option)
- 2 tablespoons olive oil
Equipment Needed
- Medium bowl
- Measuring cups and spoons
- Lightly floured surface
- Cookie sheet
- Rolling pin
- Fork
Instructions
-
Preheat your oven to 400°F (200°C). Ensuring the oven is properly preheated is crucial for a crispy crust.
-
In a medium bowl, whisk together the all-purpose flour, baking powder, and kosher salt. Make sure there are no lumps of baking powder remaining.
-
Add the skim milk (or your chosen substitute) and olive oil to the dry ingredients. Stir until a soft dough forms. Don’t overmix at this stage; you just want the ingredients to come together.
-
If the dough appears too dry, gradually stir in 1 to 2 tablespoons of additional liquid (milk, water, or broth), one tablespoon at a time, until it reaches a pliable consistency. The dough should be soft but not sticky.
-
Lightly flour your work surface. Turn the dough out onto the floured surface and knead it about 10 times. This brief kneading helps develop the gluten slightly, giving the crust a better texture.
-
Shape the dough into a ball. Cover it with the bowl you used earlier and let it rest for 10 minutes. This allows the gluten to relax, making the dough easier to roll out.
-
Place the dough on an ungreased cookie sheet. Use your hands to flatten it slightly.
-
Using a rolling pin, roll the dough out to a 12-inch round that resembles a pizza pan. If the dough resists rolling, let it rest for another 5 minutes.
-
Use a fork to poke holes all over the surface of the dough. This prevents the crust from puffing up too much during baking.
-
Bake the crust for 8 minutes at 400°F (200°C). This par-baking sets the crust, ensuring it can hold your toppings without becoming soggy.
-
Remove the crust from the oven and add your desired toppings.
-
Return the pizza to the oven and bake for another 20-25 minutes, or until the crust is golden brown and the toppings are cooked to your liking. Keep a close eye on it during the final minutes to prevent burning.
Expert Tips & Tricks
- For a crispier crust, place a pizza stone in the oven while it preheats. Carefully transfer the par-baked crust to the hot stone before adding the toppings.
- If you want to prepare the crust ahead of time, you can par-bake it and then store it in the refrigerator for up to 24 hours before adding the toppings and finishing the baking process.
- Don’t overload the pizza with toppings, as this can make the crust soggy. A thin layer of sauce, cheese, and your favorite veggies or meats is all you need.
- If the edges of the crust are browning too quickly, cover them with strips of aluminum foil during the final minutes of baking.
- To add flavor to the crust itself, incorporate herbs like dried oregano, basil, or garlic powder into the flour mixture.
Serving & Storage Suggestions
Once the pizza is baked, let it cool slightly before slicing and serving. Garnish with fresh basil or a drizzle of olive oil for an extra touch of flavor.
Leftover pizza can be stored in an airtight container in the refrigerator for up to 3 days. To reheat, you can use the oven (for a crisper crust), a skillet (for a slightly fried crust), or the microwave (for convenience, but the crust may become softer). Reheat at 350°F (175°C) for about 10 minutes or until heated through.
For longer storage, you can freeze individual slices or the whole pizza. Wrap tightly in plastic wrap and then in aluminum foil. Frozen pizza can be stored for up to 2 months. To reheat from frozen, bake at 375°F (190°C) for about 15-20 minutes, or until heated through.
Nutritional Information
| Nutrient | Amount per Serving | % Daily Value |
|---|---|---|
| Calories | 225 kcal | 11% |
| Total Fat | 7.7g | 12% |
| Saturated Fat | 1.1g | 6% |
| Cholesterol | 0.5mg | 0% |
| Sodium | 328mg | 14% |
| Total Carbohydrate | 33.8g | 11% |
| Dietary Fiber | 1.1g | 4% |
| Sugars | 0.1g | 0% |
| Protein | 5.5g | 11% |
Note: Nutritional information is an estimate and may vary based on specific ingredients and portion sizes.
Variations & Substitutions
- Gluten-Free Crust: Substitute the all-purpose flour with a gluten-free all-purpose flour blend. You may need to adjust the amount of liquid slightly to achieve the desired dough consistency.
- Whole Wheat Crust: Replace half of the all-purpose flour with whole wheat flour for a nuttier flavor and added fiber.
- Vegan Crust: As mentioned, substitute the skim milk with soymilk, almond milk, oat milk, water, or vegetable broth. Ensure your toppings are also vegan.
- Flavored Crust: Add dried herbs, garlic powder, onion powder, or Italian seasoning to the flour mixture for a more flavorful crust.
- Sweet Pizza: Instead of savory toppings, use this crust for a dessert pizza with fruit, chocolate, and a sweet glaze.
FAQs (Frequently Asked Questions)
Q: Why is my pizza crust tough?
A: Over-kneading the dough can result in a tough crust. Be sure to only knead the dough for about 10 times, just enough to bring it together. Also, ensure you’re not using too much flour during the kneading and rolling process.
Q: Can I use bread flour for this recipe?
A: While you can use bread flour, it will result in a chewier crust. All-purpose flour is recommended for a more tender and thin crust.
Q: How do I prevent my pizza crust from sticking to the cookie sheet?
A: Make sure your cookie sheet is clean and dry. You can also lightly dust it with flour or cornmeal before placing the dough on it. Alternatively, use parchment paper or a silicone baking mat.
Q: Can I make this pizza crust in a food processor?
A: Yes, you can use a food processor to combine the ingredients. Pulse the dry ingredients together, then slowly add the wet ingredients until a dough forms. Be careful not to over-process the dough.
Q: My crust is browning too quickly. What should I do?
A: Lower the oven temperature by 25 degrees and continue baking until the toppings are cooked. You can also cover the edges of the crust with aluminum foil to prevent them from burning.
Final Thoughts
This no-yeast thin pizza crust has become a staple in my kitchen, offering a quick and healthy alternative to traditional, time-consuming recipes. The simplicity of the ingredients and the straightforward instructions make it accessible for even the most novice bakers. I encourage you to try this recipe and experiment with your favorite toppings. Feel free to adjust the flavors to suit your palate and share your creations with friends and family. Pair it with a crisp green salad and a glass of your favorite beverage for a complete and satisfying meal. Bon appétit!