
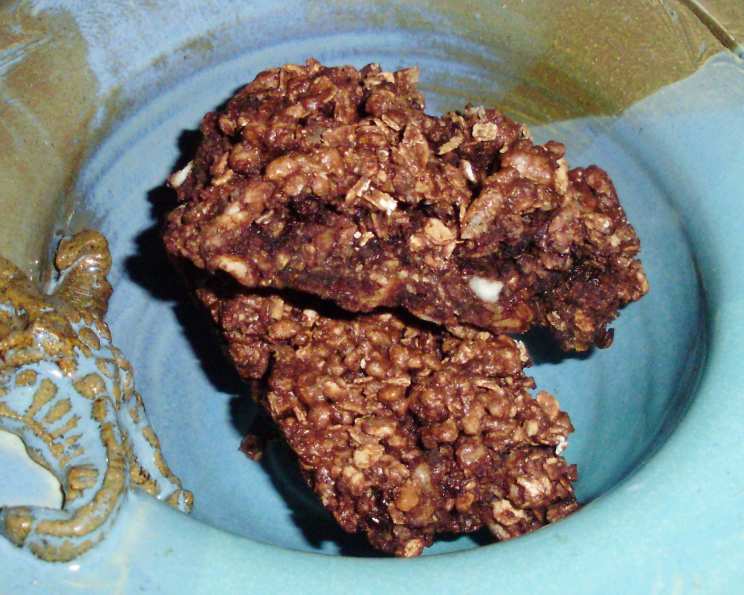
Healthy Banana Chocolate Granola Bars
The scent of toasted oats and ripe bananas always transports me back to my childhood summers. My grandmother, a beacon of healthy homemade snacks, would whip up batches of granola bars packed with wholesome ingredients. I remember sneaking into the kitchen, the warm aroma drawing me in like a moth to a flame, to pilfer a still-warm bar. These were far better than anything store-bought, and the love she put into them made each bite unforgettable. This recipe is a homage to those memories, a healthier take on a classic treat.
Recipe Overview
- Prep Time: 15 minutes
- Cook Time: 20 minutes
- Total Time: 35 minutes
- Servings: 5
- Dietary Type: Vegetarian
Ingredients
- 1/3 cup oats
- 2/3 cup Rice Krispies
- 1-2 tablespoons chopped walnuts (optional)
- 3 tablespoons cocoa
- 3 tablespoons finely chopped crunchy dried bananas (banana chips)
- 1 1/2 – 2 tablespoons semi-sweet chocolate chips, mini kind (or to taste)
- 1/8 teaspoon salt
- 1 tablespoon smooth peanut butter
- 3 tablespoons sugar
- 2 teaspoons skim milk
- 1/2 teaspoon vanilla
- 1 egg white, lightly beaten
Equipment Needed
- Large frying pan
- Large bowl
- Small bowl
- Microwave
- Loaf pan
- Grease or cooking spray
Instructions
-
Begin by preheating your oven to 350 degrees F (175 degrees C). While the oven heats, grease a standard loaf pan. This will prevent the granola bars from sticking and make them easier to remove later.
-
Now, for the toasting process. In a large frying pan over medium heat, separately toast the oats, Rice Krispies, and walnuts (if using). Toasting each ingredient separately ensures even browning and prevents burning. Keep a close eye on them, as they can go from perfectly toasted to burnt very quickly. You want them to darken slightly in color and release a fragrant, pungent aroma. Remove each ingredient from the pan as it’s toasted and set aside.
-
In a large bowl, combine all the dry ingredients: the toasted oats, Rice Krispies, banana chips, chocolate chips, walnuts (if using), cocoa, and salt. Mix well to ensure that the cocoa and salt are evenly distributed throughout the mixture.
-
In a separate, small bowl, combine the peanut butter, vanilla, skim milk, and sugar. Microwave this mixture for about 25 seconds, or until the peanut butter is softened. Stir thoroughly until smooth. If the mixture is still lumpy, microwave for another 5-10 seconds, but be careful not to overheat it.
-
Add the lightly beaten egg white to the peanut butter mixture and stir well to combine. The egg white helps bind the ingredients together, creating a chewier texture in the final product.
-
Pour the wet peanut butter mixture into the large bowl with the dry ingredients. Stir until all the dry ingredients are evenly moistened. This step is crucial for ensuring that the granola bars hold together properly.
-
Transfer the mixture to the prepared loaf pan. Now comes the important part: firmly, firmly, firmly press the mixture into the pan. Use the back of a spoon or your fingers (lightly oiled or dampened) to compact the granola bar mixture. This will help create a dense and cohesive bar that won’t crumble easily.
-
Bake in the preheated oven for 20 minutes, or until the bars are firm to the touch. The edges should be slightly golden brown.
-
Remove the loaf pan from the oven and allow the granola bars to cool completely in the pan. Once cooled, refrigerate for at least a couple of hours, or preferably overnight. This chilling period helps the bars to firm up even further, making them easier to cut and handle.
-
After chilling, remove the granola bars from the refrigerator and cut them into your desired size. Serve at room temperature for the best texture.
Expert Tips & Tricks
- Toast the oats and Rice Krispies: Toasting these ingredients adds a depth of flavor and a satisfying crispness to the bars. Don’t skip this step!
- Don’t overbake: Overbaking will result in dry, crumbly bars. Keep a close eye on them during the last few minutes of baking and remove them from the oven as soon as they are firm.
- Firmly press the mixture: This is the key to preventing the bars from falling apart. Use a spatula or the back of a spoon to really compress the mixture into the pan.
- Adjust sweetness: Feel free to adjust the amount of sugar to your liking. You can also substitute honey or maple syrup for the sugar.
- For a chewier bar: Use brown sugar instead of white sugar.
Serving & Storage Suggestions
These granola bars are perfect as an on-the-go breakfast, a mid-afternoon snack, or even a healthy dessert. Serve them at room temperature to enjoy their chewy texture.
To store, wrap the granola bars individually in plastic wrap or store them in an airtight container. They will keep at room temperature for up to 3 days, in the refrigerator for up to a week, or in the freezer for up to a month. If freezing, wrap them tightly to prevent freezer burn. Thaw at room temperature before serving.
Nutritional Information
Please note that the following is an estimate. Actual values may vary.
| Nutrient | Amount per Serving | % Daily Value |
|---|---|---|
| Calories | 144 kcal | – |
| Total Fat | 3.9 g | 5% |
| Saturated Fat | 1.3 g | 6% |
| Cholesterol | 0 mg | 0% |
| Sodium | 121.8 mg | 5% |
| Total Carbohydrate | 25.5 g | 8% |
| Dietary Fiber | 2.9 g | 11% |
| Sugars | 11.8 g | – |
| Protein | 4.5 g | 9% |
Variations & Substitutions
- Gluten-Free: Ensure that you use certified gluten-free oats and Rice Krispies.
- Nut-Free: Substitute sunflower seed butter or tahini for the peanut butter and omit the walnuts.
- Vegan: Substitute maple syrup or agave for the sugar and use a flax egg (1 tablespoon flaxseed meal mixed with 3 tablespoons water, let sit for 5 minutes) for the egg white.
- Spice It Up: Add a pinch of cinnamon, nutmeg, or ginger to the dry ingredients for a warm, comforting flavor.
- Add Dried Fruit: Incorporate other dried fruits, such as raisins, cranberries, or chopped dates, for added sweetness and texture.
FAQs (Frequently Asked Questions)
Q: Can I use regular bananas instead of banana chips?
A: While you can use mashed ripe bananas, the texture will be different. The bars will be much softer and moister, and they may not hold together as well. Banana chips provide a concentrated banana flavor and a drier texture that helps the bars bind.
Q: Can I use a different type of nut butter?
A: Absolutely! Almond butter, cashew butter, or even sunflower seed butter are all great substitutes for peanut butter. Just make sure the nut butter is smooth for the best results.
Q: My granola bars are too crumbly. What did I do wrong?
A: This is usually caused by not pressing the mixture firmly enough into the pan or not using enough of the wet ingredients. Make sure to really compact the mixture and ensure that all the dry ingredients are evenly moistened.
Q: Can I reduce the amount of sugar in this recipe?
A: Yes, you can reduce the amount of sugar, but keep in mind that the sugar helps to bind the ingredients together. If you reduce it too much, the bars may become crumbly. You can also substitute a natural sweetener like honey or maple syrup.
Q: How do I prevent the chocolate chips from melting when baking?
A: Using mini chocolate chips helps to minimize melting. You can also try chilling the chocolate chips in the freezer for about 15 minutes before adding them to the mixture.
Final Thoughts
These Healthy Banana Chocolate Granola Bars are a delightful and wholesome snack that you can feel good about eating. They’re easy to make, customizable to your preferences, and perfect for satisfying your sweet cravings without derailing your healthy eating goals. I urge you to try this recipe and adapt it to your own taste. Share your creations and feedback – I’d love to hear about your experience and any creative twists you come up with! Perhaps a cup of herbal tea would be the ideal companion to these bars.