
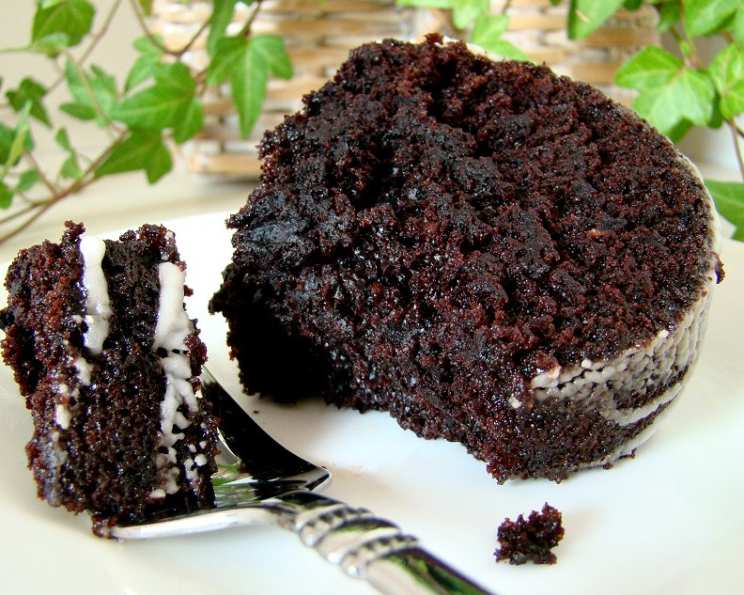
Healthy Black Devil’s Food Cake: Guilt-Free Indulgence
The aroma of Devil’s Food Cake always takes me back to my grandmother’s kitchen. She wasn’t one for fancy desserts, but her Devil’s Food, always served slightly warm with a dusting of powdered sugar, was legendary. I can still picture her, flour dusting her apron, a mischievous glint in her eye as she’d say, “A little bit of devil never hurt anyone, especially when it tastes this good!” This recipe is my healthier take on that classic, retaining all the rich chocolate flavor while lightening the load.
Recipe Overview
- Prep Time: 15 minutes
- Cook Time: 35-40 minutes
- Total Time: 50-55 minutes
- Servings: 20
- Yield: One 13×9 inch cake
- Dietary Type: Lower-Fat
Ingredients
- Vegetable oil cooking spray, 20 sprays
- 2 cups all-purpose flour, plus flour for dusting pan
- 1 3⁄4 cups sugar
- 1⁄2 cup unsweetened cocoa powder
- 1 tablespoon baking soda
- 2⁄3 cup unsweetened applesauce
- 1 cup fat-free buttermilk or 1 cup low-fat buttermilk
- 2 tablespoons vegetable oil
- 1 cup strong coffee
Equipment Needed
- 13x9x2-inch baking pan
- Large mixing bowl
- Small saucepan
- Whisk
- Sifter (optional, but recommended)
- Measuring cups and spoons
- Toothpick
Instructions
- Begin by preheating your oven to 350 degrees Fahrenheit (175 degrees Celsius). Ensuring the oven is fully preheated is crucial for even baking.
- Prepare your 13x9x2-inch baking pan. Generously spray the entire inside surface with vegetable oil cooking spray. This prevents the cake from sticking.
- Next, dust the sprayed pan with flour. This step is important even if you used a non-stick spray. Add a spoonful or two of flour into the pan, then tilt and tap the pan to coat all sides and corners with a thin layer of flour.
- Invert the pan and shake off any excess flour. This prevents the cake from having a floury taste and ensures a clean release.
- Now, in a large mixing bowl, sift together the dry ingredients. This includes the 2 cups of all-purpose flour, 1 3⁄4 cups of sugar, 1⁄2 cup of unsweetened cocoa powder, and 1 tablespoon of baking soda. Sifting helps to remove any lumps and ensures the dry ingredients are evenly distributed. If you don’t have a sifter, you can whisk the dry ingredients vigorously instead.
- Next, whisk in the wet ingredients. Add the 2⁄3 cup of unsweetened applesauce, 1 cup of fat-free or low-fat buttermilk, and 2 tablespoons of vegetable oil to the bowl with the dry ingredients. Whisk until the mixture is mostly combined, but don’t overmix at this stage.
- In a small saucepan, bring the 1 cup of strong coffee to a boil over medium-high heat. The hot coffee intensifies the chocolate flavor and adds moisture to the cake.
- Carefully stir the boiling coffee gently into the batter. The mixture will be quite soupy at this point, but don’t worry, that’s normal. Stir until everything is thoroughly combined and the batter is smooth.
- Pour the batter into the prepared 13x9x2-inch baking pan, spreading it evenly.
- Bake for 35 to 40 minutes, or until a toothpick inserted into the center of the cake comes out clean. Start checking for doneness around the 35-minute mark. If the toothpick comes out with wet batter clinging to it, continue baking for a few more minutes and check again.
- Once the cake is baked, remove it from the oven and let it cool slightly in the pan before serving. You can serve it warm, which is especially delicious, or let it cool completely.
Expert Tips & Tricks
- Coffee Strength Matters: Use a really strong brewed coffee for the best chocolate flavor enhancement. Espresso works well!
- Buttermilk Substitute: If you don’t have buttermilk, you can make a quick substitute by adding 1 tablespoon of lemon juice or white vinegar to a measuring cup, then filling it with milk to reach 1 cup. Let it sit for 5 minutes to curdle slightly before using.
- Applesauce Enhancement: For added flavor, use cinnamon applesauce instead of plain.
- Preventing a Soggy Bottom: Make sure your oven rack is in the center position to ensure even heat distribution and prevent a soggy bottom.
- Chocolate Boost: If you want an even richer chocolate flavor, add 1/4 cup of mini chocolate chips to the batter.
- High Altitude Adjustments: If you’re baking at a high altitude, you may need to reduce the amount of sugar by a tablespoon or two and increase the baking time slightly.
- Cake Release Assurance: For extra insurance against sticking, line the bottom of the pan with parchment paper before spraying and flouring.
Serving & Storage Suggestions
This healthy black devil’s food cake is delightful served warm with a scoop of light vanilla ice cream or a dollop of whipped cream (or a dairy-free alternative). A dusting of powdered sugar adds an elegant touch.
To store, let the cake cool completely. Then, cover it tightly with plastic wrap or store it in an airtight container. It will keep at room temperature for up to 2 days, in the refrigerator for up to 5 days, or in the freezer for up to 2 months. To reheat, you can warm individual slices in the microwave for a few seconds or warm the entire cake in a low oven (around 300 degrees Fahrenheit) for about 10-15 minutes. Thaw frozen cake overnight in the refrigerator before serving.
Nutritional Information
| Nutrient | Amount per Serving | % Daily Value |
|---|---|---|
| Calories | 133.8 kcal | N/A |
| Calories from Fat | 16 g | 12% |
| Total Fat | 1.8 g | 2% |
| Saturated Fat | 0.4 g | 1% |
| Cholesterol | 0 mg | 0% |
| Sodium | 189 mg | 7% |
| Total Carbohydrate | 29.1 g | 9% |
| Dietary Fiber | 1.1 g | 4% |
| Sugars | 17.6 g | 70% |
| Protein | 1.7 g | 3% |
Variations & Substitutions
- Gluten-Free: Substitute the all-purpose flour with a gluten-free all-purpose blend. Ensure the blend contains xanthan gum or add it separately, as it’s crucial for binding the ingredients.
- Vegan: Use a vegan buttermilk substitute (non-dairy milk with lemon juice or vinegar) and ensure your sugar is vegan-friendly (some refined sugars are processed with bone char).
- Spiced Devil’s Food: Add a teaspoon of cinnamon, 1/2 teaspoon of ground cloves, and 1/4 teaspoon of nutmeg to the dry ingredients for a warm, spiced flavor.
- Mexican Chocolate Devil’s Food: Add a teaspoon of cinnamon and a pinch of cayenne pepper to the dry ingredients for a subtle kick.
- Frosting Options: While this cake is delicious on its own, you can top it with a light chocolate glaze made with cocoa powder, powdered sugar, and a little milk or water. Alternatively, a simple dusting of powdered sugar is a classic and elegant choice. For a truly decadent treat, try a chocolate avocado frosting (the avocado adds creaminess without the added fat).
FAQs (Frequently Asked Questions)
Q: Why is the coffee added hot?
A: The hot coffee helps to bloom the cocoa powder, intensifying its flavor and resulting in a richer chocolate taste. It also adds moisture to the cake.
Q: Can I use regular milk instead of buttermilk?
A: While you can use regular milk, buttermilk adds a tangy flavor and helps to create a tender crumb. If you don’t have buttermilk, you can make a substitute as mentioned in the Tips & Tricks section.
Q: How do I prevent the cake from sticking to the pan?
A: Thoroughly spraying the pan with vegetable oil cooking spray and then dusting it with flour is the best way to prevent sticking. You can also line the bottom of the pan with parchment paper for extra insurance.
Q: Can I freeze this cake?
A: Yes, this cake freezes well. Let it cool completely, then wrap it tightly in plastic wrap and store it in a freezer-safe container. It can be frozen for up to 2 months.
Q: My cake sank in the middle. What went wrong?
A: A sunken cake can be caused by several factors, including overmixing the batter, opening the oven door too frequently during baking, or using an oven temperature that is too low. Make sure to follow the recipe instructions carefully and avoid opening the oven door unnecessarily.
Final Thoughts
This Healthy Black Devil’s Food Cake is proof that you don’t have to sacrifice flavor to eat well. It’s a moist, decadent, and surprisingly light take on a classic dessert, perfect for satisfying your sweet tooth without the guilt. I encourage you to try this recipe and share it with your loved ones. Let me know what you think and feel free to experiment with variations to make it your own! Maybe a scoop of homemade strawberry ice cream? Or perhaps a chocolate avocado frosting? The possibilities are endless. Happy baking!