
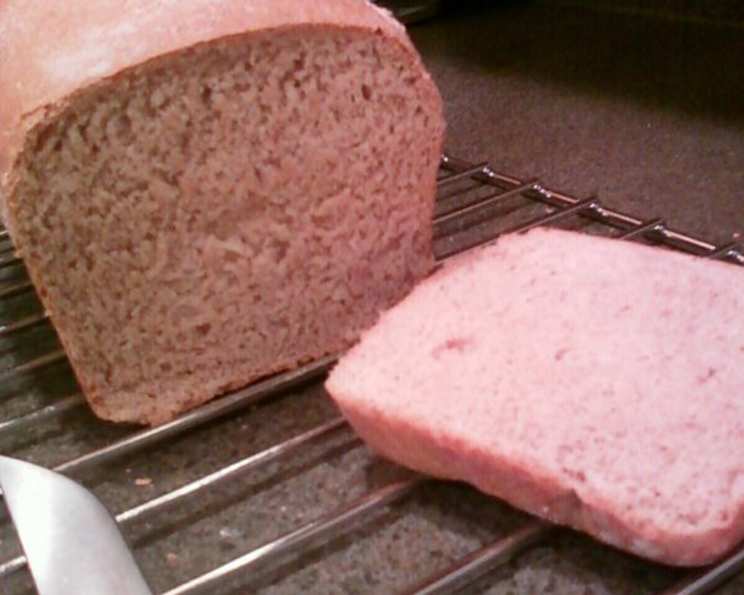
The Hearty Embrace of Homemade Whole Wheat Bread
I remember the first time I truly appreciated the magic of bread baking. It wasn’t in a fancy restaurant or a Michelin-starred kitchen. It was in my grandmother’s sun-drenched kitchen, the air thick with the yeasty aroma of rising dough. She’d let me punch down the dough – a serious responsibility for a small child – and the warmth radiating from the oven felt like a hug. That memory, that feeling of wholesome goodness, is what I strive for every time I bake a loaf. There’s a simple beauty in creating something nourishing and delicious from scratch, and this whole wheat bread recipe is my tribute to those cherished moments.
Recipe Overview
- Prep Time: 20 minutes
- Rise Time: 1 hour 30 minutes
- Cook Time: 30-35 minutes
- Total Time: 2 hours 25-30 minutes
- Yields: 1 loaf
- Dietary Type: Vegetarian
Ingredients
- 1 cup warm water (110-115 degrees F)
- 1 tablespoon milk (any kind, dairy or non-dairy works)
- 2 tablespoons applesauce (unsweetened)
- 2 tablespoons agave nectar
- 2 tablespoons brown sugar
- 1 teaspoon salt
- 1 1/2 cups all-purpose flour
- 1 1/2 cups whole wheat flour
- 1/2 tablespoon ground flax seed (optional)
- 2 teaspoons active dry yeast
Equipment Needed
- Bread machine (optional, but recommended for kneading)
- Loaf pan
- Measuring cups and spoons
- Greased loaf pan
- Clean kitchen towel
- Wire rack
Instructions
- Begin by adding the ingredients to your bread machine in the exact order they are listed in the ingredients section. This is important for proper mixing and yeast activation.
- Select the dough setting on your bread machine. This setting will handle both the kneading and the first rise of the dough.
- Once the dough cycle is complete, carefully remove the dough from the bread machine. It should be smooth and elastic.
- Shape the dough into a loaf. Gently stretch and fold the dough under itself to create a smooth surface.
- Prepare your loaf pan by greasing it thoroughly. This will prevent the bread from sticking and ensure easy removal after baking.
- Place the shaped loaf into the greased loaf pan.
- Cover the loaf pan with a clean kitchen towel. This will help to create a warm, humid environment for the dough to rise.
- Place the covered loaf pan in a warm place and let it rise until it has almost doubled in size. This should take approximately 30 minutes to 1 hour, depending on the temperature of your kitchen.
- While the dough is rising, preheat your oven to 350 degrees F (175 degrees C). Make sure your oven rack is positioned in the center.
- Once the loaf has risen adequately, carefully place the loaf pan in the preheated oven.
- Bake for 30-35 minutes, or until the bread is golden brown and sounds hollow when tapped on the bottom.
- If the loaf starts browning too quickly on top, lightly cover it with a piece of aluminum foil to prevent burning.
- Remove the bread from the oven and let it rest in the pan for a few minutes. This will make it easier to remove without damaging the loaf.
- Carefully transfer the bread to a wire rack to cool completely. Cover it with a cloth while it cools to keep the crust soft.
- Once cooled, slice and enjoy! This bread is delicious on its own, toasted, or used in sandwiches.
*If you do not have agave nectar or applesauce, you can use the same amounts of honey and oil, respectively. However, using agave and applesauce is a healthier alternative.
Expert Tips & Tricks
- Water Temperature: The water temperature is crucial for activating the yeast. Too cold, and the yeast won’t activate; too hot, and it will kill the yeast. Aim for 110-115 degrees F. Use a kitchen thermometer to ensure accuracy.
- Flour Power: Don’t be afraid to experiment with different ratios of all-purpose and whole wheat flour. Using all whole wheat flour will result in a denser loaf, while using more all-purpose flour will create a lighter texture.
- Kneading is Key (if not using a bread machine): If you’re kneading by hand, knead for at least 8-10 minutes until the dough is smooth and elastic. This develops the gluten, which gives the bread its structure.
- Rise Time: The rise time can vary depending on the temperature of your kitchen. A warm environment is ideal. You can also place the dough in a slightly warmed oven (turned off!) to speed up the process.
- Oven Calibration: Ovens can vary in temperature. Use an oven thermometer to ensure your oven is accurately calibrated.
- The Tap Test: To check for doneness, tap the bottom of the loaf. It should sound hollow. If it sounds doughy, return it to the oven for a few more minutes.
- Enhance the Flavor: Add a tablespoon of molasses for a richer, deeper flavor, or a pinch of cinnamon for a warm, comforting aroma.
Serving & Storage Suggestions
This whole wheat bread is fantastic served warm with a pat of butter or a drizzle of olive oil. It’s also perfect for making sandwiches, toast, or even croutons.
To store leftover bread, wrap it tightly in plastic wrap or place it in an airtight container at room temperature. It will stay fresh for 2-3 days. For longer storage, you can freeze the bread. Slice the bread before freezing for easy portioning. Frozen bread can be stored for up to 2-3 months. To thaw, simply remove the desired slices from the freezer and let them thaw at room temperature. You can also toast the frozen slices for a quick and easy breakfast.
Nutritional Information
| Nutrient | Amount per Serving | % Daily Value |
|---|---|---|
| Calories | 1453.4 kcal | N/A |
| Calories from Fat | N/A | 4% |
| Total Fat | 6.2 g | 9% |
| Saturated Fat | 1.3 g | 6% |
| Cholesterol | 2.1 mg | 0% |
| Sodium | 2373.8 mg | 98% |
| Total Carbohydrate | 310.4 g | 103% |
| Dietary Fiber | 29.1 g | 116% |
| Sugars | 27.8 g | N/A |
| Protein | 47.6 g | 95% |
Nutritional information is an estimate and may vary based on specific ingredients and portion sizes.
Variations & Substitutions
- Seeded Bread: Add 1/4 cup of your favorite seeds (such as sesame, poppy, or sunflower seeds) to the dough for added flavor and texture.
- Herb Bread: Mix in 1-2 tablespoons of dried herbs (such as rosemary, thyme, or oregano) for a savory twist.
- Sweet Bread: Add 1/4 cup of raisins, cranberries, or chopped nuts for a sweeter bread. Increase the agave to 1/4 cup to enhance the sweetness.
- Gluten-Free Option: Substitute the all-purpose and whole wheat flour with a gluten-free bread flour blend. Be sure to use a gluten-free yeast as well. Note that the texture will be different.
- Dairy-Free Option: Ensure you’re using a non-dairy milk alternative like almond, soy, or oat milk.
FAQs (Frequently Asked Questions)
Q: Can I use instant yeast instead of active dry yeast?
A: Yes, you can substitute instant yeast for active dry yeast. You do not need to proof instant yeast before adding it to the other ingredients.
Q: What if my dough doesn’t rise?
A: Several factors can affect dough rising, including expired yeast, water that is too hot or cold, or a cold kitchen. Ensure your yeast is fresh, your water is the correct temperature, and your kitchen is warm enough.
Q: Can I freeze the bread dough instead of baking it immediately?
A: Yes, you can freeze the dough after shaping it into a loaf. Wrap it tightly in plastic wrap and then in foil. Thaw it in the refrigerator overnight before allowing it to rise and baking as directed.
Q: Why is my bread dense and heavy?
A: Dense bread can be caused by not using enough yeast, not kneading the dough properly, or using too much whole wheat flour. Make sure your yeast is active, knead the dough thoroughly, and adjust the flour ratio if needed.
Q: How do I prevent the bread from sticking to the loaf pan?
A: Grease the loaf pan thoroughly with butter, oil, or cooking spray. You can also dust the greased pan with flour for extra insurance.
Final Thoughts
Baking bread is more than just following a recipe; it’s an act of creation, a connection to tradition, and a gift of nourishment. This whole wheat bread recipe is a starting point, a foundation upon which you can build your own baking journey. Don’t be afraid to experiment, to tweak, and to make it your own. And most importantly, enjoy the process – the kneading, the rising, the aroma filling your kitchen, and the satisfaction of sharing a homemade loaf with those you love. I encourage you to give this recipe a try, and I’d love to hear about your experiences and any variations you create. Share your feedback, your triumphs, and your questions. Happy baking!