
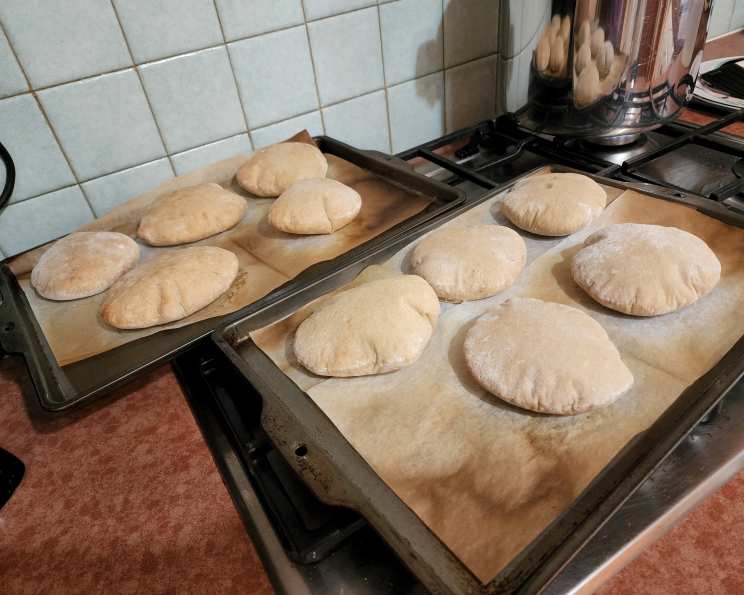
Healthy Whole Wheat Pita Bread (No Oil or Sugar)
The scent of freshly baked bread has always been a siren song to me, drawing me back to my grandmother’s sun-drenched kitchen. I remember standing on a stool, mesmerized as she effortlessly transformed simple ingredients into loaves that filled our home with warmth and comfort. While her recipes were often rich and indulgent, I’ve always been driven to recreate that same feeling with healthier alternatives, leading me to this wonderfully simple whole wheat pita bread. The best part? It’s made with just a few pantry staples, absolutely no oil or sugar, and still delivers that unmistakable taste of homemade goodness.
Recipe Overview
- Prep Time: 15 minutes
- Cook Time: 5 minutes
- Rise Time: 30 minutes
- Total Time: 50 minutes
- Servings: 10
- Dietary Type: Vegan
Ingredients
- 4 cups whole wheat flour (or 2 cups whole wheat flour and 2 cups all-purpose flour)
- 1 tablespoon dry yeast
- 1 1/4 cups warm water (120-130°F degrees)
- 1/2 teaspoon salt (optional)
Equipment Needed
- Large mixing bowl or stand mixer
- Measuring cups and spoons
- Baking sheet (non-stick recommended)
- Clean kitchen towel
- Rolling pin
Instructions
- Begin by preheating your oven to a scorching 500°F. This high heat is crucial for creating that characteristic pita puff.
- In a large mixing bowl (or the bowl of your stand mixer), sift together 2 cups of the flour (whether it’s all whole wheat, or a mix of whole wheat and all-purpose) and the dry yeast. Sifting ensures there are no lumps and the yeast is evenly distributed.
- Add the warm water (it should feel comfortably warm to the touch, not scalding) and the salt (if using) to the bowl. Mix everything together well until a shaggy dough forms.
- Gradually add in the remaining flour, mixing continuously, until the dough begins to pull away from the sides of the bowl. Here’s a critical tip: you might not need all 4 cups of flour. Stop adding flour once the dough cleans the sides of the bowl. This prevents the pitas from becoming too dense.
- Now it’s time to knead the dough. If using a stand mixer, knead with the dough hook for about 4-5 minutes until the dough is smooth and elastic. If kneading by hand, turn the dough out onto a lightly floured surface and knead for about 8-10 minutes until it reaches the same smooth and elastic consistency. Be careful not to over-knead the dough, which can result in tough pitas. At this stage, if you desire, you can knead in some of your favorite dried herbs or spices for added flavor.
- Once the dough is kneaded, form it into 10 equal-sized balls.
- Lightly flour a clean work surface. Using a rolling pin, roll each ball into a 5-6 inch circle, about 1/4 inch thick. Be sure to sprinkle a little flour on both sides of the dough to prevent sticking to the counter or the rolling pin.
- Place the rolled-out circles onto a non-stick baking sheet. Cover them with a clean kitchen towel and allow them to rise for 30 minutes. They won’t rise dramatically, but they should puff up slightly. Remember, this is a flatbread, not a fluffy loaf.
- Just before you place the baking sheet in the oven, carefully flip each pita over on its other side. This is a crucial step that helps them puff up in the oven.
- Bake the pitas on the bottom rack of the preheated oven for 5 minutes. The intense heat will cause them to puff up quickly. Keep a close eye on them to prevent burning.
- When the pitas come out of the oven, they will feel firm and slightly hard. This is normal! They will soften as they cool.
- To keep them soft, store the warm pitas in plastic baggies or an airtight container while they are still warm. This traps the moisture and helps them stay pliable.
- To serve, cut the pitas in half crosswise and stuff them with your favorite fillings.
Expert Tips & Tricks
- Warm water is key: Make sure the water is between 120-130°F for optimal yeast activation. Too cold, and the yeast won’t activate; too hot, and you’ll kill the yeast.
- Don’t over-flour: Add flour gradually and stop when the dough cleans the sides of the bowl. Over-flouring will result in dense, dry pitas.
- The flip is fundamental: Flipping the pitas just before baking is essential for creating that signature pocket.
- Bottom rack baking: Baking on the bottom rack exposes the pitas to the highest heat, encouraging puffing.
- Reheating: If your pitas become slightly stale, simply reheat them in a 350°F oven or microwave for a few seconds to restore their softness.
Serving & Storage Suggestions
These whole wheat pitas are incredibly versatile. Serve them warm, straight from the oven, filled with your favorite ingredients. They are perfect for:
- Mediterranean feasts: Stuff with hummus, falafel, chopped vegetables, and a drizzle of tahini.
- Taco Tuesdays: Use them instead of tortillas for a healthier taco night.
- Lunchbox heroes: Pack them with deli meats, cheeses, and crisp lettuce for a satisfying and nutritious lunch.
- Soup companions: Serve them alongside hearty soups and stews for dipping.
Store leftover pitas in an airtight container at room temperature for up to 2 days, in the refrigerator for up to 5 days, or in the freezer for up to 2 months. To freeze, wrap the pitas individually in plastic wrap and then place them in a freezer-safe bag. Reheat frozen pitas in a preheated oven or toaster until warmed through.
Nutritional Information
| Nutrient | Amount per Serving | % Daily Value |
|---|---|---|
| Calories | 167 kcal | N/A |
| Fat | 1.3 g | 1% |
| Saturated Fat | 0.2 g | 1% |
| Cholesterol | 0 mg | 0% |
| Sodium | 2.5 mg | 0% |
| Carbohydrates | 35 g | 11% |
| Fiber | 5.5 g | 21% |
| Sugars | 0.2 g | 0% |
| Protein | 6.8 g | 13% |
Note: Nutritional information is an estimate and may vary based on specific ingredients and portion sizes.
Variations & Substitutions
- Gluten-free: Substitute the whole wheat flour with a gluten-free all-purpose blend. You may need to adjust the amount of water to achieve the right dough consistency.
- Herbed Pitas: Experiment with different herbs and spices. Add dried oregano, rosemary, garlic powder, or onion powder to the dough for a flavorful twist.
- Spiced Pitas: For a warm and aromatic pita, add a pinch of cinnamon, cardamom, or nutmeg to the dough.
- Seeded Pitas: Before baking, sprinkle the pitas with sesame seeds, poppy seeds, or everything bagel seasoning for added flavor and texture.
- Olive Oil Option: While the recipe is designed to be oil-free, you can add a tablespoon of olive oil to the dough for a richer flavor and softer texture.
FAQs (Frequently Asked Questions)
Q: Why didn’t my pitas puff up?
A: Several factors can prevent pitas from puffing up. Ensure your oven is preheated to the correct temperature (500°F), you flipped the pitas before baking, and you didn’t over-flour the dough. Also, make sure your yeast is fresh and active.
Q: Can I make the dough ahead of time?
A: Yes, you can prepare the dough in advance. After kneading, place it in a lightly oiled bowl, cover it, and refrigerate it for up to 24 hours. Bring the dough to room temperature before rolling it out and baking.
Q: My pitas are too hard after baking. What did I do wrong?
A: Over-baking or using too much flour can result in hard pitas. Reduce the baking time slightly or add a bit more water to the dough. Storing the pitas in an airtight container while they’re still warm will also help them soften.
Q: Can I use all-purpose flour instead of whole wheat flour?
A: Yes, you can use all-purpose flour, but the pitas will have a different texture and nutritional profile. Whole wheat flour provides more fiber and a slightly nutty flavor.
Q: How do I reheat frozen pitas?
A: You can reheat frozen pitas in a preheated oven at 350°F for a few minutes, in a toaster, or in the microwave for a few seconds.
Final Thoughts
These simple, healthy whole wheat pitas are a testament to the fact that wholesome food can be incredibly delicious. I encourage you to give this recipe a try and experience the joy of making your own bread. Feel free to experiment with different herbs and fillings to create your own signature pita. Share your creations and feedback – I’d love to hear about your culinary adventures! Serve them alongside a vibrant Greek salad for a complete and satisfying meal.