
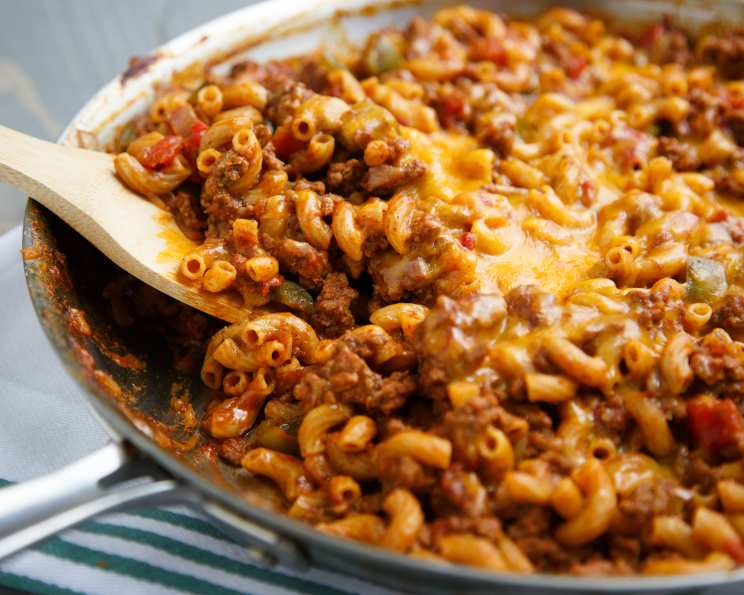
Hearty Chili Roni: Comfort Food Reimagined
The first time I had something resembling this dish, I was huddled around a campfire on a chilly autumn evening in the Smoky Mountains. My Aunt Carol, a culinary wizard with a penchant for one-pot wonders, whipped up a version using venison, canned tomatoes, and whatever pasta shapes she could scavenge from her pantry. The smoky aroma, the warmth spreading from my belly, and the shared laughter – that memory is forever intertwined with the simple magic of a hearty, comforting bowl of pasta and chili. This Hearty Chili Roni recipe is my homage to that moment, elevated with fresh ingredients and a perfectly balanced flavor profile.
Recipe Overview
- Prep Time: 10 minutes
- Cook Time: 20 minutes
- Total Time: 30 minutes
- Servings: 6
- Yield: 6 servings
- Dietary Type: Not specified
Ingredients
- 1 lb ground beef
- ½ cup chopped green bell pepper
- ½ cup chopped onion
- 1 (1 1/4 ounce) package chili seasoning mix, original
- 1 (14 1/2 ounce) can diced tomatoes, undrained
- 1 (14 ounce) can reduced-sodium beef broth
- 2 tablespoons tomato paste
- 1 1/2 cups uncooked elbow macaroni
- 1 cup shredded cheddar cheese
Equipment Needed
- Large skillet
- Measuring cups and spoons
- Lid for skillet
Instructions
-
In a large skillet, cook the ground beef, chopped green bell pepper, and chopped onion over medium-high heat. Stir frequently, breaking up the beef as it cooks, for about 4 to 5 minutes, or until the beef is browned. Be sure to drain any excess fat from the skillet after browning.
-
Add the chili seasoning mix to the skillet and stir until everything is well mixed and coated. This step is crucial for infusing the beef and vegetables with that classic chili flavor.
-
Stir in the diced tomatoes (undrained), reduced-sodium beef broth, and tomato paste. Ensure everything is well combined. The tomato paste will add a depth of richness to the chili.
-
Bring the mixture to a boil over medium-high heat. Once boiling, stir in the uncooked elbow macaroni.
-
Reduce the heat to medium, cover the skillet, and cook for 10 minutes, or until the pasta is tender. Check the pasta occasionally and stir to prevent sticking. The cooking time may vary slightly depending on your stove and the type of macaroni used. You want the macaroni to be cooked through, but still slightly firm to the bite (al dente).
-
Remove the skillet from the heat. Sprinkle the shredded cheddar cheese evenly over the top of the chili and macaroni mixture.
-
Cover the skillet again and let it stand for 5 minutes, or until the cheese is melted and gooey. The residual heat will melt the cheese perfectly.
Expert Tips & Tricks
- Spice it up: If you like a little extra kick, add a pinch of cayenne pepper or a dash of hot sauce to the chili mixture while it’s simmering. You can also use a spicier chili seasoning mix.
- Meat variations: While this recipe calls for ground beef, you can easily substitute ground turkey or ground chicken for a leaner option. For a vegetarian version, omit the meat and add a can of drained and rinsed kidney beans or black beans.
- Vegetable boost: Feel free to add other vegetables to the chili, such as diced carrots, celery, or corn. Add them along with the bell pepper and onion for best results.
- Cheese perfection: For an extra cheesy experience, try using a blend of cheddar and Monterey Jack cheese.
- Thickening: If your chili roni is too watery, remove the lid during the last few minutes of cooking to allow some of the liquid to evaporate. You can also mix a tablespoon of cornstarch with a tablespoon of cold water and stir it into the chili to thicken it.
Serving & Storage Suggestions
Serve Hearty Chili Roni hot, straight from the skillet. For a complete meal, pair it with a side of cornbread or a simple green salad. Garnish with a dollop of sour cream or a sprinkle of chopped green onions for added flavor and visual appeal.
Leftovers can be stored in an airtight container in the refrigerator for up to 3 days. To reheat, simply microwave until heated through, or warm it up in a skillet over medium heat. Add a splash of beef broth or water if the chili roni seems too dry.
Freezing is also an option. Allow the chili roni to cool completely before transferring it to a freezer-safe container. It can be frozen for up to 2 months. Thaw overnight in the refrigerator before reheating.
Nutritional Information
| Nutrient | Amount per Serving | % Daily Value |
|---|---|---|
| Calories | 360.4 kcal | N/A |
| Calories from Fat | 163 g | 45% |
| Total Fat | 18.2 g | 27% |
| Saturated Fat | 8.5 g | 42% |
| Cholesterol | 71.2 mg | 23% |
| Sodium | 215 mg | 8% |
| Total Carbohydrate | 25.3 g | 8% |
| Dietary Fiber | 2.3 g | 9% |
| Sugars | 4.1 g | 16% |
| Protein | 23.2 g | 46% |
Note: Nutritional information is an estimate and may vary based on specific ingredients and preparation methods.
Variations & Substitutions
- Spicy Chorizo Roni: Swap the ground beef for spicy chorizo for a richer, more flavorful dish.
- Vegetarian Delight: Omit the meat and use vegetable broth instead of beef broth. Add a can of drained and rinsed black beans and kidney beans for protein and fiber.
- Creamy Tomato Roni: Stir in a dollop of sour cream or Greek yogurt just before serving for a creamy, tangy twist.
- Pasta Alternatives: While elbow macaroni is classic, feel free to experiment with other small pasta shapes like shells, ditalini, or even orzo.
- Cheese Variations: Try Pepper Jack cheese for some heat, or a smoked Gouda for a richer, smoky flavor.
FAQs (Frequently Asked Questions)
Q: Can I make this recipe ahead of time?
A: Yes, you can prepare the chili roni ahead of time and store it in the refrigerator for up to 2 days. Reheat thoroughly before serving.
Q: Can I use canned chili instead of making it from scratch?
A: While this recipe is designed to be made from scratch, you could substitute canned chili in a pinch. However, the flavor and texture may not be quite the same.
Q: How do I prevent the pasta from sticking to the bottom of the skillet?
A: Stir the pasta frequently while it’s cooking, and make sure there is enough liquid in the skillet to prevent it from drying out.
Q: Can I add other toppings to this dish?
A: Absolutely! Feel free to add your favorite chili toppings, such as sour cream, chopped onions, avocado, or a sprinkle of hot sauce.
Q: Is this recipe suitable for freezing?
A: Yes, Hearty Chili Roni freezes well. Allow it to cool completely before transferring it to a freezer-safe container. It can be frozen for up to 2 months. Thaw overnight in the refrigerator before reheating.
Final Thoughts
Hearty Chili Roni is more than just a recipe; it’s a celebration of simple ingredients transformed into a comforting and satisfying meal. Whether you’re looking for a quick weeknight dinner or a crowd-pleasing dish for a casual gathering, this recipe is sure to be a hit. Don’t be afraid to experiment with different variations and make it your own. And most importantly, enjoy the process of cooking and sharing this delicious dish with the ones you love. I encourage you to try this recipe and share your feedback – I’d love to hear about your own culinary adventures and variations! Pair this dish with a crisp green salad and a glass of your favorite beverage for a complete and unforgettable meal.