
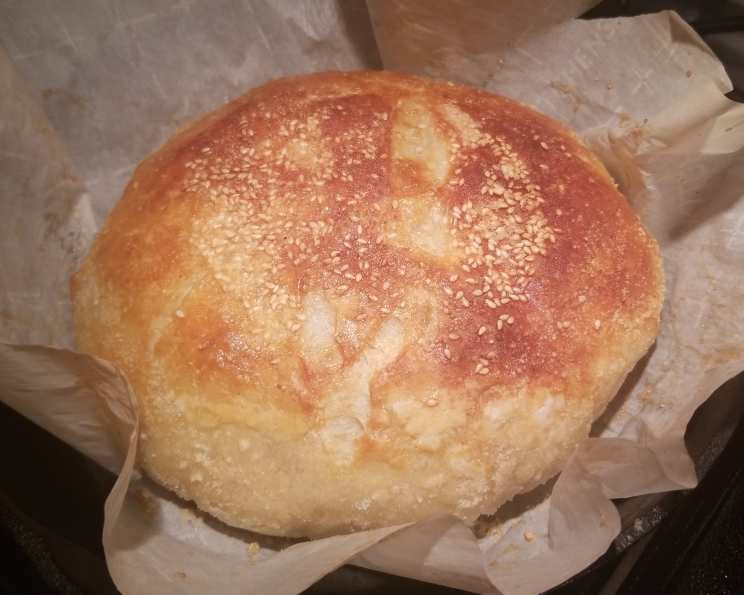
Heather’s High Altitude Sourdough Bread
The aroma of freshly baked sourdough has always transported me back to my grandmother’s kitchen nestled high in the Rockies. She wasn’t a fancy baker, but her sourdough was legendary, a staple at every family gathering. I remember watching, mesmerized, as she nurtured her starter, a bubbling, fragrant concoction that seemed to have a life of its own. This recipe, adapted from her teachings and tweaked for my own high-altitude kitchen, embodies that same spirit of simple ingredients transformed into something truly special. It’s more than just bread; it’s a taste of home.
Recipe Overview
- Prep Time: 168 hours 30 minutes (includes starter preparation)
- Cook Time: 30-45 minutes
- Total Time: 7 days, 45 minutes
- Servings: 8
- Yield: 1 loaf
- Dietary Type: Vegetarian
Ingredients
- 2 cups sourdough starter (see instructions for preparation)
- 3 cups unbleached flour, plus extra for kneading
- 2 tablespoons melted butter or 2 tablespoons oil
- 4 teaspoons sugar
- 1 1/2 teaspoons salt
- 1 tablespoon dry active yeast
Equipment Needed
- Glass or plastic bowls
- Towel
- Mason jar
- Baking sheet
- Wooden spoon
Instructions
-
Creating the Sourdough Sponge/Starter: In a glass or plastic bowl, combine 2 cups flour, 2 cups warm water, and ½ cup sugar. Mix well. Cover the bowl with a towel and let it sit in a warm place for approximately one week. You’ll know it’s ready when a beery smell starts to develop. This is your sourdough starter! If any brownish liquid (hooch) forms on top, simply mix it back into the starter.
-
Proofing the Sponge: Before baking, you need to “proof” the sponge. Take your starter and add 1 cup flour and 1 cup warm water to it. Place the mixture in a clean glass or plastic bowl, cover with a towel, and leave in a very warm spot for about an hour. The sponge is ready when a frothy surface and beery smell develop. Remember, the longer your sponge sits out, the more sour the bread will taste.
-
Maintaining the Starter: From this point, you’ll use 2 cups of the sponge in your bread recipe. Save the remaining 1 cup in a mason jar in the refrigerator. To the mason jar sponge, add 1 cup flour and 1 cup warm water. Mix thoroughly and loosely cap the jar to allow it to breathe a little. To keep your starter alive, feed it ½ cup flour and ½ cup warm water weekly, or bake bread at least once a week. This is a living yeast culture, so treat it like a pet!
-
Activating the Yeast: In a separate bowl, place your dry active yeast in ¾ cup warm water. Let it sit for a few minutes to moisten, then stir to dissolve.
-
Combining Ingredients: Add the sugar, salt, yeast water, and melted butter (or oil) to the proofed sponge. Mix everything together thoroughly.
-
Kneading the Dough: Gradually knead in the unbleached flour, a little at a time, until you achieve a good, flexible dough consistency. Be mindful of your environment; in drier climates, you might not need all the flour, while in humid climates, you may need to add slightly more.
-
First Rise: Lightly grease the surface of the dough to prevent it from drying out. Place the dough in a warm place, loosely covered with a towel, and let it rise for about an hour, or until it has doubled in size. This is a crucial step for developing the airy texture of the bread.
-
Shaping the Loaf: Punch down the risen dough and knead it a few more times. Shape the dough into a loaf. Place it on a lightly greased baking sheet and grease the dough again to prevent it from drying out during the second rise. You can optionally slit the top of the loaf at this stage for a decorative touch and to control the expansion of the crust.
-
Second Rise: Cover the shaped loaf with a towel and place it back in your warm spot. Let it rise again until it has doubled in size. This second rise is essential for achieving a light and airy crumb.
-
Optional Egg Wash: For a dark, slick crust, you can lightly coat the dough with beaten egg whites before baking. This is optional, but it adds a beautiful sheen to the finished loaf.
-
Baking: Place the loaf in a COLD oven; then turn the oven to 350 degrees F. Do not preheat! This slow, even heating process is key to a perfectly baked sourdough loaf. Bake for anywhere from 30-45 minutes. The loaf is done when a light brown crust forms and it makes a hollow noise when tapped with a wooden spoon. Start checking for doneness around the 30-minute mark.
-
Cooling: Remove the baked loaf from the oven and let it cool completely on a wire rack before slicing. This allows the internal structure to set, preventing a gummy texture.
Expert Tips & Tricks
- Starter Activity: A strong, active starter is the key to a successful sourdough loaf. If your starter isn’t bubbling vigorously after feeding, it may need more time or a warmer environment.
- Humidity Adjustment: As the recipe notes, adjust the amount of flour based on your local humidity. The dough should be slightly sticky but not overly wet.
- Oven Temperature: Ovens can vary, so keep an eye on the bread during baking. If the crust is browning too quickly, tent it loosely with foil.
- Scoring: Scoring the bread allows steam to escape during baking, which prevents the loaf from cracking unevenly. Use a sharp knife or lame for clean cuts.
- Steam: For a crispier crust, create steam in your oven during the first 15 minutes of baking. You can do this by placing a pan of hot water on the bottom rack of your oven.
- High Altitude Adjustments: At high altitudes, dough tends to rise faster. Keep a close eye on your dough during both rises and shorten the rising times if necessary. You may also need to reduce the amount of yeast slightly.
Serving & Storage Suggestions
Serve Heather’s High Altitude Sourdough Bread warm or at room temperature. It’s delicious on its own, with butter, or as a base for sandwiches, toast, or bruschetta. Leftover bread can be stored at room temperature in a bread box or airtight container for up to 3 days. For longer storage, wrap the loaf tightly in plastic wrap and freeze for up to 2 months. To reheat, thaw completely and warm in a 350°F oven for about 10 minutes.
Nutritional Information
| Nutrient | Amount per Serving | % Daily Value |
|---|---|---|
| Calories | 208.6 kcal | N/A |
| Calories from Fat | 30 g | 15% |
| Total Fat | 3.4 g | 5% |
| Saturated Fat | 1.9 g | 9% |
| Cholesterol | 7.6 mg | 2% |
| Sodium | 458.2 mg | 19% |
| Total Carbohydrate | 38.5 g | 12% |
| Dietary Fiber | 1.6 g | 6% |
| Sugars | 2.2 g | 8% |
| Protein | 5.5 g | 10% |
Note: Nutritional information is an estimate and may vary based on specific ingredients and preparation methods.
Variations & Substitutions
- Whole Wheat Sourdough: Substitute up to half of the unbleached flour with whole wheat flour for a nuttier flavor and denser texture.
- Seeded Sourdough: Add seeds like sesame, poppy, or sunflower seeds to the dough before the second rise for added flavor and texture.
- Herb Sourdough: Incorporate fresh herbs like rosemary, thyme, or oregano into the dough for a savory twist.
- Garlic Sourdough: Add roasted garlic cloves to the dough for a rich, aromatic flavor.
- Gluten-Free Sourdough: While it requires a different recipe altogether, gluten-free sourdough is achievable using a blend of gluten-free flours like rice flour, tapioca starch, and potato starch, along with a gluten-free starter.
FAQs (Frequently Asked Questions)
Q: How do I know when my sourdough starter is ready to use?
A: A mature and active sourdough starter will double in size within a few hours after feeding, have a bubbly texture, and a slightly sour, beery aroma.
Q: Can I use bread flour instead of unbleached flour?
A: Yes, bread flour can be substituted for unbleached flour. Bread flour has a higher protein content, which can result in a slightly chewier texture.
Q: Why is my sourdough bread so dense?
A: A dense sourdough bread can be caused by several factors, including an inactive starter, not enough rising time, or too much flour in the dough.
Q: Can I freeze my sourdough starter?
A: Yes, you can freeze your sourdough starter for longer-term storage. Thaw it in the refrigerator overnight and feed it once or twice to reactivate it before using.
Q: What does it mean to score the loaf?
A: Scoring the loaf means making shallow cuts on the surface of the dough before baking. This allows steam to escape during baking, which helps to control the expansion of the loaf and prevent it from cracking unevenly.
Final Thoughts
Baking Heather’s High Altitude Sourdough Bread is a journey, a testament to the magic of time and simple ingredients. Don’t be discouraged if your first loaf isn’t perfect; sourdough baking is a learning process. Embrace the process, experiment with different variations, and most importantly, enjoy the delicious aroma and taste of homemade sourdough bread. I hope this recipe inspires you to create your own family tradition, one loaf at a time. Share your baking adventures and creations! I’d love to hear how this recipe works in your kitchen.