
Heavenly Caramels: A Taste of Sweet Nostalgia
I remember being a little girl, perched on a stool in my grandmother’s kitchen, the air thick with the scent of simmering sugar and butter. She’d be at the stove, her brow furrowed in concentration as she stirred a bubbling pot of caramel. The anticipation was almost unbearable, knowing that soon, those golden squares of melt-in-your-mouth goodness would be ours to savor. Those were the best caramels I’ve ever tasted, and now, I’m excited to share this recipe with you to create sweet memories of your own.
Recipe Overview
- Prep Time: 15 minutes
- Cook Time: 40-50 minutes
- Total Time: 1 hour
- Servings: 60
- Yield: Approximately 60 caramels
- Dietary Type: Not specified (contains dairy)
Ingredients
- 2 cups brown sugar, packed
- 1 cup white granulated sugar
- 1 cup corn syrup
- 1 cup evaporated milk
- 1 pint heavy whipping cream
- 1 cup (2 sticks) butter
- 1 ½ teaspoons vanilla extract
Equipment Needed
- 9 x 13 inch pan
- Large heavy-bottomed pot
- Candy thermometer
- Plastic knife
- Wax paper
Instructions
-
Prepare your pan. Lightly grease a 9 x 13 inch pan. Alternatively, line the pan with parchment paper for easy removal, ensuring the paper is also very lightly greased. Wipe off any excess grease with a napkin, leaving only a barely-there coating.
-
Combine the ingredients in a large pot. In a large heavy-bottomed pot (remember, the mixture will triple in size!), combine the brown sugar, white sugar, corn syrup, evaporated milk, heavy whipping cream, and butter.
-
Monitor the cooking process. Attach your candy thermometer to the side of the pot, ensuring it doesn’t touch the bottom. Begin heating the mixture over medium heat, stirring constantly with a heat-resistant spatula or wooden spoon.
-
Reach the magic temperature. Continue stirring the mixture constantly as it comes to a boil and the temperature rises. Your goal is to reach between 242-250°F (116-121°C).
- For softer, stringier caramels, aim for the lower end of the temperature range (242°F).
- For chewier, but still beautifully soft, caramels, aim for the higher end (250°F).
-
Adjust heat and stir constantly. This process typically takes around 40-50 minutes. Maintain medium heat initially to prevent burning. As the mixture approaches 220°F (104°C), you may need to slightly increase the heat to reach the desired temperature. However, at this point, it is absolutely crucial to stand and stir constantly to prevent scorching.
-
Remove from the heat. Once the mixture reaches the desired temperature, immediately remove the pot from the heat.
-
Stir in the vanilla. Carefully stir in the vanilla extract. The mixture will bubble slightly.
-
Pour into the prepared pan. Pour the hot caramel mixture into the prepared 9×13 inch pan, spreading it evenly.
-
Cool completely. Let the caramel cool completely at room temperature. This could take several hours, or even overnight. Do not attempt to cut them while they are still warm.
-
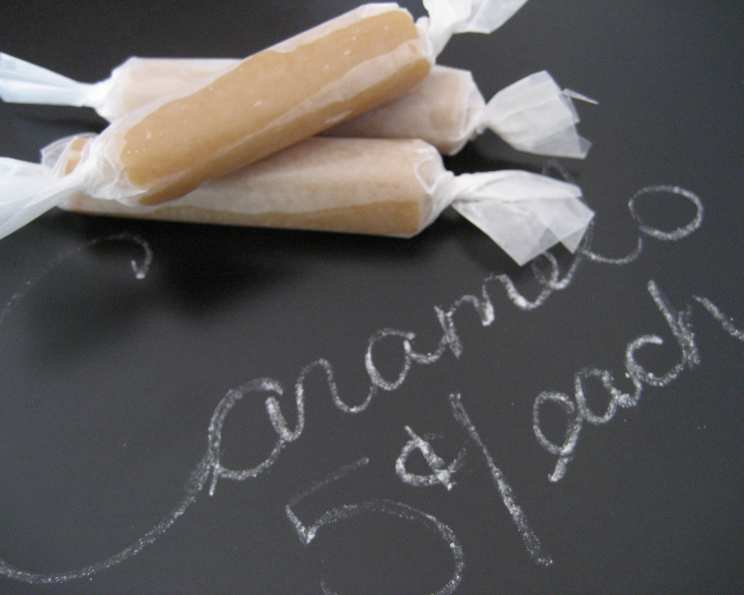
Cut and wrap. Once the caramel is firm and completely cooled, cut it into small squares using a plastic knife. The plastic knife is crucial; it will glide through the caramel much more easily than a metal knife. Wrap each square individually in wax paper for storage.
Expert Tips & Tricks
- The Right Pot: Using a heavy-bottomed pot is essential to prevent scorching.
- Candy Thermometer Placement: Make sure the bulb of your candy thermometer is fully immersed in the caramel mixture but not touching the bottom of the pot for accurate readings.
- Constant Stirring: I cannot stress enough the importance of constant stirring, especially as the caramel nears the desired temperature. This prevents burning and ensures even cooking.
- Soft vs. Chewy: The temperature is the key to texture. A few degrees can make a significant difference between soft and chewy caramels.
- Plastic Knife Trick: The plastic knife truly is a game-changer. It prevents the caramel from sticking and makes cutting a breeze.
- Troubleshooting Burnt Caramels: If you accidentally burn the caramel, do not scrape the burnt bits from the bottom of the pot into the rest of the mixture. Discard the entire batch and start over. Burnt caramel is acrid and will ruin the flavor.
- For easy release: Spray your measuring cup with cooking spray or a light coating of oil before measuring the corn syrup. This will help it slide out easily and prevent sticking.
Serving & Storage Suggestions
These heavenly caramels are perfect for sharing, gifting, or simply enjoying as a sweet treat. They make wonderful Christmas gifts, party favors, or additions to dessert platters.
Store the wrapped caramels at room temperature in an airtight container. They will stay fresh for up to 2 weeks. For longer storage, you can freeze them for up to 2 months. Thaw them at room temperature before serving.
Nutritional Information
(Note: Nutritional information is an estimate and may vary depending on specific ingredients and portion sizes.)
| Nutrient | Amount per Serving | % Daily Value |
|---|---|---|
| Calories | 115.5 kcal | N/A |
| Total Fat | 6.3 g | 9% |
| Saturated Fat | 4 g | 19% |
| Cholesterol | 20.2 mg | 6% |
| Sodium | 32.2 mg | 1% |
| Total Carbohydrate | 15.1 g | 5% |
| Dietary Fiber | 0 g | 0% |
| Sugars | 11.8 g | 47% |
| Protein | 0.5 g | 0% |
Variations & Substitutions
- Salted Caramels: Add a sprinkle of flaky sea salt to the top of the caramel after pouring it into the pan for a delightful salty-sweet contrast.
- Chocolate Caramels: Drizzle melted chocolate over the cooled caramel before cutting it into squares.
- Nut Caramels: Add chopped nuts (such as pecans, walnuts, or almonds) to the caramel mixture after removing it from the heat.
- Spice Infusion: Infuse the heavy cream with spices like cinnamon, cardamom, or cloves for a warm, aromatic flavor. Simply heat the cream with the spices before adding it to the pot. Remember to strain out the solids before adding the cream.
FAQs (Frequently Asked Questions)
Q: Can I use a different type of sugar?
A: While you can experiment, using brown and white sugar in the specified ratios provides the best flavor and texture for these caramels.
Q: What if I don’t have evaporated milk?
A: You can try using a combination of regular milk and heavy cream to approximate the richness of evaporated milk, but the results may vary slightly.
Q: Why is it important to grease the parchment paper if I am using it?
A: The very light greasing helps the caramel release from the parchment, preventing it from sticking during the cutting process.
Q: My caramels are too hard. What did I do wrong?
A: You likely cooked the caramel to a higher temperature than recommended. Make sure to monitor your candy thermometer closely in your next attempt.
Q: Can I make these caramels without a candy thermometer?
A: While it’s possible, it’s highly recommended to use a candy thermometer for accuracy. Visual cues can be unreliable. The thermometer is essential for best results.
Final Thoughts
These Heavenly Caramels are more than just a sweet treat; they’re a labor of love, a taste of nostalgia, and a way to create cherished memories. Don’t be intimidated by the stirring! With a little patience and attention to detail, you’ll be rewarded with the most decadent, melt-in-your-mouth caramels you’ve ever tasted. I encourage you to try this recipe, experiment with the variations, and share your delicious creations with friends and family. And if you’re feeling particularly adventurous, pair these caramels with a steaming cup of coffee or a rich glass of port wine for an extra touch of indulgence. Enjoy!