
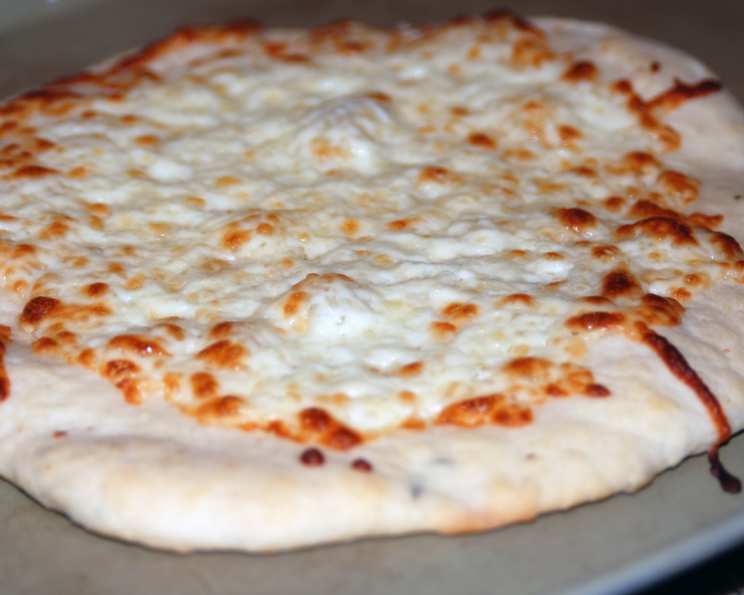
Herb Pizza Dough: A Taste of Italy in Your Own Kitchen
I remember the first time I truly understood the power of fresh herbs. I was a young apprentice, struggling to find my voice in a bustling Italian kitchen. The head chef, a woman whose hands seemed to hold the secrets of generations, simply told me to “smell the oregano.” That single, fragrant sprig, crushed between my fingers, transported me to sun-drenched hillsides and the heart of simple, perfect cuisine. It was then I realized that herbs weren’t just garnish; they were the soul of so many dishes, especially pizza. And this herb pizza dough? It’s my way of sharing that little bit of soul with you.
Recipe Overview
- Prep Time: 30 minutes
- Cook Time: 10-15 minutes
- Total Time: 2 hours 30 minutes (including rise time)
- Servings: 6
- Yield: 1 pizza dough
- Dietary Type: Vegetarian
Ingredients
- 1 tablespoon active dry yeast
- ¾ cup lukewarm water (105 degrees F)
- 2 ¾ cups all-purpose flour, plus ½ cup for working
- 1 teaspoon salt
- 2 tablespoons mixed fresh herbs, minced (or 1 tablespoon dried herbs) – Suggested herbs: oregano, basil, marjoram, chives, thyme, rosemary, sage, mint, fennel seeds
- 1 tablespoon extra virgin olive oil
Equipment Needed
- Small bowl
- Large bowl
- Measuring cups and spoons
- Fork
- Plastic wrap
- Work surface
- Baker’s peel or baking sheet
- Oven
Instructions
-
In a small bowl, dissolve the active dry yeast in the lukewarm water. Let it stand until slightly foamy on top, about 10 minutes. This step is crucial for activating the yeast, ensuring a light and airy crust. If the yeast doesn’t foam, it might be old, and you’ll need to start with fresh yeast.
-
In a large bowl, stir together the 2 ¾ cups of all-purpose flour, salt, and minced herbs. Feel free to experiment with different herb combinations. A mix of rosemary and thyme is wonderful for savory pizzas, while basil and oregano lend themselves to classic Italian flavors.
-
Form the flour mixture into a mound with a well in the center. Pour the yeast mixture into the well.
-
Using a fork, stir the dough in a circular motion, gradually pulling the flour into the yeast mixture until a dough forms. This is the beginning of building the gluten structure, which will give the pizza its chewiness.
-
Place the dough on a lightly floured work surface, using some of the ½ cup of flour reserved for working. This prevents the dough from sticking and makes it easier to handle.
-
Using the heel of your hand, knead the dough until it’s smooth and elastic, about 10 minutes. This is perhaps the most important step. Kneading develops the gluten, creating a strong and flexible dough. If the dough is too sticky, add a little more flour, a tablespoon at a time. If it’s too dry, add a teaspoon of water. You’ll know it’s ready when it springs back slightly when poked.
-
Form the dough into a ball.
-
Brush a large bowl with the olive oil and place the dough in it. The oil prevents the dough from sticking to the bowl as it rises.
-
Cover the bowl with plastic wrap and let it rise at room temperature until doubled in size, about 1 to 2 hours. The rising time depends on the temperature of your kitchen. A warmer environment will speed up the process.
-
Place dough on a work surface lightly dusted with the remaining flour.
-
Punch the dough down. This releases the air bubbles that have formed during rising, resulting in a more even texture.
-
By hand, gently press the dough out into the desired shape.
-
Place one hand in the center of the dough, and with the other hand, pull, lift, and stretch the dough, gradually working your way all around the edge, until it is the desired thickness, about ¼ inch thick for a crusty pizza base and ½ inch thick for a softer one. This technique creates a thin and even crust without the need for a rolling pin.
-
Flip the dough over from time to time as you work with it; alternately, roll the dough out with a rolling pin. The dough should be slightly thinner in the middle than the edge.
-
Lift the edge of the pizza to form a slight rim. This helps to contain the toppings and creates a nice crust.
-
Transfer dough to a baker’s peel or baking sheet, cover, and let rise again until almost doubled, about 20 minutes. This second rise contributes to a lighter and airier crust.
-
Top as desired. Get creative with your toppings! Fresh mozzarella, ripe tomatoes, and a drizzle of olive oil are always a classic choice. Or, try adding roasted vegetables, grilled chicken, or spicy sausage.
-
Bake in a 400-degree F oven for 10 to 15 minutes, until the crust is golden, or according to your pizza recipe’s instructions. Keep a close eye on the pizza as it bakes. The baking time will vary depending on your oven and the thickness of the crust. The crust should be golden brown and the cheese melted and bubbly.
Expert Tips & Tricks
- For an extra crispy crust, preheat a pizza stone in the oven before baking.
- If you don’t have fresh herbs, dried herbs can be used, but reduce the amount by half, as dried herbs are more concentrated in flavor.
- Make the dough ahead of time and store it in the refrigerator for up to 24 hours. Bring it to room temperature before shaping.
- For a richer flavor, substitute some of the water with milk or beer.
- Don’t overload the pizza with toppings, as this can make the crust soggy.
Serving & Storage Suggestions
Serve your herb pizza hot out of the oven, garnished with a few fresh herb sprigs for visual appeal. A simple green salad and a glass of Chianti make a perfect accompaniment. Leftover pizza can be stored in the refrigerator for up to 3 days. Reheat in a preheated oven or toaster oven for the best results. For longer storage, freeze individual slices wrapped tightly in plastic wrap.
Nutritional Information
Please note that this is an estimate and will vary based on specific ingredients and portion sizes.
| Nutrient | Amount per Serving | % Daily Value |
|---|---|---|
| Calories | 280 kcal | 14% |
| Total Fat | 5g | 8% |
| Saturated Fat | 1g | 5% |
| Cholesterol | 0mg | 0% |
| Sodium | 400mg | 17% |
| Total Carbohydrate | 50g | 17% |
| Dietary Fiber | 2g | 8% |
| Sugars | 1g | 2% |
| Protein | 8g | 16% |
Variations & Substitutions
- Gluten-Free: Use a gluten-free all-purpose flour blend. You may need to adjust the amount of liquid.
- Whole Wheat: Substitute up to half of the all-purpose flour with whole wheat flour for a nuttier flavor and added fiber.
- Vegan: Ensure your toppings are vegan-friendly.
- Herb Variations: Experiment with different herb combinations based on your preferences and the toppings you plan to use. Sun-dried tomatoes and rosemary make a delicious addition.
FAQs (Frequently Asked Questions)
Q: Can I use bread flour instead of all-purpose flour?
A: Yes, bread flour will result in a chewier crust. You may need to add a bit more water as bread flour absorbs more liquid.
Q: How do I prevent the pizza dough from sticking to the baking sheet?
A: Make sure to grease the baking sheet well with olive oil or sprinkle it with cornmeal. You can also use parchment paper.
Q: Can I freeze the pizza dough?
A: Yes, you can freeze the dough after the first rise. Wrap it tightly in plastic wrap and store it in the freezer for up to 3 months. Thaw in the refrigerator overnight before using.
Q: My pizza crust is tough. What did I do wrong?
A: Over-kneading the dough or using too much flour can result in a tough crust. Be sure to measure your ingredients accurately and knead the dough until it’s smooth and elastic but not overly stiff.
Q: Can I use a pizza stone if I have one?
A: Absolutely! A pizza stone will give you a crispier crust. Preheat the stone in the oven for at least 30 minutes before baking the pizza.
Final Thoughts
This herb pizza dough is more than just a recipe; it’s an invitation to connect with the simple joys of creating something delicious with your own hands. Don’t be afraid to experiment with different herbs, toppings, and techniques to find your perfect pizza. Gather your friends and family, share a slice, and savor the moment. I can’t wait to hear about your culinary adventures – so please, let me know how it turns out!