
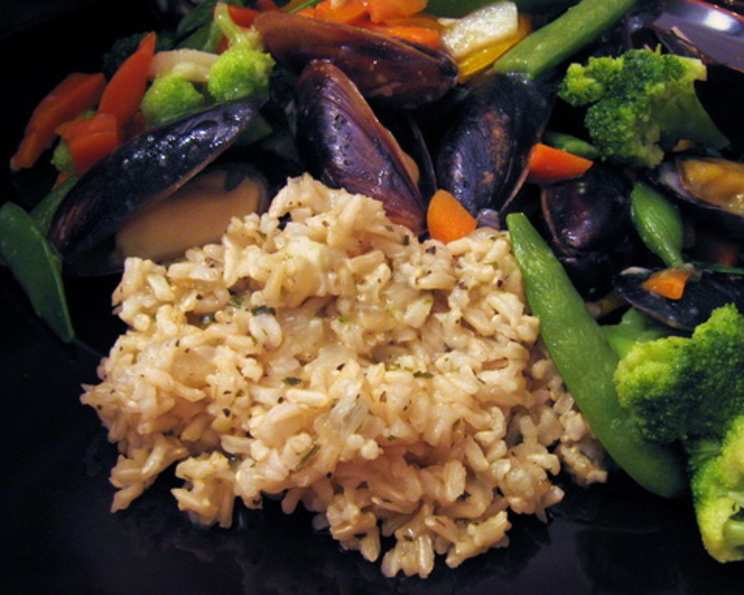
Herbed Brown Rice: A Symphony of Flavor and Simplicity
The aroma still takes me back to my grandmother’s kitchen. It wasn’t the usual sugary sweetness of cookies or pies, but a savory, earthy scent that always meant comfort was on its way. She always made a pot of herbed brown rice on Sundays, a simple dish that somehow managed to steal the show, transforming any humble meal into a feast. The nutty fragrance mingled with the bright notes of basil and parsley, creating a symphony of aromas that wrapped around you like a warm hug. This isn’t just a side dish; it’s a memory, a feeling, a taste of home.
Recipe Overview
- Prep Time: 10 minutes
- Cook Time: 45 minutes
- Total Time: 55 minutes
- Servings: 6
- Yield: 1 Rice Batch
- Dietary Type: Gluten-Free
Ingredients
- 1 tablespoon olive oil
- 1 cup onion, chopped
- 1 (12 ounce) package long grain brown rice
- 2 garlic cloves, minced
- 3 cups chicken broth
- 1 teaspoon dried basil
- 1 teaspoon dried parsley
- 1 teaspoon dried chives
- ¾ teaspoon black pepper
- ½ teaspoon salt
Equipment Needed
- 3-quart ovenproof saucepan with lid
Instructions
-
Preheat your oven to 350 degrees Fahrenheit (175 degrees Celsius). This step is crucial for even cooking of the rice.
-
Heat the olive oil in a 3-quart, ovenproof saucepan over medium heat. Ensure the saucepan has a tight-fitting lid, as this is essential for trapping steam and cooking the rice perfectly.
-
Add the chopped onion to the heated oil. Sauté, stirring frequently, for about 5 minutes, or until the onions are softened and translucent. This process releases the natural sweetness of the onion, creating a flavorful base for the rice. Be careful not to brown the onions.
-
Add the long grain brown rice to the saucepan and cook, stirring constantly, for about 2 minutes. Toasting the rice lightly enhances its nutty flavor and helps prevent it from becoming mushy during baking.
-
Stir in the minced garlic, chicken broth, dried basil, dried parsley, dried chives, black pepper, and salt. Make sure all ingredients are well combined. The broth should completely cover the rice.
-
Cover the saucepan tightly with its lid. Transfer the saucepan to the preheated oven.
-
Bake for 40 minutes, or until the rice is tender and the liquid is absorbed. Do not lift the lid during baking, as this will release steam and affect the cooking time and texture.
-
After 40 minutes, carefully remove the saucepan from the oven. Let it stand, covered, for 5-10 minutes before fluffing the rice gently with a fork. This resting period allows the rice to finish steaming and ensures a perfectly tender texture.
Expert Tips & Tricks
- Broth Matters: Using high-quality chicken broth can significantly enhance the flavor of the rice. Consider using homemade or a low-sodium variety to control the salt content. Beef broth or vegetable broth are also viable options, creating a completely different flavor profile.
- Herbs: Feel free to experiment with different herbs. Dried oregano, thyme, or a pinch of red pepper flakes can add a unique twist. Fresh herbs can be used, but you’ll need to use about three times the amount as dried. Add fresh herbs in the last 10 minutes of cooking to preserve their flavor.
- Don’t Peek: Resist the urge to lift the lid during baking! The steam trapped inside is essential for cooking the rice evenly.
- Pre-soaking: For even softer rice, you can pre-soak the brown rice in cold water for at least 30 minutes before cooking. Drain well before adding to the saucepan.
- Make-Ahead: This herbed brown rice can be made ahead of time. Simply prepare the rice as directed, let it cool completely, and store it in an airtight container in the refrigerator for up to 3 days. Reheat gently in a saucepan with a splash of broth or water, or in the microwave.
Serving & Storage Suggestions
Serve the herbed brown rice as a side dish with grilled chicken, fish, or vegetables. It also makes a fantastic base for grain bowls or a filling for stuffed peppers. Garnish with a sprinkle of fresh herbs, such as parsley or chives, for added visual appeal and flavor.
Leftover herbed brown rice can be stored in an airtight container in the refrigerator for up to 3 days. For longer storage, freeze the rice in individual portions. To reheat, add a tablespoon or two of water or broth to prevent it from drying out. Reheat in the microwave or in a saucepan over low heat. Freezing is not recommended for extended periods as it can affect the texture of the rice. Properly stored leftover rice should be reheated to an internal temperature of 165°F (74°C).
Nutritional Information
| Nutrient | Amount per Serving | % Daily Value |
|---|---|---|
| Calories | 264.3 kcal | N/A |
| Calories from Fat | 41 g | 16% |
| Total Fat | 4.6 g | 7% |
| Saturated Fat | 0.8 g | 4% |
| Cholesterol | 0 mg | 0% |
| Sodium | 580.8 mg | 24% |
| Total Carbohydrate | 47.9 g | 15% |
| Dietary Fiber | 2.5 g | 10% |
| Sugars | 2 g | 7% |
| Protein | 7.3 g | 14% |
Variations & Substitutions
- Vegetarian/Vegan: Substitute vegetable broth for chicken broth to make this recipe vegetarian or vegan.
- Spicy: Add a pinch of red pepper flakes or a dash of hot sauce for a little heat.
- Mushroom Rice: Sauté sliced mushrooms along with the onions for a richer, earthier flavor.
- Lemon Herb: Add the zest of one lemon and a tablespoon of fresh lemon juice along with the herbs for a bright, citrusy flavor.
- Nutty Rice: Add ¼ cup of chopped nuts (such as almonds or walnuts) to the saucepan along with the rice for added texture and flavor.
FAQs (Frequently Asked Questions)
Q: Can I use a different type of rice?
A: While this recipe is specifically for long-grain brown rice, you can experiment with other types of rice, such as short-grain brown rice or basmati rice, but cooking times may vary.
Q: Can I cook this on the stovetop instead of in the oven?
A: Yes, you can cook this on the stovetop. Bring the mixture to a boil, then reduce heat to low, cover, and simmer for 45-50 minutes, or until the rice is tender and the liquid is absorbed.
Q: What if my rice is still hard after 40 minutes?
A: If the rice is still too firm, add another half cup of broth and continue baking for another 10-15 minutes, checking occasionally.
Q: Can I add vegetables to this recipe?
A: Absolutely! You can add chopped vegetables like carrots, celery, or bell peppers along with the onions for added nutrients and flavor.
Q: How do I prevent the rice from sticking to the bottom of the pan?
A: Using a good quality, oven-safe saucepan and ensuring there is enough liquid are key to preventing sticking. Also, avoid lifting the lid during baking.
Final Thoughts
I hope this recipe for Herbed Brown Rice brings as much comfort and joy to your table as it has to mine. It’s a versatile, flavorful, and healthy dish that’s perfect for any occasion. Don’t be afraid to experiment with different herbs and seasonings to create your own signature version. I encourage you to try it out, share your feedback, and pair it with your favorite main course. Perhaps some roasted chicken and steamed asparagus? The possibilities are endless! Happy cooking!