
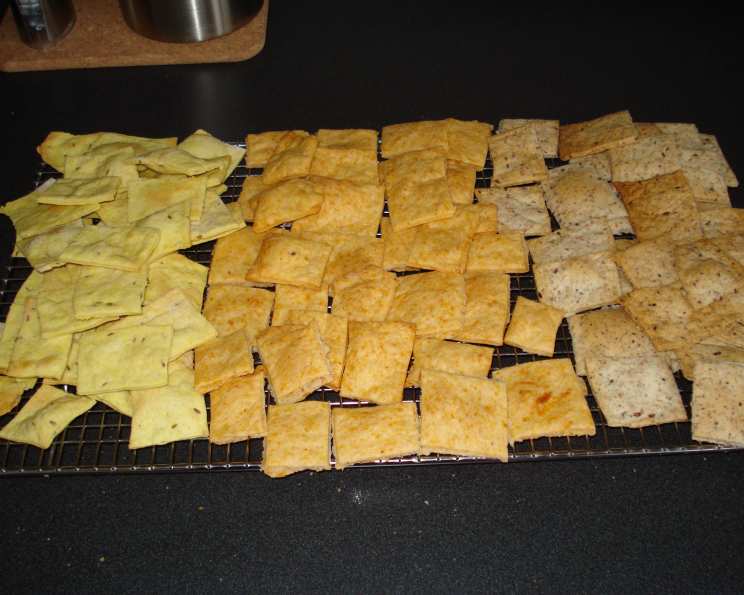
Herbed Crackers: A Taste of Provence in Every Bite
The first time I tasted a cracker quite like this, I was cycling through the lavender fields of Provence. A tiny, sun-drenched boulangerie, smelling of warm bread and thyme, beckoned. Inside, nestled amongst crusty loaves, were these unassuming crackers. Their savory aroma, a blend of herbs and toasted grain, was intoxicating. One bite, and I was hooked – the delicate crispness, the rustic, herbal flavor, a perfect snapshot of the French countryside. I knew I had to recreate them at home, and this recipe is my tribute to that unforgettable experience.
Recipe Overview
- Prep Time: 15 minutes
- Cook Time: 12-14 minutes
- Total Time: Approximately 30 minutes
- Servings: Varies, approximately 20 crackers
- Yield: Approximately 20 crackers
- Dietary Type: Vegetarian
Ingredients
- 1 cup flour
- ½ teaspoon salt
- 2 tablespoons cold butter, cut into small pieces
- ½ teaspoon herbes de provence
- ¼ teaspoon coarsely ground pepper
- ¼ cup water, plus more as needed
Equipment Needed
- Food processor
- Rolling pin
- Cookie sheet
- Fork
- Sharp knife
- Cooling rack
Instructions
-
Preheat your oven to 400 degrees Fahrenheit (200 degrees Celsius). Ensure the rack is in the center position for even baking.
-
In the bowl of a food processor fitted with the steel blade, combine the flour, salt, butter, herbes de provence, and pepper.
-
Pulse the mixture until it resembles coarse crumbs. The butter should be broken down into very small pieces, but not completely incorporated.
-
With the motor running, slowly pour in the 1/4 cup of water through the feed tube. Watch closely; you may need to add a little more water, a teaspoon at a time, until the dough just begins to come together.
-
Continue to process until the dough forms a ball. It should be cohesive but not sticky. If it seems too dry, add a tiny bit more water; if too wet, add a tablespoon of flour. The perfect dough is crucial for a crisp cracker.
-
Lightly flour a clean, flat surface. Turn the dough out and roll it out as thinly as possible. Aim for less than 1/8 inch thick. The thinner the dough, the crispier your crackers will be. This step may require patience and a light touch.
-
Carefully transfer the rolled-out dough to an ungreased cookie sheet. A large spatula or rolling the dough around your rolling pin can help with this.
-
Use a fork to prick the dough all over. This prevents the crackers from puffing up unevenly during baking. Be thorough and space the pricks evenly.
-
If desired, lightly score the dough with a sharp knife to create rectangles or squares before baking. This will make it easier to break the crackers apart after they’ve cooled. Alternatively, you can leave the dough in a free-form shape and break it into irregular shards after baking for a more rustic look.
-
Bake for 12 to 14 minutes, or until the crackers are lightly browned. Keep a close eye on them, as they can burn quickly, especially around the edges. The color should be a light golden brown, indicating that they are crisp and cooked through.
-
Remove from the oven and transfer the crackers to a cooling rack to cool completely. This allows air to circulate and ensures they become even crispier.
-
Once completely cool, break the crackers along the scored lines (if you made them) or into free-form shards. Store in an airtight container at room temperature.
Expert Tips & Tricks
-
Cold Butter is Key: Using very cold butter is crucial for creating a flaky, crisp cracker. Cut the butter into small cubes and chill it in the freezer for about 15 minutes before using.
-
Don’t Overwork the Dough: Overworking the dough will develop the gluten, resulting in tougher crackers. Use the food processor sparingly and avoid excessive kneading.
-
Thickness Matters: Rolling the dough out thinly is essential for achieving a crispy texture. If the dough is too thick, the crackers will be dense and chewy.
-
Even Baking: To ensure even baking, rotate the cookie sheet halfway through the baking time. This will help prevent some crackers from browning faster than others.
-
Listen for Crispness: As the crackers cool, they will become crispier. You can tell if they are done by tapping one gently – it should sound hollow and crisp.
Serving & Storage Suggestions
These herbed crackers are incredibly versatile. Serve them as part of a cheese board with soft cheeses like brie or goat cheese, or alongside a bowl of creamy soup. They are also delicious paired with dips like hummus or baba ghanoush. For a simple snack, enjoy them with a drizzle of olive oil and a sprinkle of sea salt.
Store the cooled crackers in an airtight container at room temperature. They will stay fresh and crisp for up to a week. If they lose some of their crispness, you can briefly re-crisp them in a warm oven (around 300°F) for a few minutes.
Nutritional Information
Note: Nutritional information is an estimate and may vary based on specific ingredients and portion sizes.
| Nutrient | Amount per Serving | % Daily Value |
|---|---|---|
| Calories | 33 kcal | 2% |
| Total Fat | 1.2g | 2% |
| Saturated Fat | 0.7g | 3% |
| Cholesterol | 3mg | 1% |
| Sodium | 67mg | 3% |
| Total Carbohydrate | 4.8g | 2% |
| Dietary Fiber | 0.2g | 1% |
| Sugars | 0g | 0% |
| Protein | 0.7g | 1% |
Variations & Substitutions
-
Gluten-Free Crackers: Substitute the all-purpose flour with a gluten-free blend. Be sure to add a binder like xanthan gum to help hold the dough together.
-
Seed Crackers: Incorporate seeds like sesame, poppy, or flax seeds into the dough for added texture and flavor. Add about 1-2 tablespoons of seeds to the flour mixture.
-
Cheese Crackers: Add grated Parmesan, cheddar, or Gruyere cheese to the dough for a cheesy twist. Use about 1/4 cup of grated cheese.
-
Spicy Crackers: Add a pinch of red pepper flakes or a dash of cayenne pepper to the dough for a spicy kick.
-
Different Herbs: Experiment with different herbs like rosemary, thyme, oregano, or sage. Adjust the amount to your liking. Fresh herbs can also be used, but you may need to adjust the amount of water in the recipe.
-
Garlic Crackers: Incorporate garlic powder into the dough. Start with 1/8 teaspoon and adjust to taste. Roasted garlic can also be used for a more intense flavor.
FAQs (Frequently Asked Questions)
Q: Can I make the dough ahead of time?
A: Yes, you can make the dough ahead of time and store it in the refrigerator for up to 2 days. Wrap it tightly in plastic wrap to prevent it from drying out. Let it come to room temperature slightly before rolling.
Q: My crackers are not crispy enough. What did I do wrong?
A: There are several reasons why your crackers might not be crispy enough. Ensure that you rolled the dough very thinly, that your oven temperature is accurate, and that you allowed the crackers to cool completely on a wire rack.
Q: Can I freeze the crackers?
A: Yes, you can freeze the baked crackers. Store them in an airtight container or freezer bag for up to 2 months. Thaw at room temperature before serving.
Q: Can I use olive oil instead of butter?
A: While butter provides a characteristic flavor and texture, you can experiment with using olive oil. Use a high-quality extra virgin olive oil and reduce the amount slightly, as olive oil is more liquid than butter. The texture of the cracker will be different, resulting in a slightly denser result, but it will still be delicious.
Q: What’s the best way to store these crackers?
A: To maintain optimal crispness, store completely cooled crackers in an airtight container at room temperature, away from moisture and strong smells. A tin or resealable plastic bag works well.
Final Thoughts
These herbed crackers are more than just a snack; they’re a taste of simple pleasures. I encourage you to try this recipe and make it your own. Experiment with different herbs and spices, and share your creations with friends and family. Pair them with your favorite cheese, dip, or soup, and savor the flavors of the French countryside. I can’t wait to hear about your culinary adventures!