
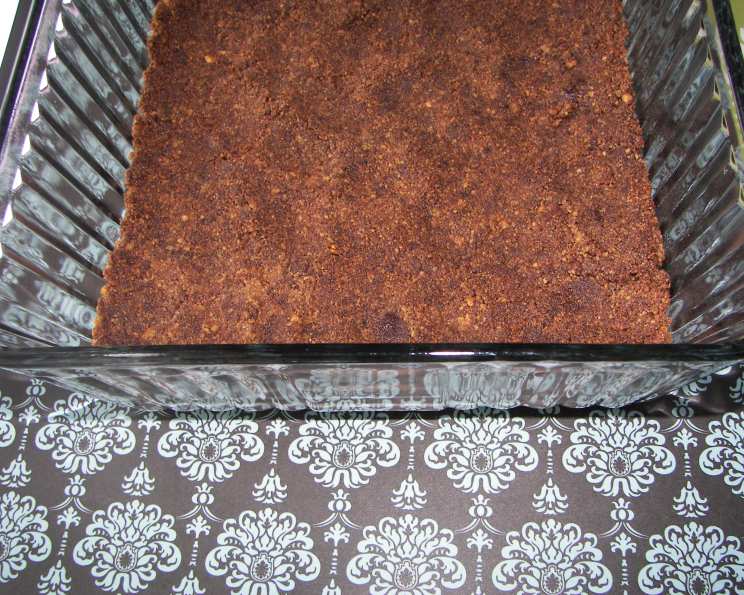
Hershey’s Chocolate Crumb Crust: A Culinary Classic
The scent of a freshly baked chocolate crumb crust always transports me back to my grandmother’s kitchen. I remember being a little girl, perched on a stool, mesmerized as she carefully pressed the dark, fragrant mixture into a pie plate. The anticipation was almost unbearable, knowing that soon, that crust would cradle a luscious filling, transforming into something truly magical. Even now, the simplicity of that chocolatey aroma evokes a sense of warmth, love, and the comforting promise of a delicious treat.
Recipe Overview
- Prep Time: 10 minutes
- Cook Time: 0 minutes (Chilling Required)
- Total Time: 10 minutes + chilling
- Servings: 8
- Yield: 1 pie crust
- Dietary Type: Vegetarian
Ingredients
- 1 cup graham cracker crumbs
- 1/4 cup cocoa
- 1/4 cup sugar
- 5 tablespoons butter, melted (can use margarine also)
Equipment Needed
- Small bowl
- 9-inch square pan or pie plate
- Measuring cups and spoons
Instructions
- In a small bowl, thoroughly mix together the graham cracker crumbs, cocoa, and sugar until well blended. It’s important to ensure the cocoa is evenly distributed to prevent pockets of bitterness in the finished crust.
- Pour the melted butter (or margarine) into the dry ingredients. Stir until the mixture is evenly moistened and resembles damp sand. Be careful not to overmix; you want a crumbly texture, not a paste.
- Press the crumb mixture firmly and evenly onto the bottom of a 9-inch square pan or a 9-inch pie plate. Use the back of a spoon or your fingers to create a compact and uniform layer. If using a pie plate, you can also bring the crust slightly up the sides for a more traditional pie appearance.
- Chill the crust in the refrigerator to set. This usually takes at least 30 minutes, but chilling for an hour or more will result in a sturdier crust that holds its shape better when filled. You can also place it in the freezer for about 15 minutes for quicker setting.
Expert Tips & Tricks
- Boosting the Chocolate Flavor: For a deeper, richer chocolate experience, use Dutch-processed cocoa. It has a smoother, less acidic flavor compared to natural cocoa powder.
- Perfect Pressing: To ensure an even and compact crust, use the bottom of a measuring cup or a tart tamper to press the crumbs firmly. This helps the crust hold its shape and prevents it from crumbling when you slice and serve your pie.
- Blind Baking (Optional): For a particularly crisp crust, you can blind bake it before adding the filling. Preheat the oven to 350°F (175°C). Press the crumb mixture into the pan as directed, then line the crust with parchment paper and fill with pie weights or dried beans. Bake for 10-12 minutes, then remove the weights and parchment paper and bake for another 3-5 minutes, or until the crust is set. Allow to cool completely before filling.
- Adding a Touch of Spice: Consider adding a pinch of cinnamon or a dash of espresso powder to the crumb mixture for a more complex flavor profile. These additions pair wonderfully with chocolate.
- Preventing a Soggy Crust: If you’re using a wet filling, such as a custard or mousse, brush the cooled crust with a thin layer of melted chocolate before adding the filling. This creates a barrier that helps prevent the crust from becoming soggy.
Serving & Storage Suggestions
This Hershey’s Chocolate Crumb Crust is incredibly versatile and can be used as the base for a wide variety of fillings. It’s delicious with chocolate mousse, peanut butter pie, cheesecake, or even fruit fillings.
- Serving: Serve chilled or at room temperature, depending on the filling. Garnish with whipped cream, chocolate shavings, or fresh berries for an elegant presentation.
- Storage: If you’re not using the crust immediately, wrap it tightly in plastic wrap and store it at room temperature for up to 2 days. For longer storage, keep it in the refrigerator for up to 5 days or in the freezer for up to 2 months.
- Freezing: To freeze the crust, wrap it tightly in plastic wrap and then in aluminum foil. Thaw in the refrigerator overnight before filling.
Nutritional Information
Note: Nutritional information is an estimate and may vary depending on specific ingredients and serving size.
| Nutrient | Amount per Serving | % Daily Value |
|---|---|---|
| Calories | 225 kcal | 11% |
| Total Fat | 14g | 22% |
| Saturated Fat | 8g | 40% |
| Cholesterol | 30mg | 10% |
| Sodium | 110mg | 5% |
| Total Carbohydrate | 23g | 8% |
| Dietary Fiber | 2g | 8% |
| Sugars | 13g | – |
| Protein | 2g | 4% |
Variations & Substitutions
- Gluten-Free: Use gluten-free graham crackers or a gluten-free cookie crumb for a gluten-free crust. Ensure all other ingredients are also gluten-free.
- Vegan: Substitute the butter with a vegan butter alternative.
- Nut-Free: Ensure the graham crackers and any other ingredients are manufactured in a nut-free facility if nut allergies are a concern.
- Spice it Up: Add a pinch of cayenne pepper to the crumb mixture for a subtle kick.
- Cookie Crumb Crust: Substitute the graham cracker crumbs with crushed chocolate wafers, vanilla wafers, or shortbread cookies for a different flavor profile. Adjust the amount of sugar accordingly, depending on the sweetness of the cookies.
FAQs (Frequently Asked Questions)
Q: Can I use a food processor to make the crumbs?
A: Yes, you can use a food processor to finely crush the graham crackers. Pulse until you achieve a fine crumb texture.
Q: What if I don’t have graham crackers?
A: You can substitute with other similar cookies like digestive biscuits, shortbread, or even Oreo cookies (remove the filling first). Adjust the sugar amount based on the cookie’s sweetness.
Q: My crust is too crumbly and won’t hold together. What did I do wrong?
A: You may not have used enough butter or the butter wasn’t evenly distributed. Try adding a tablespoon more of melted butter and mixing well.
Q: Can I bake this crust instead of just chilling it?
A: Yes, you can bake the crust for a firmer texture. Bake in a preheated oven at 350°F (175°C) for 8-10 minutes, or until lightly golden brown. Let it cool completely before filling.
Q: How do I prevent the crust from sticking to the pan?
A: Lightly grease the pan with cooking spray before pressing in the crumb mixture. This will help the crust release easily when you’re ready to serve.
Final Thoughts
The Hershey’s Chocolate Crumb Crust is more than just a base for a pie; it’s a blank canvas for your culinary creativity. It’s an invitation to experiment with different fillings, flavors, and textures, and to create something truly special. Don’t be afraid to put your own spin on this classic recipe, and most importantly, don’t forget to share your creations with those you love. The joy of baking is best enjoyed when shared. So, gather your ingredients, preheat your oven (or just chill!), and let the delicious adventure begin!