
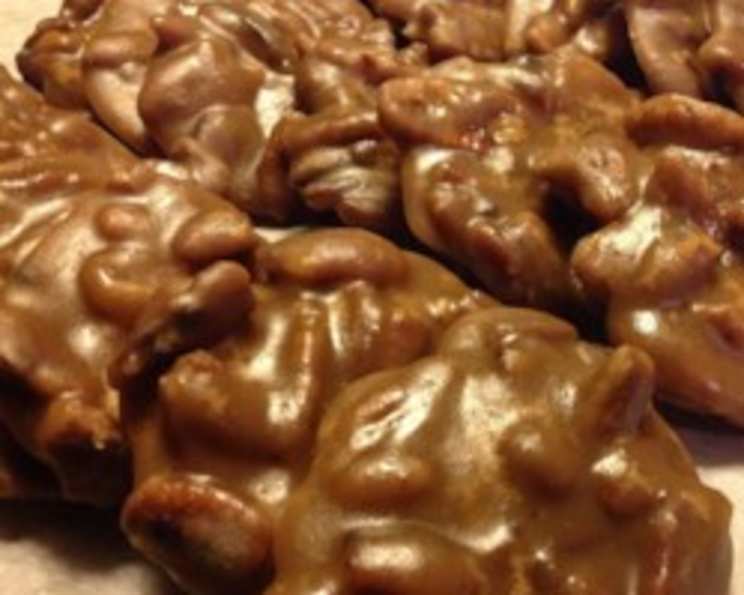
Decadent Delights: Crafting Perfect Hershey’s Chocolate Pralines
My grandmother, a woman whose apron always held the comforting scent of vanilla and warm sugar, made pralines every Christmas. Not just any pralines, but intensely chocolatey, impossibly smooth pralines studded with pecans – a recipe she swore came straight from Hershey’s kitchens. The rich, fudgy squares were the highlight of the holiday dessert spread, a small, sweet indulgence that epitomized family and the joy of shared traditions. Trying to recreate her pralines brings back a flood of those cherished memories, filling my kitchen with the familiar aroma of cocoa and the warmth of her love.
Recipe Overview
- Prep Time: 15 minutes
- Cook Time: 20-25 minutes
- Cooling Time: Approximately 1 hour
- Yields: Approximately 3 dozen pralines
- Dietary Type: Suitable for Vegetarian diets
Ingredients
- 1 1/2 cups sugar
- 1 1/2 cups packed light brown sugar
- 6 tablespoons Hershey’s cocoa
- 1 cup light cream
- 6 tablespoons butter
- 1 teaspoon vanilla extract
- 2 cups coarsely broken pecans
Equipment Needed
- 2 cookie sheets
- Wax paper
- Heavy 3-quart saucepan
- Candy thermometer
- Wooden spoon
- Measuring cups and spoons
Instructions
-
Begin by preparing your workspace. Line two cookie sheets with wax paper. This prevents the pralines from sticking and makes cleanup a breeze.
-
In a heavy 3-quart saucepan, combine the sugar, light brown sugar, Hershey’s cocoa, and light cream. Using a heavy-bottomed saucepan is crucial to prevent scorching and ensure even heat distribution.
-
Place the saucepan over medium heat. Cook, stirring constantly, until the mixture comes to a boil. Constant stirring is essential at this stage to dissolve the sugars and prevent them from burning.
-
Once the mixture is boiling, reduce the heat to low. Continue to cook, stirring occasionally, until the mixture reaches 234 degrees Fahrenheit on a candy thermometer. This is the “soft ball stage,” critical for achieving the right texture. The mixture should be thick enough to form a soft ball when dropped into cold water.
-
Remove the saucepan from the heat. Immediately add the butter and vanilla extract.
-
DO NOT STIR at this point. Let the butter and vanilla sit undisturbed on top of the hot mixture. This allows the butter to melt evenly without prematurely incorporating it.
-
Allow the mixture to cool at room temperature until it reaches 160 degrees Fahrenheit. This cooling process is essential for developing the proper crystal structure that gives pralines their characteristic creamy texture.
-
Once the mixture has cooled to 160 degrees Fahrenheit, add the coarsely broken pecans.
-
Now, using a wooden spoon, beat the mixture vigorously just until it begins to thicken (about 1-2 minutes). The mixture should still be glossy, not dry or crumbly. Be careful not to overbeat; this can cause the pralines to become grainy.
-
Working quickly, drop the praline mixture by teaspoonfuls onto the prepared cookie sheets. The pralines will spread slightly as they cool.
-
Allow the pralines to cool completely on the cookie sheets. This may take approximately 30 minutes to an hour, depending on the room temperature.
-
Once the pralines are cool and firm, they are ready to be stored.
-
Store the covered pralines in an airtight container at room temperature.
Expert Tips & Tricks
- Invest in a reliable candy thermometer: Accuracy is key to achieving the soft ball stage. A digital thermometer is preferable for precise readings.
- Don’t skip the cooling step: Cooling the mixture to 160 degrees Fahrenheit before beating is crucial for the correct sugar crystallization and a smooth, creamy texture.
- Beating technique: Use a sturdy wooden spoon and a firm, even motion. Overbeating will result in dry, crumbly pralines.
- Pecan preparation: Toasting the pecans lightly before adding them to the mixture enhances their flavor and adds a pleasant crunch. Spread the pecans on a baking sheet and toast them in a 350°F oven for 5-7 minutes, or until fragrant. Let them cool slightly before coarsely chopping them.
- Troubleshooting grainy pralines: If your pralines turn out grainy, it’s likely due to overcooking or premature stirring during the cooking process. Unfortunately, there’s not much you can do to fix a grainy batch. Focus on precise temperature control and minimal stirring next time.
- Consider using a stand mixer fitted with the paddle attachment instead of a wooden spoon for a more consistent and less tiring beating process. Make sure to watch closely to prevent overbeating.
Serving & Storage Suggestions
Serve these Hershey’s Chocolate Pralines as a delightful after-dinner treat, as part of a festive dessert platter, or package them attractively as homemade gifts. They pair beautifully with a cup of strong coffee, a glass of port wine, or a scoop of vanilla ice cream.
Store the pralines in an airtight container at room temperature for up to a week. For longer storage, you can freeze them for up to two months. Thaw them at room temperature before serving. The pralines are best enjoyed within a few days of making them, as they can become slightly dry over time.
Nutritional Information
Note: The following information is an estimate and can vary based on specific ingredient brands and portion sizes.
| Nutrient | Amount per Serving | % Daily Value |
|---|---|---|
| Calories | 1707.5 kcal | N/A |
| Calories from Fat | 826 g | 48% |
| Total Fat | 91.8 g | 141% |
| Saturated Fat | 28.7 g | 143% |
| Cholesterol | 113.9 mg | 37% |
| Sodium | 238.6 mg | 9% |
| Total Carbohydrate | 226.2 g | 75% |
| Dietary Fiber | 9 g | 35% |
| Sugars | 208.9 g | 835% |
| Protein | 11.1 g | 22% |
Variations & Substitutions
- Walnut Pralines: Substitute walnuts for the pecans for a different nutty flavor.
- Chocolate Chip Pralines: Add 1 cup of Hershey’s semi-sweet chocolate chips to the mixture along with the pecans for an extra dose of chocolate.
- Spiced Pralines: Add 1/2 teaspoon of ground cinnamon and 1/4 teaspoon of ground nutmeg to the mixture along with the cocoa for a warm, spiced flavor.
- Salted Caramel Pralines: Add 1/4 teaspoon of sea salt to the mixture along with the butter for a salty-sweet twist.
- Dairy-Free Option: While light cream is essential for the praline’s texture, experiment with a combination of full-fat coconut cream and a touch of unsweetened almond milk to achieve a similar consistency. The taste will be slightly different but still delicious. (Note that butter still contains dairy.)
FAQs (Frequently Asked Questions)
Q: Why is it important not to stir the mixture after adding the butter and vanilla?
A: Allowing the butter to melt undisturbed helps create a smoother emulsion and prevents premature sugar crystallization, resulting in a creamier praline.
Q: How can I tell if the mixture has reached the soft ball stage without a candy thermometer?
A: Drop a small amount of the mixture into a bowl of ice water. If it forms a soft, pliable ball that you can easily shape with your fingers, it’s at the soft ball stage.
Q: What causes pralines to be grainy?
A: Graininess is usually caused by overcooking, undercooking, or stirring the mixture too much during the cooling process. Precise temperature control and minimal stirring are key.
Q: Can I use dark chocolate instead of Hershey’s cocoa?
A: Using melted dark chocolate will alter the texture and sweetness of the praline significantly. It is not a direct substitution.
Q: How long do these pralines last?
A: Stored in an airtight container at room temperature, these pralines will last for up to a week. For longer storage, you can freeze them for up to two months.
Final Thoughts
These Hershey’s Chocolate Pralines are more than just a simple recipe; they’re a gateway to cherished memories and shared moments. Don’t be intimidated by the candy thermometer – with a little patience and attention to detail, you can create these decadent treats in your own kitchen. Gather your ingredients, embrace the process, and enjoy the sweet rewards of this classic confection. I encourage you to try this recipe and share your creations with loved ones. Let me know how they turn out and any variations you might try!