
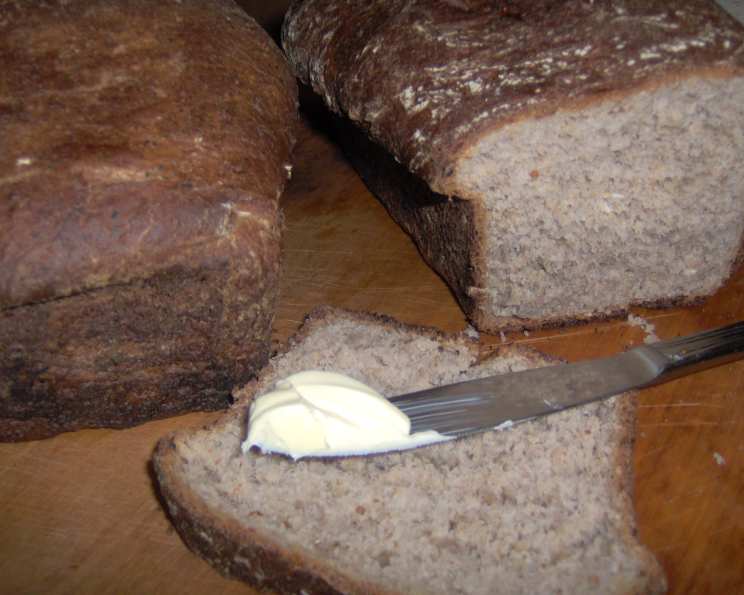
Hi-Protein Honey Wheat Bread: A Chef’s Homage to Homemade Goodness
The scent of baking bread, warm honey, and toasted nuts…it takes me back to my grandmother’s kitchen. I can almost feel the warmth of the oven on my face as I peered inside, watching the dough rise and transform into golden-brown loaves. This Hi-Protein Honey Wheat Bread isn’t just a recipe; it’s a memory, a taste of home, and a testament to the simple joys of baking from scratch. Every slice is a reminder of her love, and it’s a privilege to share this legacy with you.
Recipe Overview
- Prep Time: 2 hours 10 minutes (includes rising time)
- Cook Time: 35-40 minutes
- Total Time: 2 hours 50 minutes
- Yields: 2 loaves
- Serves: 32
- Dietary Type: High Protein
Ingredients
- 4-5 cups all-purpose flour
- 2 teaspoons salt
- 2 packages active dry yeast
- 1 cup water
- ½ cup honey
- ¼ cup margarine or ¼ cup butter
- 1 cup cream-style cottage cheese (creamed cottage cheese is important here!)
- 2 eggs
- 1 cup whole wheat flour
- ½ cup rolled oats
- 1 cup chopped nuts (walnuts, pecans, or almonds work well)
Equipment Needed
- Large Mixing Bowl
- Medium Saucepan
- Measuring Cups and Spoons
- Electric Mixer (optional, but recommended)
- Floured Surface
- Greased Bowl
- Plastic Wrap
- Cloth Towel
- Two 8×4 or 9×5-inch Loaf Pans
- Wire Racks
Instructions
-
In a large bowl, combine 2 cups of the all-purpose flour, the salt, and the active dry yeast. Blend these dry ingredients together thoroughly. This ensures even distribution of the yeast and salt, which is crucial for proper rising and flavor.
-
In a medium saucepan, heat the water, honey, margarine (or butter), and cream-style cottage cheese until the mixture is very warm – ideally between 120°F and 130°F. This temperature range is optimal for activating the yeast without killing it. The margarine or butter doesn’t need to melt completely; just ensure the mixture is warm enough.
-
Add the warm liquid mixture and the eggs to the flour mixture in the large bowl.
-
Using an electric mixer, blend the ingredients at low speed until just moistened. Then, increase the speed to medium and beat for 3 minutes. This step develops the gluten in the flour, contributing to the bread’s structure. If mixing by hand, use a sturdy spoon and beat vigorously.
-
By hand, stir in the whole wheat flour, rolled oats, and chopped nuts. Gradually add enough of the remaining all-purpose flour to form a soft dough that is slightly sticky but manageable. You may not need all 5 cups of all-purpose flour; add it gradually until the dough reaches the right consistency.
-
Turn the dough out onto a lightly floured surface. Knead the dough until it is smooth and elastic, about 10 minutes. Kneading develops the gluten further, resulting in a bread with good texture and rise. If the dough is too sticky, add a little more all-purpose flour, one tablespoon at a time.
-
Place the kneaded dough in a greased bowl, turning to coat the entire surface with grease. This prevents the dough from sticking as it rises. Cover the bowl loosely with plastic wrap and then with a clean cloth towel.
-
Let the dough rise in a warm place (ideally 80°F to 85°F) until it is light and has doubled in size. This usually takes about 1 hour, but it can vary depending on the temperature of your environment.
-
Generously grease two 8×4 or 9×5-inch loaf pans. This is important to prevent the bread from sticking to the pans.
-
Punch down the risen dough to release the excess air.
-
Divide the dough into two equal parts. Shape each part into a loaf.
-
Place the shaped loaves in the greased loaf pans.
-
Cover the pans and let the dough rise again in a warm place until it is light and has doubled in size, about 1 hour. This second rise is crucial for achieving a light and airy texture.
-
Preheat your oven to 375°F (190°C).
-
Uncover the dough and bake for 35 to 40 minutes, or until the loaves sound hollow when lightly tapped on the bottom. The internal temperature of the bread should reach 200-210°F (93-99°C). If the tops of the loaves start to brown too quickly, you can loosely tent them with aluminum foil.
-
Immediately remove the baked loaves from the pans and place them on wire racks to cool completely.
-
For softer crusts, brush the tops of the loaves with melted margarine or butter, if desired.
Expert Tips & Tricks
- Temperature is key: Using a thermometer to check the water temperature (120-130°F) ensures the yeast is activated properly. Too hot, and you’ll kill the yeast; too cold, and it won’t activate.
- Don’t over-knead: Over-kneading can result in a tough loaf. Knead until the dough is smooth and elastic, but no longer.
- The finger-dent test: To check if the dough has risen enough, gently poke it with your finger. If the indentation slowly springs back, it’s ready. If it springs back immediately, it needs more time. If it doesn’t spring back at all, it may have over-proofed.
- Adjust for altitude: If you live at a high altitude, you may need to adjust the amount of flour and/or the rising time. Start with less flour and add more as needed, and reduce the rising time slightly.
- Add seeds: For added texture and flavor, try adding a tablespoon or two of sesame seeds, poppy seeds, or sunflower seeds to the dough.
- Make ahead: The dough can be made ahead of time and stored in the refrigerator for up to 24 hours. Just punch it down before shaping and baking.
Serving & Storage Suggestions
This Hi-Protein Honey Wheat Bread is delicious served warm with butter, jam, or a drizzle of honey. It makes excellent toast, sandwiches, or even grilled cheese. Store the bread in an airtight container at room temperature for up to 3 days. For longer storage, wrap the loaves tightly in plastic wrap and freeze for up to 3 months. To reheat, thaw completely and then warm in a 350°F (175°C) oven for 10-15 minutes, or until heated through. You can also slice it and toast it.
Nutritional Information
Here’s an estimate of the nutritional information per slice (assuming 16 slices per loaf):
| Nutrient | Amount per Serving | % Daily Value (approx.) |
|---|---|---|
| Calories | 141 | 7% |
| Total Fat | 4.5g | 6% |
| Saturated Fat | 0.9g | 4% |
| Cholesterol | 14mg | 4% |
| Sodium | 223mg | 9% |
| Total Carbohydrate | 21g | 7% |
| Dietary Fiber | 1.5g | 5% |
| Sugars | 5g | N/A |
| Protein | 4.5g | 9% |
Note: Nutritional information is an estimate and may vary based on specific ingredients and portion sizes.
Variations & Substitutions
- Gluten-Free: While this recipe isn’t inherently gluten-free, you can experiment with gluten-free flour blends. Be aware that the texture will likely be different, and you may need to adjust the liquid.
- Dairy-Free: Substitute the cottage cheese with a plant-based cream cheese alternative. Ensure the margarine is also dairy-free.
- Nut-Free: Omit the chopped nuts altogether, or replace them with sunflower seeds or pumpkin seeds.
- Spice it up: Add a teaspoon of cinnamon, nutmeg, or cardamom to the dry ingredients for a warm, spiced flavor.
- Sweeten it more: For a sweeter bread, increase the amount of honey by a tablespoon or two.
FAQs (Frequently Asked Questions)
Q: Can I use a stand mixer instead of kneading by hand?
A: Yes, absolutely! Use the dough hook attachment and knead on medium-low speed for about 8 minutes, or until the dough is smooth and elastic.
Q: My dough isn’t rising. What could be the problem?
A: Several factors can affect rising. The water might have been too hot, killing the yeast, or too cold, not activating it. The room may be too cold. Ensure the yeast is fresh and store in a cool, dry place. Also, check the expiration date.
Q: Can I freeze the dough instead of baking it right away?
A: Yes, you can! After the first rise, punch down the dough, shape it into loaves, and place them in greased pans. Wrap the pans tightly with plastic wrap and freeze. When ready to bake, thaw the dough in the refrigerator overnight, then let it rise in a warm place until doubled in size before baking as directed.
Q: What’s the best way to get a soft crust on my bread?
A: Brushing the top of the loaves with melted butter or margarine immediately after baking will help soften the crust. Covering the loaves with a clean kitchen towel as they cool can also help.
Q: Can I use quick-rise yeast instead of active dry yeast?
A: Yes, you can. If using quick-rise yeast, you can skip the initial proofing step of the yeast. Just add it directly to the dry ingredients. The rising times may be slightly shorter.
Final Thoughts
I truly hope you’ll try this Hi-Protein Honey Wheat Bread recipe. It’s more than just a loaf of bread; it’s an experience, a journey back to simple pleasures. Share it with your loved ones, experiment with variations, and most importantly, enjoy the process. Let me know how it turns out, and happy baking!