
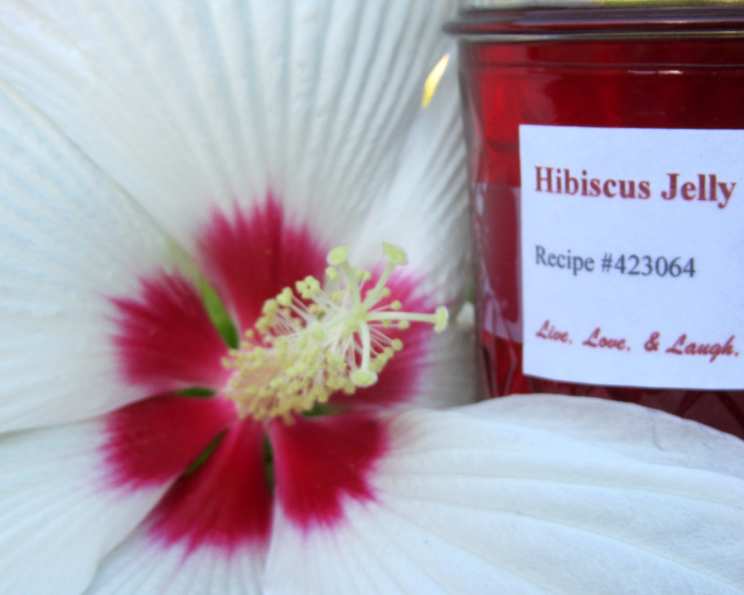
Ruby Red Radiance: Crafting Exquisite Hibiscus Jelly
The first time I encountered hibiscus jelly, it was in a tiny, sun-drenched cafe in Oaxaca, Mexico. The air hummed with the low thrum of Spanish conversation and the tantalizing aroma of roasting coffee. Served alongside warm, crusty bread, the vibrant ruby jelly, shimmering like a captured sunset, was unlike anything I’d ever tasted. Its sweet-tart flavor, hinting of cranberry and sunshine, danced on my tongue. I knew in that moment, I had to learn how to make this culinary gem. The memory of that breakfast, filled with warmth, laughter, and that unforgettable jelly, still inspires me today.
Recipe Overview
- Prep Time: 2 hours (includes steeping time)
- Cook Time: 20 minutes
- Total Time: 2 hours 20 minutes
- Yields: 7 half-pint jars
- Servings: 80
- Dietary Type: Vegan, Gluten-Free, Dairy-Free
Ingredients
- 1/4 cup flor de jamaica dried hibiscus flowers
- 1 1/2 cups unsweetened apple juice or unsweetened cranberry juice
- 1 cup boiling water
- 1 cup vinegar
- 1 lemon, juiced (about 4 tablespoons)
- 1 3/4 ounces dry pectin
- 5 1/2 cups sugar
Optional Additions:
- 1/4 inch fresh gingerroot, peeled (for a spicy kick)
- 4 cardamom pods, crushed (for warmth)
- 1 cinnamon stick
Equipment Needed
- Large, heavy-bottomed pot
- Sterilized canning jars (7 half-pint jars)
- Lids and bands for canning jars
- Boiling water canner
- Jar lifter
- Kitchen strainer
- Coffee filter or cheesecloth
- Ladle
- Measuring cups and spoons
Instructions
-
Steep the Hibiscus: In a heat-safe bowl or pot, combine the dried hibiscus flowers with 1 cup of boiling water. If using, add your optional flavorings: the peeled gingerroot, crushed cardamom pods, and/or cinnamon stick. Cover and let steep for at least 1-2 hours, or preferably overnight. This long steeping time extracts the maximum flavor and color from the hibiscus.
-
Prepare for Canning: While the hibiscus is steeping, prepare your boiling water canner. Fill it with enough water to cover the jars by 1-2 inches and bring to a boil. Sterilize your canning jars, lids, and bands according to manufacturer instructions. This is crucial for preventing spoilage and ensuring a safe, shelf-stable product.
-
Strain the Hibiscus Infusion: Once the steeping is complete, strain the liquid twice. First, use a kitchen strainer to remove the larger pieces of hibiscus flowers and optional flavorings. Then, strain the liquid again through a coffee filter or several layers of cheesecloth to remove any fine sediment. This step is important for a clear and sparkling jelly. Discard the solids.
-
Combine Ingredients (Except Sugar): In a large, heavy-bottomed pot (stainless steel or enamel-coated cast iron are best), combine the strained hibiscus infusion, apple juice (or cranberry juice), vinegar, and lemon juice.
-
Add Pectin and Bring to a Boil: Add the dry pectin to the pot and stir well to prevent clumping. Bring the mixture to a rolling boil over medium-high heat. A “rolling boil” means the mixture continues to boil vigorously even when stirred.
-
Add Sugar and Return to a Rolling Boil: Add all the sugar at once. Stir constantly until the sugar is completely dissolved. Return the mixture to a rolling boil that cannot be stirred down.
-
Cook to Gelling Point: Continue to cook the jelly at a rolling boil, stirring frequently, until it reaches the gelling point. This usually takes 1-3 minutes. To test for gelling, place a small spoonful of the hot jelly on a chilled plate. Let it cool for a minute. If it wrinkles when pushed with your finger, it’s ready. Alternatively, use a candy thermometer; the gelling point is typically 8 degrees Fahrenheit above the boiling point of water in your location.
-
Ladle into Jars: Remove the pot from the heat. Carefully ladle the hot jelly into the sterilized jars, leaving 1/4 inch headspace at the top. Headspace is the space between the top of the jelly and the lid.
-
Wipe Rims and Apply Lids: Wipe the rims of the jars clean with a damp cloth to remove any spills or drips. This ensures a proper seal. Place the sterilized lids on the jars and screw on the bands until fingertip tight. Do not overtighten.
-
Process in a Boiling Water Canner: Carefully lower the filled jars into the boiling water canner using a jar lifter. Make sure the jars are covered by 1-2 inches of water. Bring the water back to a rolling boil and process for 10 minutes. Processing time ensures a proper seal and eliminates any remaining bacteria.
-
Turn Off Heat and Wait: After processing for 10 minutes, turn off the heat and let the jars sit in the hot water for 5 minutes before removing them. This helps to prevent siphoning (loss of liquid from the jars).
-
Remove and Cool: Carefully remove the jars from the canner using the jar lifter and place them on a flat surface lined with a towel or cooling rack. Leave at least 1 inch of space between the jars to allow for air circulation. Do not tilt the jars.
-
Check for Seals: Let the jars cool completely for 12-24 hours without disturbing them. As the jars cool, you should hear a “popping” sound, which indicates that a seal has formed. After 24 hours, check the seals by pressing down on the center of each lid. If the lid doesn’t flex or pop back up, it’s sealed. If a lid doesn’t seal, you can either reprocess the jar with a new lid or store the jelly in the refrigerator and use it within a few weeks.
-
Remove Bands, Wipe Jars, and Label: Once the jars are completely cooled and sealed, remove the bands. Wipe the jars clean with a damp cloth to remove any residue. Label each jar with the date and contents.
-
Store: Store the sealed jars in a cool, dark place for up to 1 year.
Expert Tips & Tricks
- Adjust Sweetness: If you prefer a less sweet jelly, you can reduce the amount of sugar slightly, but be aware that this may affect the gelling process.
- Ensure a Good Set: If your jelly doesn’t set properly, it may be due to insufficient pectin, overcooking, or undercooking. You can try reprocessing the jelly with additional pectin, but results are not guaranteed.
- Prevent Cloudiness: To ensure a clear jelly, avoid stirring too vigorously while cooking and carefully strain the hibiscus infusion.
- Spice it Up: Experiment with different spices to create unique flavor combinations. A pinch of cayenne pepper or a few star anise pods can add a surprising twist.
- Use Fresh Lemons: Bottled lemon juice can have a slightly metallic taste. Freshly squeezed lemon juice provides a brighter, cleaner flavor.
- Double Strain: Use a cheesecloth to strain for extra clearness.
Serving & Storage Suggestions
Hibiscus jelly is incredibly versatile. Serve it on toast, scones, or biscuits for breakfast. Use it as a glaze for grilled chicken or pork. Stir it into yogurt or oatmeal for a burst of flavor. Add a spoonful to iced tea, cocktails, or mocktails for a touch of sweetness and tang. Once opened, store the jelly in the refrigerator. It will last for several weeks. Unopened jars can be stored in a cool, dark place for up to 1 year.
Nutritional Information
| Nutrient | Amount per Serving | % Daily Value |
|---|---|---|
| Calories | 58 kcal | 3% |
| Total Fat | 0g | 0% |
| Saturated Fat | 0g | 0% |
| Cholesterol | 0mg | 0% |
| Sodium | 1.6mg | 0% |
| Total Carbohydrate | 15g | 5% |
| Dietary Fiber | 0.1g | 0% |
| Sugars | 14.2g | 56% |
| Protein | 0g | 0% |
Variations & Substitutions
- Different Juice: Experiment with other fruit juices, such as white grape juice or pear juice, for a different flavor profile.
- Honey or Agave: While sugar is essential for the proper gel, you can substitute a small amount of the sugar with honey or agave nectar for a slightly different flavor. Start with replacing 1/4 cup of sugar and adjust to taste.
- Spicy Hibiscus Jelly: Add a pinch of cayenne pepper or a small, finely chopped chili pepper to the jelly for a spicy kick.
- Floral Infusion: Incorporate other edible flowers, such as rose petals or lavender, into the hibiscus infusion for a more complex floral aroma.
FAQs (Frequently Asked Questions)
Q: Can I use frozen hibiscus flowers?
A: While dried hibiscus flowers are preferred for their concentrated flavor, you can use frozen hibiscus flowers if they are high quality and unsweetened. You may need to adjust the amount of liquid accordingly.
Q: Do I have to use vinegar?
A: Yes, vinegar is an essential ingredient in this recipe. It helps to balance the sweetness of the sugar and aids in the gelling process. It also acts as a preservative.
Q: How do I know if my jars are properly sealed?
A: After cooling, a properly sealed jar will have a lid that is concave (slightly indented). When you press down on the center of the lid, it should not flex or pop back up.
Q: What if my jelly doesn’t set?
A: If your jelly doesn’t set, you can try reprocessing it with additional pectin. Follow the instructions on the pectin package for “remaking” jelly.
Q: Can I double the recipe?
A: Yes, you can double the recipe, but be sure to use a large enough pot to prevent boiling over. You may also need to adjust the cooking time slightly.
Final Thoughts
I urge you to try this recipe and experience the joy of creating your own vibrant hibiscus jelly. It’s a rewarding process that yields a truly unique and delicious condiment. Don’t be afraid to experiment with different flavor combinations and make it your own. Share your creations with friends and family, and let the ruby red radiance of hibiscus jelly brighten their day. Enjoy!