
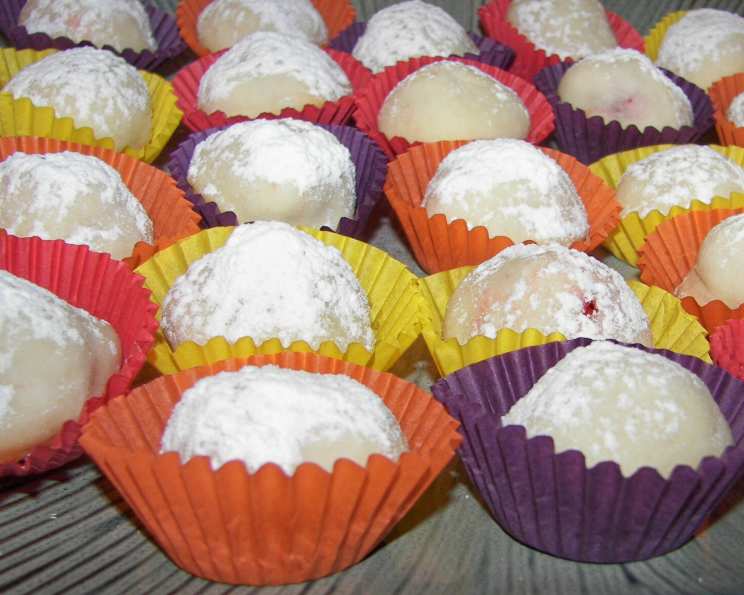
Hidden Kisses: A Sweet Surprise Worth Sharing
The memory is still so clear: my grandmother’s kitchen, warm and filled with the scent of vanilla and chocolate. It was Valentine’s Day, and she was letting me “help” her bake. I remember her gnarled hands, dusted with flour, carefully folding dough around chocolate kisses, creating these little packages of delight. She called them “Hidden Kisses,” because the best part was the surprise inside. Every bite was a little burst of love, a sweet secret shared between us. I’m excited to share that same feeling with you today.
Recipe Overview
- Prep Time: 1 hour (includes refrigeration)
- Cook Time: 10-11 minutes
- Total Time: 1 hour 11 minutes
- Yields: 30-35 cookies
- Dietary Type: Vegetarian
Ingredients
- 1/2 cup unsalted butter, at room temperature
- 1/4 cup granulated sugar
- 1/2 teaspoon vanilla extract
- 1 pinch salt
- 1 cup all-purpose flour
- 4-5 teaspoons water
- 227 g Hershey’s chocolate kisses (8 oz)
- 1/4 cup icing sugar
Equipment Needed
- Mixing bowl
- Electric mixer
- Measuring cups and spoons
- Plastic wrap
- Baking sheet
- Cooling rack
Instructions
-
In a bowl, using an electric mixer on high speed, cream the butter and sugar together until light and fluffy, about 4 minutes. This step is crucial for a tender cookie, so don’t rush it!
-
Beat in the vanilla extract and salt. Make sure everything is well combined.
-
Gradually add the flour, mixing on low speed until just combined. Be careful not to overmix, as this can lead to tough cookies.
-
Sprinkle in the water, one teaspoon at a time, until the dough just comes together. Start with 4 teaspoons, and add the 5th only if needed. The dough should be moist enough to hold its shape, but not sticky. The mixture will still be quite crumbly at this stage, and that’s okay.
-
Cover the dough with plastic wrap and refrigerate for 45 minutes. This chilling period is essential for preventing the cookies from spreading too much in the oven and helps to develop the flavor.
-
Preheat your oven to 375°F (190°C). Place a rack in the center of the oven.
-
Once the dough is chilled, pinch off about 1 tablespoon of dough.
-
Using both hands, form the dough into a ball. Then, with the flat of your hand, flatten it against the countertop, making it as thin as possible without tearing. Aim for a circle about 2-3 inches in diameter. The thinner the dough, the more delicate the cookie.
-
Peel off the wrapper from a chocolate kiss. This is a great task for little helpers!
-
Place 1 chocolate kiss in the center of the flattened dough.
-
Carefully bring the dough up with the tips of your fingers, shaping it neatly around the chocolate kiss. Pinch the edges together to seal, ensuring the chocolate is completely hidden. Think of it like wrapping a tiny present.
-
Repeat steps 7-11 until all the dough and/or kisses are used up.
-
Place the dough-covered kisses about 1 inch apart on an ungreased baking sheet. They don’t spread much, so you can fit quite a few on a sheet.
-
When the oven is ready, bake the cookies for 10 to 11 minutes, or until golden brown around the edges. Keep a close eye on them, as they can burn easily. Ovens vary, so start checking for doneness at the 9-minute mark.
-
Remove the baking sheet from the oven and let the cookies cool on the baking sheet for 30 minutes before transferring them to a cooling rack. This allows them to firm up and prevents them from breaking.
-
Once the cookies are completely cool, dust them generously with icing sugar. This adds a touch of sweetness and elegance.
Expert Tips & Tricks
- For a richer flavor, use European-style butter, which has a higher fat content.
- If the dough is too sticky to work with, add a tablespoon of flour at a time until it reaches the desired consistency.
- Don’t overbake the cookies! They should be golden brown, but still slightly soft in the center. They will firm up as they cool.
- To prevent the cookies from sticking to the baking sheet, line it with parchment paper or a silicone baking mat.
- If you want to add a little extra flavor, try incorporating a pinch of cinnamon or nutmeg into the dough.
Serving & Storage Suggestions
These Hidden Kisses are best served at room temperature. Arrange them artfully on a plate or in a decorative tin. They make a wonderful gift for Valentine’s Day, birthdays, or any special occasion.
To store, place the cooled cookies in an airtight container at room temperature. They will stay fresh for up to 3 days. For longer storage, you can freeze them for up to 2 months. Thaw them at room temperature before serving. If you freeze them after dusting with icing sugar, the sugar might dissolve when thawing. In this case, you can sprinkle them with icing sugar again after thawing them completely.
Nutritional Information
| Nutrient | Amount per Serving | % Daily Value |
|---|---|---|
| Calories | 93.3 kcal | N/A |
| Calories from Fat | 48 kcal | 52% |
| Total Fat | 5.3 g | 8% |
| Saturated Fat | 3.4 g | 16% |
| Cholesterol | 9.9 mg | 3% |
| Sodium | 11.7 mg | 0% |
| Total Carbohydrate | 10.3 g | 3% |
| Dietary Fiber | 0.4 g | 1% |
| Sugars | 6.6 g | 26% |
| Protein | 1 g | 2% |
Note: Nutritional information is an estimate and may vary based on specific ingredients and preparation methods.
Variations & Substitutions
- Gluten-Free: Use a gluten-free all-purpose flour blend in place of the regular flour.
- Dairy-Free: Substitute the butter with a plant-based butter alternative. Ensure the chocolate kisses are also dairy-free (some brands offer dark chocolate options that are).
- Different Flavors: Experiment with different types of chocolate kisses, such as caramel-filled or mint-flavored.
- Nutty Kisses: Add 1/4 cup of chopped nuts (such as pecans or walnuts) to the dough for a nutty twist.
- Citrus Zest: Grate the zest of an orange or lemon into the dough for a bright, citrusy flavor.
FAQs (Frequently Asked Questions)
Q: Why is it important to chill the dough?
A: Chilling the dough prevents the cookies from spreading too much during baking, resulting in a more compact and tender cookie. It also helps to develop the flavors.
Q: Can I use a different type of chocolate?
A: Yes, you can substitute the Hershey’s Kisses with other small chocolate pieces, such as chocolate squares or mini chocolate chips.
Q: My dough is too dry and crumbly. What should I do?
A: Add a teaspoon of water at a time until the dough just comes together. Be careful not to add too much water, as this can make the dough sticky.
Q: How do I prevent the cookies from burning?
A: Keep a close eye on the cookies during baking. Start checking for doneness at the 9-minute mark. If they are browning too quickly, lower the oven temperature slightly or cover them loosely with foil.
Q: Can I make the dough ahead of time?
A: Yes, you can make the dough ahead of time and store it in the refrigerator for up to 2 days. Be sure to wrap it tightly in plastic wrap to prevent it from drying out.
Final Thoughts
I hope this recipe for Hidden Kisses brings as much joy to your kitchen as it has to mine. These little cookies are more than just a sweet treat; they’re a reminder of the simple pleasures in life and the love we share with those around us. Don’t be afraid to get creative with the variations and make them your own. And, most importantly, have fun! I’d love to hear your feedback and see your creations. Consider serving these alongside a warm mug of hot chocolate or a scoop of vanilla ice cream for an extra special treat. Happy baking!