
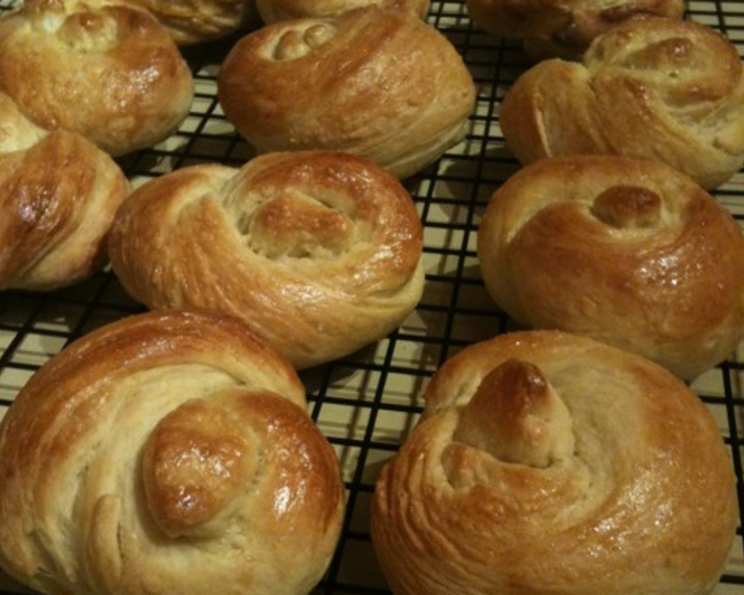
High-Altitude Challah: A Taste of Tradition Above the Clouds
There’s nothing quite like the smell of baking bread to fill a home with warmth and comfort. But living in the mountains presents its own unique baking challenges. I remember one Thanksgiving, years ago, attempting my grandmother’s beloved challah recipe, only to end up with a dense, lifeless brick. The thin mountain air had wreaked havoc on my carefully measured ingredients. That humbling experience ignited a passion for understanding the science of high-altitude baking, and after countless experiments, I’ve perfected a challah that rises beautifully every time, even at 8,000 feet. Now, that golden braided loaf, fragrant with the sweet scent of yeast and honey, is a staple at every holiday table, a testament to perseverance and the enduring power of tradition.
Recipe Overview
- Prep Time: 30 minutes
- Cook Time: 35 minutes
- Total Time: 1 hour 5 minutes (plus rising time)
- Yields: 1 large loaf
- Serves: 16
- Dietary Type: Dairy
Ingredients
- 1/2 cup warm water (110 degrees F)
- 3 tablespoons white sugar, divided
- 2 (1/4 ounce) packages active dry yeast
- 2 eggs
- 2 egg yolks
- 1/3 cup milk (as needed)
- 1/4 cup butter, melted
- 1 1/2 teaspoons salt
- 3 1/2 cups all-purpose flour
- 1 egg
- Poppy seeds or sesame seeds (optional)
Equipment Needed
- Measuring cups and spoons
- Large mixing bowl
- Measuring cup
- Whisk
- Baking sheet
- Wire rack
- Plastic wrap
Instructions
-
In a measuring cup, combine the warm water, 1/2 teaspoon of sugar, and the yeast. Let stand until the yeast dissolves and starts to foam, about 5 to 10 minutes. This step is crucial; if the yeast doesn’t foam, it’s likely expired, and your dough won’t rise properly.
-
In a large bowl, beat 2 eggs. Separate the egg yolks, placing them in a 1/3 cup measuring cup. Add enough milk to the measuring cup to equal 1/3 cup with the yolks in it. This extra yolk richness contributes to the challah’s tender crumb.
-
Pour the egg/milk mixture into the bowl with the beaten eggs. Add the yeast mixture, melted butter, salt, and the remaining sugar (2 tablespoons + 2 1/2 teaspoons).
-
Gradually mix in the flour until the dough is firm enough to handle. At high altitude, dough tends to be drier, so add the flour slowly, and only add as much as needed to form a manageable dough.
-
Knead the dough on a floured surface until the dough doesn’t stick to your hands. You’ll likely use more flour while kneading. The key here is patience. Kneading develops the gluten, which gives the challah its structure. Don’t be afraid to add a little more flour if needed, but avoid adding too much, or your challah will be dense. A good rule of thumb is to knead for 8-10 minutes.
-
Place the dough into an oiled bowl, turning to coat. This prevents the dough from drying out during the rising process. Cover and let rise until doubled in size, about 1 hour. At higher altitudes, this may take slightly less time, so keep an eye on it.
-
Cut the dough into 3 even portions (or 6 for a more intricate braid) and roll into long ropes. For a 6-strand braid, search “braiding a 6-strand challah” on YouTube for visual guides.
-
Press one set of ends together, and braid, tucking the other set of ends under, pressing gently. Securing the ends well prevents the braid from unraveling during baking.
-
Place the loaf on a greased baking sheet and cover loosely with plastic wrap. Set in a warm place to rise. The bread is ready to bake when your finger leaves a slight impression in the dough. This second rise is essential for a light and airy texture.
-
Preheat the oven to 350 degrees F.
-
Whisk the remaining egg in a small bowl. Brush onto the loaf. This egg wash gives the bread a lovely golden color and a delicious crust. You can also sprinkle poppy seeds or sesame seeds on top at this point, if desired.
-
Bake until the loaf is golden brown and sounds hollow when tapped on the bottom, about 35 minutes. Ovens can vary, so check for doneness at around 30 minutes. If the top is browning too quickly, tent it with foil.
-
Remove from the baking sheet and cool on a wire rack. This prevents the bottom from becoming soggy.
-
To make rolls: Follow the steps to prepare the dough and let it rise until doubled in size. Divide the dough into 15-16 even pieces (about 2 oz [weight] each) and craft into the desired shape. Brush with egg wash and bake at 350 degrees F for 20 minutes. Cool completely on a wire rack.
Expert Tips & Tricks
- High-Altitude Adjustment: Due to the lower air pressure, liquids evaporate more quickly at higher altitudes. This recipe is formulated to account for this, but keep an eye on the dough’s consistency. If it seems too dry, add a tablespoon of water at a time until it reaches the right consistency.
- Yeast Proofing: Always proof your yeast! This simple step ensures that your yeast is alive and active. If the yeast doesn’t foam, discard it and start with fresh yeast.
- Temperature Control: Maintaining a consistent temperature during the rising process is crucial. A warm, draft-free environment is ideal.
- Egg Wash Secret: For an extra glossy crust, add a pinch of sugar to the egg wash.
- Salt Quality: Use a good quality sea salt or kosher salt for best flavor.
- Kneading Method: If you have a stand mixer, you can use the dough hook attachment to knead the dough. Start on low speed and gradually increase to medium speed.
Serving & Storage Suggestions
Challah is best served fresh, slightly warm from the oven. It’s delicious on its own, or with butter, jam, or honey. It also makes fantastic French toast or bread pudding. Leftover challah can be stored at room temperature in an airtight bag for up to 3 days. For longer storage, wrap tightly in plastic wrap and freeze for up to 2 months. To reheat, thaw overnight in the refrigerator and then warm in a 350 degree F oven for 5-10 minutes. You can also toast individual slices.
Nutritional Information
| Nutrient | Amount per Serving | % Daily Value |
|---|---|---|
| Calories | 159.9 kcal | N/A |
| Calories from Fat | 43 g | 27% |
| Total Fat | 4.8 g | 7% |
| Saturated Fat | 2.5 g | 12% |
| Cholesterol | 71.6 mg | 23% |
| Sodium | 256.1 mg | 10% |
| Total Carbohydrate | 23.9 g | 7% |
| Dietary Fiber | 0.9 g | 3% |
| Sugars | 2.5 g | N/A |
| Protein | 4.8 g | 9% |
Note: Nutritional information is an estimate and can vary based on specific ingredients and portion sizes.
Variations & Substitutions
- Sweet Challah: Add 1/4 cup of honey to the dough for a sweeter flavor.
- Savory Challah: Add herbs like rosemary or thyme to the dough for a savory twist.
- Whole Wheat Challah: Substitute up to half of the all-purpose flour with whole wheat flour for a nuttier flavor.
- Egg-Free Challah: Substitute the eggs with an equal amount of applesauce or mashed banana. The result will be a slightly denser texture.
- Gluten-Free Challah: Use a gluten-free flour blend specifically designed for bread baking. You may need to adjust the liquid content to achieve the right dough consistency.
FAQs (Frequently Asked Questions)
Q: Why is my challah dense and not rising properly?
A: Several factors can cause this, including expired yeast, not kneading enough, or not allowing the dough to rise long enough. Ensure your yeast is fresh, knead the dough for at least 8-10 minutes, and provide a warm environment for rising.
Q: Can I make the dough ahead of time?
A: Yes! You can prepare the dough through the first rise, then punch it down, wrap it tightly, and refrigerate it for up to 24 hours. Let it come to room temperature before shaping and baking.
Q: How do I know when the challah is done baking?
A: The challah is done when it’s golden brown and sounds hollow when tapped on the bottom. You can also use a thermometer to check the internal temperature; it should be around 200 degrees F.
Q: Can I freeze baked challah?
A: Absolutely! Let the challah cool completely, then wrap it tightly in plastic wrap and freeze for up to 2 months. Thaw overnight in the refrigerator before reheating.
Q: What can I use instead of butter?
A: You can substitute the butter with an equal amount of vegetable oil or melted coconut oil.
Final Thoughts
Now it’s your turn to experience the magic of homemade challah, even if you’re baking above the clouds! This recipe is a labor of love, but the results are well worth the effort. The aroma of freshly baked bread filling your home, the satisfying texture of the braided loaf, and the delighted smiles of your family and friends – these are the moments that make baking so rewarding. Don’t be afraid to experiment with different flavors and toppings, and most importantly, enjoy the process. I encourage you to bake this challah, share it with your loved ones, and create your own lasting memories around this timeless tradition. And please, let me know how it turns out – I love hearing your feedback and seeing your beautiful creations!