
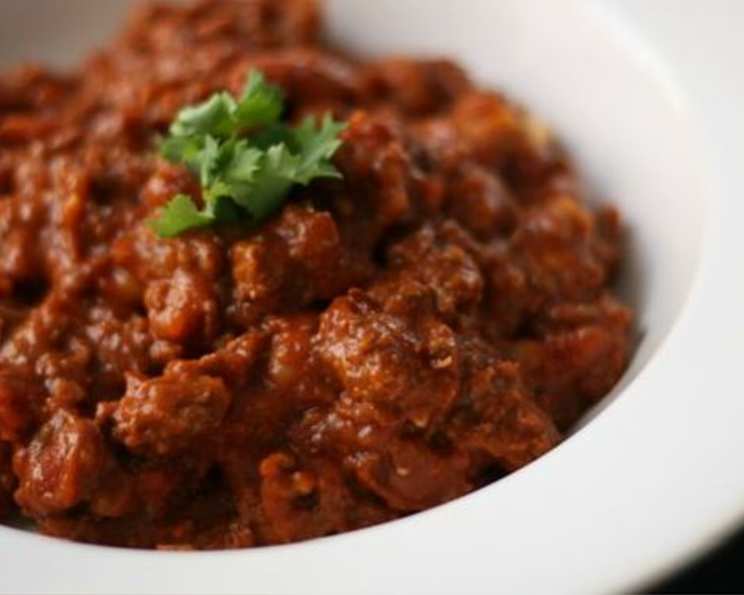
Hillbilly Chili: A Hearty Taste of Home
My earliest memory of chili isn’t from a fancy restaurant or a trendy food truck, but from the back of a dusty pickup truck at a county fair. The air was thick with the scent of woodsmoke and livestock, and a little old lady with a smile as warm as her cast iron pot ladled out steaming bowls of what she simply called “Hillbilly Chili.” It wasn’t about winning awards; it was about feeding folks, sharing stories, and building community. That memory, that simple, honest flavor, is what I strive to capture in every batch of chili I make.
Recipe Overview
- Prep Time: 15 minutes
- Cook Time: 45 minutes
- Total Time: 1 hour
- Servings: 8
- Dietary Type: Not specified; contains meat
Ingredients
- 2 lbs ground beef
- 1 large onion, coarsely chopped
- 1 small green pepper, coarsely chopped
- 3 (15 ounce) cans red kidney beans
- 1 (15 ounce) can tomato sauce
- 2 garlic cloves, minced
- 1/4 teaspoon Italian seasoning
- 3 tablespoons chili powder
- 1 1/2 tablespoons ground cumin
- Salt, to taste
- Pepper, to taste
Equipment Needed
- 3 qt or larger saucepan
- Stirring spoon
- Colander (for draining meat)
Instructions
- In a 3 qt or larger saucepan, combine the ground beef, coarsely chopped onion, and coarsely chopped green pepper.
- Season generously with salt and pepper to taste. Remember, you can always add more later, so start conservatively.
- Over medium heat, break the ground beef up into smaller pieces using a spoon or spatula.
- Cook the mixture, stirring occasionally, until the ground beef is evenly browned. This usually takes about 8-10 minutes. Keep an eye on it to prevent burning.
- Once the ground beef is browned, carefully drain off any excess grease from the pan. This will help prevent the chili from being too oily.
- Add the three cans of red kidney beans (undrained), the can of tomato sauce, the two minced garlic cloves, the 1/4 teaspoon of Italian seasoning, the 3 tablespoons of chili powder, and the 1 1/2 tablespoons of ground cumin to the saucepan.
- Stir well to combine all ingredients, ensuring that the spices are evenly distributed throughout the mixture.
- Bring the chili to a simmer over medium heat.
- Once simmering, reduce the heat to low and cover the saucepan.
- Simmer uncovered for about 30 to 45 minutes, stirring occasionally to prevent sticking and to ensure that the flavors meld together beautifully. The longer it simmers, the richer the flavor will become. After the first 15 minutes, be sure to taste and adjust the seasoning as needed. Some like it saltier, some spicier, some more savory.
- After 45 minutes, give it a final stir and serve hot.
Expert Tips & Tricks
- Browning the Beef: Don’t overcrowd the pan when browning the ground beef. If you have a lot of meat, it’s better to brown it in batches. Overcrowding can lower the pan’s temperature and cause the meat to steam instead of brown, which affects the final flavor.
- Spice It Up: If you like a spicier chili, add a pinch of cayenne pepper or a dash of your favorite hot sauce. Alternatively, finely chop a jalapeño pepper and add it along with the onion and green pepper.
- Enhance the Flavor: A secret ingredient for many chili recipes is a tablespoon of unsweetened cocoa powder or a small square of dark chocolate. It adds depth and richness without making the chili taste like chocolate. Add it during the simmering stage.
- Make-Ahead Magic: Chili is a fantastic make-ahead dish. The flavors actually improve after a day or two in the refrigerator. Prepare the chili in advance and store it in an airtight container in the fridge for up to 3 days. Reheat gently on the stovetop or in the microwave.
- Fixing Common Issues: If your chili is too thick, add a little water or beef broth to thin it out. If it’s too thin, simmer it uncovered for a longer period to allow some of the liquid to evaporate.
Serving & Storage Suggestions
Serve this Hillbilly Chili hot in bowls, garnished with your favorite toppings. Some popular choices include shredded cheddar cheese, sour cream, chopped green onions, and a dollop of salsa. For a heartier meal, serve it with a side of cornbread or crackers.
Leftover chili should be cooled completely before storing it in an airtight container in the refrigerator. It will keep for up to 3-4 days. For longer storage, transfer the cooled chili to freezer-safe containers or bags and freeze for up to 2-3 months. Thaw the chili in the refrigerator overnight before reheating on the stovetop or in the microwave.
Nutritional Information
| Nutrient | Amount per Serving | % Daily Value |
|---|---|---|
| Calories | 482.4 kcal | N/A |
| Calories from Fat | 167 g | 35% |
| Total Fat | 18.6 g | 28% |
| Saturated Fat | 6.9 g | 34% |
| Cholesterol | 77.1 mg | 25% |
| Sodium | 411 mg | 17% |
| Total Carbohydrate | 43.7 g | 14% |
| Dietary Fiber | 14.3 g | 57% |
| Sugars | 4 g | N/A |
| Protein | 36.5 g | 73% |
Variations & Substitutions
- Vegetarian Option: Substitute the ground beef with plant-based ground meat substitute or an additional can of kidney beans and one can of black beans.
- Spicy Southwestern Style: Add one can of diced tomatoes and green chiles (like Rotel) for a spicy kick. You can also add a tablespoon of smoked paprika.
- White Bean Chili: Replace the red kidney beans with great northern beans or cannellini beans for a milder flavor. Add some shredded cooked chicken for protein.
- Hearty Vegetable Boost: Add diced bell peppers (any color), carrots, or celery along with the onion for added nutrients and texture.
- Slow Cooker Version: Brown the beef as directed, then transfer all ingredients to a slow cooker. Cook on low for 6-8 hours or on high for 3-4 hours.
FAQs (Frequently Asked Questions)
Q: Can I use dried beans instead of canned beans?
A: Yes, you can! You’ll need about 1 cup of dried kidney beans. Soak them overnight, then cook them until tender before adding them to the chili.
Q: How can I make this chili spicier?
A: Add a pinch of cayenne pepper, a dash of hot sauce, or finely chop a jalapeño pepper and add it along with the onion and green pepper.
Q: Can I freeze this chili?
A: Absolutely! Chili freezes very well. Allow it to cool completely before transferring it to freezer-safe containers or bags. It will keep for up to 2-3 months.
Q: What’s the best way to reheat chili?
A: You can reheat chili on the stovetop over medium heat, stirring occasionally, or in the microwave. If the chili is too thick, add a little water or beef broth to thin it out.
Q: Can I add other vegetables to this chili?
A: Of course! Diced bell peppers, carrots, celery, or corn are all great additions. Add them along with the onion and green pepper for best results.
Final Thoughts
This Hillbilly Chili is more than just a recipe; it’s a connection to simpler times, to shared meals, and to the comfort of home. I encourage you to try it, adapt it to your own tastes, and share it with the people you love. Whether you’re serving it at a tailgate party, a family gathering, or a cozy night in, this chili is sure to be a crowd-pleaser. Don’t be afraid to experiment with different spices and toppings to create your own signature version. And most importantly, enjoy the process of cooking and sharing this hearty, flavorful dish! Let me know in the comments how your version turns out, and any creative tweaks you’ve made.