
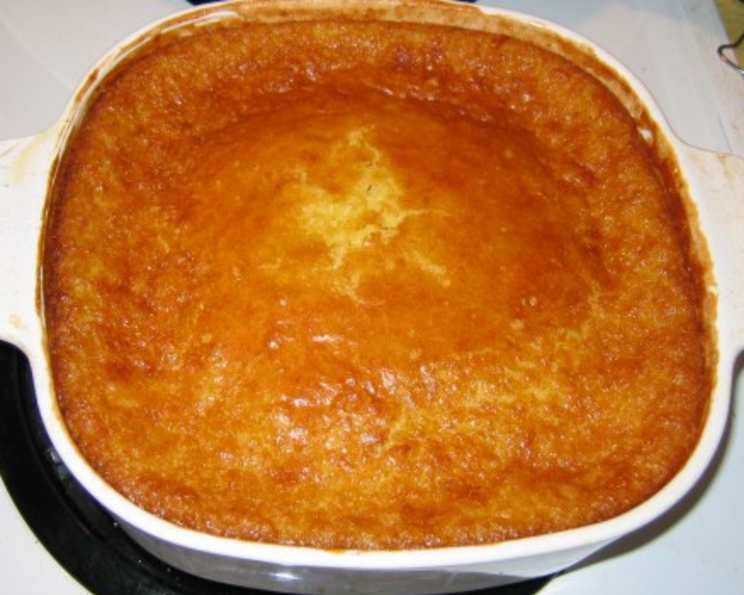
Holiday Corn Pudding: A Family Favorite
The scent of warm corn pudding baking in the oven always takes me back to childhood Christmases at my grandmother’s house. The entire family would gather, and amidst the aroma of roasted turkey and simmering cranberry sauce, that sweet, creamy corn pudding was a beacon of comfort. I remember sneaking spoonfuls straight from the casserole dish while my grandma wasn’t looking – a testament to its irresistible allure. Now, carrying on the tradition, I make it for every holiday, and the empty dish at the end of the meal speaks volumes about its enduring popularity.
Recipe Overview
- Prep Time: 15 minutes
- Cook Time: 1 hour
- Total Time: 1 hour 15 minutes
- Servings: 6-9
- Yield: 1 casserole dish
- Dietary Type: Vegetarian
Ingredients
- 2 (15 ounce) cans creamed corn (Libby’s or Del Monte recommended for consistency)
- 1 (15 ounce) can whole kernel corn, drained
- 6 tablespoons butter, salted (real butter, please!)
- 1/4 cup sugar (can increase to 1/2 cup if a sweeter pudding is desired)
- 6 tablespoons flour
- 4 large eggs
- 1 tablespoon baking powder
Equipment Needed
- 2-quart casserole dish
- Pam or other cooking spray
- Large mixing bowl
- Wooden spoon or spatula
- Small microwave-safe bowl
Instructions
-
Begin by preheating your oven to 350°F (175°C). Ensuring the oven is fully heated will help the corn pudding cook evenly and develop a beautiful golden-brown top.
-
Prepare a 2-quart casserole dish by spraying it generously with Pam or another non-stick cooking spray. This crucial step prevents the corn pudding from sticking to the dish, making serving and cleanup a breeze. Set the prepared dish aside.
-
In a large mixing bowl, combine the two cans of creamed corn and the drained can of whole kernel corn. The combination of textures – the smooth creamed corn and the pops of whole kernels – is what gives this pudding its delightful mouthfeel.
-
Add the 1/4 cup of sugar (or 1/2 cup if you prefer a sweeter pudding) and the 4 large eggs to the corn mixture. Using a wooden spoon, gently beat the ingredients together until well blended. Avoid overmixing at this stage, as it can make the pudding tough.
-
In a separate microwave-safe bowl, melt the 6 tablespoons of salted butter. A microwave is the quickest and easiest way to melt the butter, but you can also melt it in a saucepan over low heat. Be careful not to burn the butter.
-
Pour the melted butter into the corn mixture and stir to combine. The butter adds richness and moisture to the pudding, contributing to its creamy texture.
-
In the same large bowl, add the 6 tablespoons of flour and the 1 tablespoon of baking powder. Gently mix until all the ingredients are fully incorporated, ensuring there are no lumps of flour remaining. The baking powder helps the pudding rise slightly and become light and airy.
-
Pour the batter into the prepared 2-quart casserole dish. Spread the mixture evenly to ensure uniform cooking.
-
Bake in the preheated oven for approximately 1 hour, or until the top of the corn pudding is a nice golden color. To check for doneness, carefully open the oven and, using a pot holder, gently jiggle the casserole dish. If the pudding jiggles significantly, it needs a few more minutes in the oven. The center should be set, not liquid. However, ovens can vary, so keep a close eye on it during the last 15 minutes of baking to prevent over-browning.
-
Remove from the oven and let cool slightly before serving. This allows the pudding to set further and prevents it from being too hot to handle.
Expert Tips & Tricks
- For an even richer flavor, try using browned butter. Brown the butter in a saucepan over medium heat until it turns a nutty brown color, then let it cool slightly before adding it to the corn mixture. Be careful not to burn the butter.
- If you’re short on time, you can prepare the corn pudding mixture ahead of time and store it in the refrigerator for up to 24 hours before baking. Just be sure to give it a good stir before pouring it into the casserole dish.
- To prevent the top from browning too quickly, tent the casserole dish with aluminum foil during the last 15-20 minutes of baking.
- For a savory twist, add a pinch of cayenne pepper or a dash of hot sauce to the corn mixture.
- If you don’t have salted butter, you can use unsalted butter and add a pinch of salt to the corn mixture.
Serving & Storage Suggestions
This Holiday Corn Pudding is best served warm, making it a perfect complement to roasted meats, poultry, or even vegetarian entrees. Garnish with a sprig of fresh parsley or a sprinkle of paprika for added visual appeal.
Leftovers can be stored in an airtight container in the refrigerator for up to 3 days. To reheat, microwave individual portions or reheat the entire casserole dish in a preheated oven at 350°F (175°C) until warmed through. You can also freeze leftovers for up to 2 months. Thaw in the refrigerator overnight before reheating.
Nutritional Information
| Nutrient | Amount per Serving | % Daily Value |
|---|---|---|
| Calories | 383 kcal | N/A |
| Calories from Fat | 146g | 38% |
| Total Fat | 16.3 g | 25% |
| Saturated Fat | 8.6 g | 42% |
| Cholesterol | 171.5 mg | 57% |
| Sodium | 986.3 mg | 41% |
| Total Carbohydrate | 56.7 g | 18% |
| Dietary Fiber | 3.5 g | 14% |
| Sugars | 15.3 g | 61% |
| Protein | 9.7 g | 19% |
Note: Nutritional information is an estimate and may vary based on specific ingredients and portion sizes.
Variations & Substitutions
- Dairy-Free: Substitute the butter with a dairy-free butter alternative.
- Gluten-Free: While the recipe already uses a relatively small amount of flour, ensure you’re using a certified gluten-free flour blend to accommodate gluten sensitivities.
- Spicy Corn Pudding: Add diced jalapeños or a pinch of cayenne pepper for a kick.
- Cheesy Corn Pudding: Stir in shredded cheddar cheese or Monterey Jack cheese before baking.
- Herbed Corn Pudding: Add chopped fresh herbs such as chives, thyme, or rosemary to the corn mixture for a more aromatic flavor.
FAQs (Frequently Asked Questions)
Q: Can I use frozen corn instead of canned corn?
A: While canned corn is recommended for the best texture, you can use frozen corn. Be sure to thaw it completely and drain any excess liquid before adding it to the recipe.
Q: Can I make this corn pudding in a smaller or larger dish?
A: Yes, you can adjust the recipe to fit a different size dish. Keep in mind that the baking time may need to be adjusted accordingly. A larger, shallower dish may require less baking time, while a smaller, deeper dish may require more.
Q: How do I prevent the corn pudding from getting too brown on top?
A: If the top of the corn pudding is browning too quickly, tent the casserole dish with aluminum foil during the last 15-20 minutes of baking.
Q: Can I add other vegetables to this corn pudding?
A: Absolutely! Diced bell peppers, onions, or even cooked bacon can be added to the corn mixture for extra flavor and texture.
Q: Is it necessary to use salted butter?
A: Salted butter is preferred for its flavor, but you can use unsalted butter and add a pinch of salt to the corn mixture if needed.
Final Thoughts
This Holiday Corn Pudding is more than just a side dish; it’s a warm embrace, a nostalgic reminder of cherished memories, and a guaranteed crowd-pleaser. I urge you to try this recipe and create your own holiday traditions. Feel free to experiment with variations and substitutions to make it your own. Serve it alongside your favorite holiday dishes and watch as it disappears from the table. And, most importantly, don’t forget to share your feedback and experiences – I’d love to hear how it turns out! Happy cooking!