
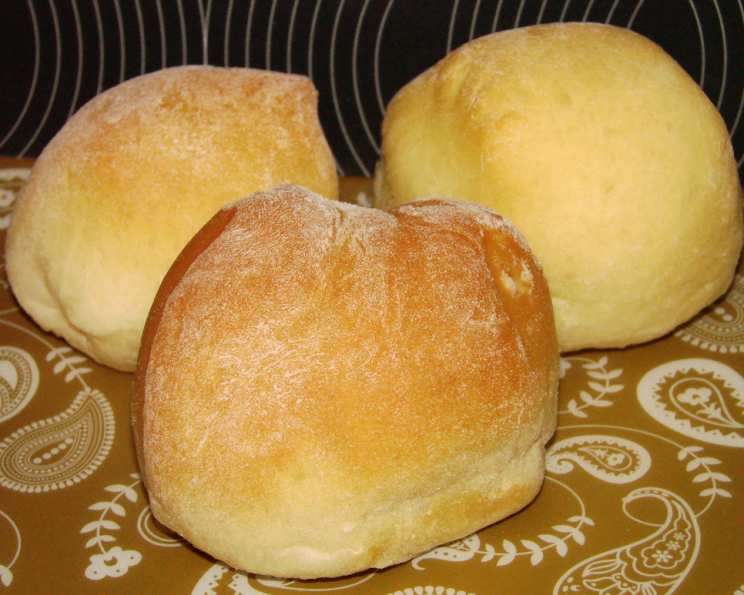
Holiday Dinner Rolls 2016 – WALKER STYLE
The aroma of baking bread is, for me, inextricably linked to the holidays. I can still remember, as a child, the sheer anticipation as my grandmother bustled about her kitchen, flour dusting her apron, humming carols as she prepared her famous dinner rolls. The warmth radiating from the oven, the yeasty scent mingling with the crisp air of a December afternoon – it was pure magic. These Walker-style rolls capture that same comforting essence, promising a taste of home and hearth with every bite.
Recipe Overview
- Prep Time: 45 minutes
- Cook Time: 12 minutes
- Total Time: 2 hours 12 minutes
- Servings: 24
- Yield: 2 dozen rolls
- Dietary Type: Vegetarian
Ingredients
- 4 ½ cups all-purpose flour
- 4 teaspoons yeast
- ⅓ cup sugar
- 1 teaspoon salt
- 3 eggs
- ¼ cup butter, softened
- 1 cup warm water
- Melted butter, for dipping and brushing
Equipment Needed
- Mixing bowl
- Dough hook (for stand mixer, optional)
- Floured surface
- Large round cookie cutter or drinking glass
- Lightly greased cookie sheet
- Wire rack
Instructions
-
Begin by activating the yeast. In a small bowl, combine ½ cup of the warm water with the yeast. Sprinkle a little bit of the sugar over the top – this provides nourishment to help the yeast get to work. Let it sit for about 5-10 minutes, until it becomes foamy. This indicates that the yeast is alive and ready to leaven your dough.
-
In a large mixing bowl (or the bowl of your stand mixer), combine the remaining wet ingredients: the remaining ½ cup warm water, the softened butter, and the eggs. Whisk them together until well combined.
-
Gradually add the flour, one cup at a time, to the wet ingredients. Simultaneously add the softened yeast mixture. If using a stand mixer, use the dough hook attachment. Continue mixing until a soft dough forms. The dough should be slightly sticky, just barely clinging to your fingers. Avoid adding too much flour, as this can result in dry, tough rolls.
-
Remove the dough from the bowl and place it onto a lightly floured surface. Gently roll out the dough to about ½ inch thickness.
-
Using a large, round cookie cutter or a drinking glass, cut out circles of dough.
-
Prepare a bowl of melted butter. Dip each dough circle into the melted butter, ensuring both sides are coated.
-
Fold the buttered dough circle in half, creating a semi-circle shape.
-
Place the folded dough pieces onto a lightly greased cookie sheet, positioning them close enough so they are just touching each other. This encourages them to rise upwards rather than outwards, creating a soft, pull-apart texture.
-
Cover the cookie sheet with a clean kitchen towel and let the rolls rise in a warm place until doubled in size, about 1 hour.
-
Preheat your oven to 350 degrees Fahrenheit (175 degrees Celsius).
-
Once the rolls have doubled in size, bake them in the preheated oven for 12 minutes, or until they are golden brown on top. Keep a close eye on them during the last few minutes of baking to prevent burning.
-
Remove the rolls from the oven and immediately brush the tops with more melted butter. This adds extra richness and a beautiful shine.
-
Cool the rolls on a wire rack, if you can resist eating them straight away!
Expert Tips & Tricks
- Yeast Activation: Ensure your water is warm, not hot. Hot water will kill the yeast. Aim for a temperature between 105-115°F (40-46°C).
- Dough Consistency: The stickiness of the dough is key. If it’s too dry, add a tablespoon of water at a time until it reaches the desired consistency. Conversely, if it’s overly sticky, add flour sparingly.
- Rising Time: The rising time may vary depending on the temperature of your environment. A warm, draft-free place is ideal. You can also proof the dough in a slightly warmed oven (turned off, of course!).
- Butter Quality: Using high-quality butter will significantly enhance the flavor of these rolls. Splurge on a good brand!
- Oven Calibration: Every oven is different. Keep a close watch during baking and adjust the time accordingly. If the rolls are browning too quickly, tent them with foil.
Serving & Storage Suggestions
Serve these Holiday Dinner Rolls warm, straight from the oven for the best experience. They are perfect alongside a holiday roast, a comforting bowl of soup, or simply enjoyed with a pat of butter. Leftover rolls can be stored in an airtight container at room temperature for up to 2 days, in the refrigerator for up to 5 days, or in the freezer for up to 3 months. To reheat, wrap them in foil and warm in a 350°F (175°C) oven for about 10 minutes, or until heated through. You can also microwave them for a few seconds, but be careful not to overdo it, as they can become tough.
Nutritional Information
| Nutrient | Amount per Serving | % Daily Value |
|---|---|---|
| Calories | 124 kcal | N/A |
| Calories from Fat | 25 g | 20% |
| Total Fat | 2.8 g | 4% |
| Saturated Fat | 1.4 g | 7% |
| Cholesterol | 28.3 mg | 9% |
| Sodium | 123.8 mg | 5% |
| Total Carbohydrate | 21 g | 6% |
| Dietary Fiber | 0.8 g | 3% |
| Sugars | 2.9 g | 11% |
| Protein | 3.5 g | 7% |
Variations & Substitutions
- Whole Wheat Rolls: Substitute up to half of the all-purpose flour with whole wheat flour for a nuttier flavor and added fiber.
- Herb-Infused Rolls: Add 1-2 tablespoons of chopped fresh herbs, such as rosemary, thyme, or sage, to the dough for an aromatic twist.
- Garlic Butter: Infuse the melted butter with minced garlic for a savory, garlicky flavor.
- Sweet Rolls: Increase the sugar to ½ cup and add a teaspoon of vanilla extract for a sweeter roll.
FAQs (Frequently Asked Questions)
Q: Can I make the dough ahead of time?
A: Yes, you can! After the initial mixing, place the dough in a lightly greased bowl, cover it tightly, and refrigerate for up to 24 hours. Allow the dough to come to room temperature for about an hour before rolling it out and baking.
Q: My rolls didn’t rise properly. What went wrong?
A: Possible culprits include using expired yeast, water that was too hot or too cold, or a rising environment that was too cold. Make sure your yeast is fresh, your water is at the correct temperature, and provide a warm, draft-free place for rising.
Q: Can I freeze the baked rolls?
A: Absolutely! Allow the rolls to cool completely, then wrap them individually in plastic wrap and place them in a freezer bag. They can be frozen for up to 3 months. Thaw them overnight in the refrigerator and reheat as directed above.
Q: My rolls are browning too quickly on top. What should I do?
A: Tent the rolls with aluminum foil during the last few minutes of baking to prevent them from browning too much.
Q: Can I use milk instead of water?
A: Yes, you can substitute milk for water for a richer flavor and softer texture. Just make sure to warm the milk slightly before adding it to the yeast.
Final Thoughts
These Walker-style Holiday Dinner Rolls are more than just a side dish; they are a warm embrace, a symbol of togetherness, and a taste of tradition. Gather your loved ones, preheat your oven, and embark on this delightful baking adventure. The aroma alone will fill your home with holiday cheer, and the soft, buttery rolls will undoubtedly become a cherished part of your family’s celebrations for years to come. Don’t hesitate to experiment with variations and make them your own. And most importantly, share the warmth and joy that these rolls bring with everyone you cherish. Happy baking!