
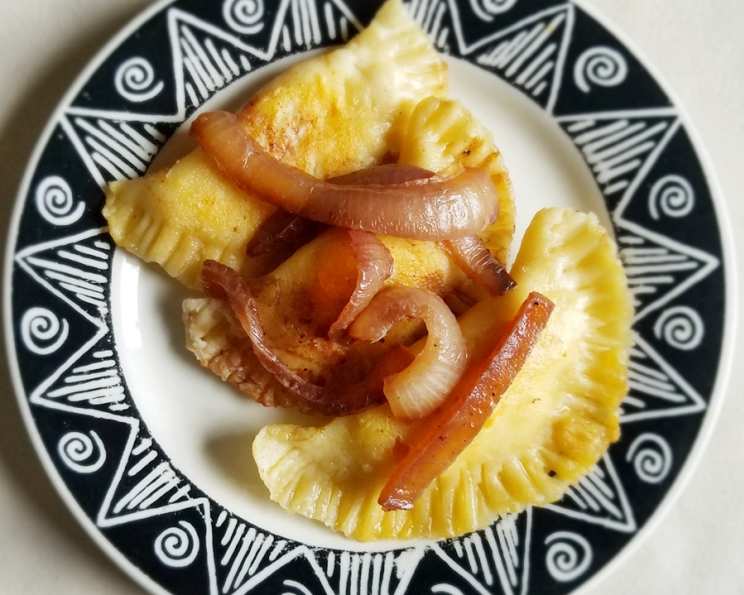
Homemade Pierogies with Caramelized Onion: A Taste of Tradition
The scent of browned butter and sweet onions always transports me back to my childhood kitchen. My Babcia (grandmother in Polish), her hands dusted with flour, would stand at her counter, tirelessly rolling out dough and assembling these delightful dumplings. The aroma alone was enough to make my mouth water, and the first bite was always pure comfort – a warm hug in food form. This recipe is a direct line to those cherished memories, and I’m so excited to share it with you.
Recipe Overview
- Prep Time: 1 hour
- Cook Time: 1 hour
- Total Time: 2 hours
- Yields: 30 Pierogies
- Dietary Type: Vegetarian
Ingredients
- 4 cups all-purpose flour
- 1 teaspoon salt
- ½ teaspoon baking powder
- ¼ cup olive oil
- 1 cup warm water
- 1 beaten egg
- 1 (32 ounce) jar sauerkraut, well drained
- 2 large sweet onions, peeled and cut into half rings
- ¾ cup butter, divided (½ cup to brown the pierogies and ¼ cup to brown the onion)
- ⅛ cup dry red wine
Equipment Needed
- Large mixing bowl
- Fork or pastry blender
- Clean kitchen towel
- Rolling pin
- 3-inch cutter or glass
- Medium stockpot
- Slotted spoon
- Paper towels
- Large skillet
- Cookie Sheet (for freezing, optional)
Instructions
-
In a large mixing bowl, combine the flour, salt, and baking powder. Make sure everything is evenly distributed.
-
Pour in the olive oil, warm water, and beaten egg. The water should be comfortably warm to the touch, not hot.
-
Mix well with a fork or pastry blender until the dough starts to come together. Then, turn it out onto a lightly floured surface.
-
Knead the dough for about 5 minutes, or until it becomes smooth and elastic. This develops the gluten and ensures a tender pierogi.
-
Form the dough into a ball. Cover it with a clean towel and let it rest for 10 minutes. This allows the gluten to relax, making it easier to roll out.
-
Divide the dough into thirds. This makes it more manageable to work with.
-
On a lightly floured surface, roll out one portion of the dough to approximately ⅛ inch thickness. The thinner the dough, the more delicate the pierogi will be. Be careful not to make it too thin, or it will tear when you fill it.
-
Using a 3-inch cutter or glass, cut out circles from the rolled dough. Gather the scraps, re-roll them, and cut out more circles until you’ve used all the dough.
-
Place a tablespoon of well-drained sauerkraut in the center of each circle. Don’t overfill, or the pierogies will be difficult to seal.
-
Fold the dough over to form a half-moon shape. Pinch the edges firmly to seal. For extra security and a decorative touch, press the tines of a fork dipped in flour along the sealed edge. This also prevents the filling from escaping during cooking.
-
Fill a medium stockpot with water and add 1 tablespoon of salt. Bring the water to a rolling boil.
-
Gently drop the pierogies into the boiling water, working in batches of 5 to 6 at a time to avoid overcrowding the pot.
-
Let the pierogies boil for 2 to 3 minutes. They are done when they float to the surface.
-
Remove the cooked pierogies with a slotted spoon and let them drain on paper towels. This prevents them from becoming soggy.
-
Freezing Tip (Optional): If you plan to freeze the pierogies, place them on a cookie sheet in a single layer and freeze for one hour. This prevents them from sticking together in the freezer. Once frozen, remove them from the cookie sheet and place them in freezer containers or gallon freezer bags. They will keep for 6 to 9 months. Thaw them for at least 30 minutes before browning.
-
In a large skillet over medium heat, melt ½ cup of butter.
-
Add the pierogies to the melted butter and brown them on both sides, turning carefully to ensure even cooking. Keep warm while you prepare the onions.
-
In the same skillet, melt the remaining ¼ cup of butter.
-
Add the sliced onions and sauté, stirring occasionally, until they are browned and soft. This process of caramelizing the onions brings out their natural sweetness and adds a wonderful depth of flavor to the dish.
-
Add the ⅛ cup of red wine to the skillet to deglaze the pan, scraping up any browned bits from the bottom. This adds another layer of flavor to the caramelized onions.
-
Serve the browned pierogies topped generously with the caramelized onions.
Expert Tips & Tricks
- Dough Consistency: The dough should be smooth and elastic, but not sticky. If it’s too sticky, add a little more flour, one tablespoon at a time.
- Sauerkraut Flavor: For a less intense sauerkraut flavor, rinse the sauerkraut before draining it. This removes some of the acidity.
- Sealing Pierogies: Make sure the edges of the pierogies are sealed tightly to prevent the filling from leaking out during boiling.
- Browning Pierogies: Don’t overcrowd the skillet when browning the pierogies. Work in batches to ensure even browning.
- Flavor Boost: For extra flavor, consider adding a pinch of caraway seeds to the sauerkraut filling.
Serving & Storage Suggestions
Serve these homemade pierogies hot, topped generously with the caramelized onions. A dollop of sour cream or a sprinkle of fresh dill can also be added for extra flavor and presentation.
Leftover pierogies can be stored in an airtight container in the refrigerator for up to 3 days. To reheat, pan-fry them in butter until warmed through and slightly crispy. You can also reheat them in the microwave, but they will be less crispy.
Frozen pierogies should be thawed in the refrigerator overnight before cooking.
Nutritional Information
| Nutrient | Amount per Serving | % Daily Value |
|---|---|---|
| Calories | 275 kcal | 14% |
| Total Fat | 12g | 18% |
| Saturated Fat | 7g | 35% |
| Cholesterol | 35mg | 12% |
| Sodium | 450mg | 19% |
| Total Carbohydrate | 35g | 12% |
| Dietary Fiber | 3g | 10% |
| Sugars | 5g | |
| Protein | 6g | 12% |
Variations & Substitutions
- Potato and Cheese Filling: Substitute the sauerkraut with mashed potatoes and cheese for a classic variation.
- Sweet Pierogies: Fill the pierogies with fruit preserves, such as blueberry or strawberry, for a sweet treat.
- Gluten-Free Pierogies: Use a gluten-free flour blend to make the dough.
- Vegan Pierogies: Omit the egg from the dough and use a vegan butter substitute.
FAQs (Frequently Asked Questions)
Q: Can I use pre-made sauerkraut?
A: Yes, you can use pre-made sauerkraut, but make sure to drain it very well to prevent the pierogies from becoming soggy.
Q: Can I make the dough ahead of time?
A: Absolutely! The dough can be made a day in advance and stored in the refrigerator, wrapped tightly in plastic wrap. Let it come to room temperature before rolling it out.
Q: How do I prevent the pierogies from sticking together while boiling?
A: Boiling the pierogies in batches and ensuring the water is at a rolling boil will help prevent them from sticking together.
Q: Can I bake the pierogies instead of boiling and browning them?
A: While not traditional, you can bake the pierogies at 375°F (190°C) for about 20-25 minutes, or until golden brown. Brush them with melted butter before baking.
Q: What can I serve with these pierogies?
A: These pierogies are delicious on their own, but they also pair well with sour cream, applesauce, or a side salad.
Final Thoughts
This recipe for homemade pierogies with caramelized onions is more than just a meal; it’s a connection to the past, a celebration of tradition, and a testament to the power of home cooking. I encourage you to try it, experiment with different fillings, and make it your own. I’m sure these pierogies will become a treasured recipe in your family, just as they are in mine. Don’t hesitate to share your feedback and variations!