
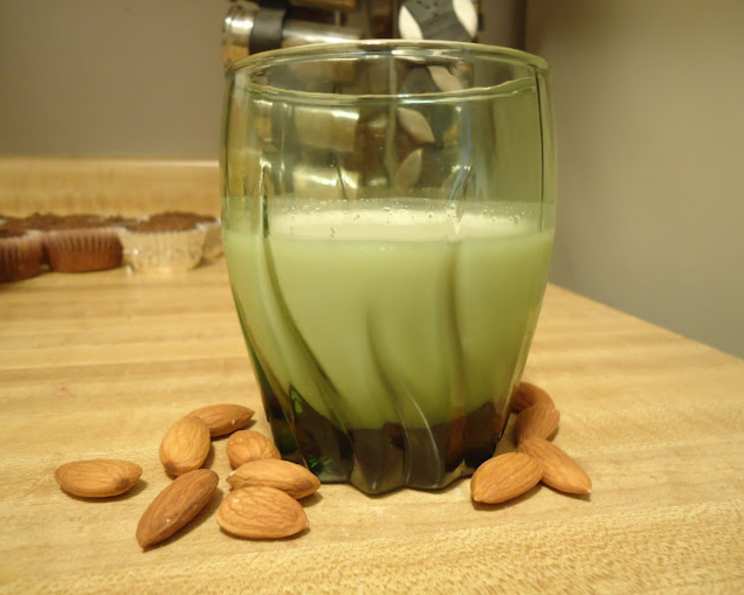
The Magic of Almonds: Homemade Milk & Flour from Scratch
The first time I made almond milk, it was a revelation. Growing up, store-bought almond milk always tasted a little… manufactured. But the homemade version? It was creamy, subtly sweet, and tasted purely of almonds. The best part was what came after. Not wanting to waste a single bit, I transformed the leftover almond pulp into flour, and the possibilities suddenly felt endless. From delicate macarons to wholesome muffins, that almond flour opened up a whole new world of baking. This is a recipe I always keep coming back to, and I’m excited to share it with you.
Recipe Overview
- Prep Time: 10 minutes
- Soak Time: 6-8 hours
- Cook Time (for flour): 2 hours
- Total Time: 8 hours 10 minutes
- Yield: 1 1/2 quarts milk & ~2 cups flour
- Dietary Type: Vegan, Gluten-Free, Dairy-Free
Ingredients
- 3 cups raw natural almonds (unroasted, unsalted)
- Water
- 1 tablespoon artificial sweetener (such as honey, maple syrup, or agave) – optional
Equipment Needed
- Blender
- Large bowl or container for soaking
- Cheesecloth or nut milk bag
- Large pitcher or jar
- Baking sheet
- Fork
- Container with tight-fitting lid for storing flour
Instructions
-
Soak the Almonds: Place the 3 cups of raw natural almonds in a large bowl or container. Cover them completely with water – ensure there’s about an inch or two of water above the almonds, as they will expand. Let them soak for 6-8 hours. This soaking process is essential; it softens the almonds, making them easier to blend and also helps to remove phytic acid, an “anti-nutrient” found in the brown skin.
-
Drain and Rinse: After soaking, drain the almonds thoroughly and rinse them under cold, running water. Rinsing removes any remaining impurities and ensures a clean, fresh flavor for your almond milk.
-
Blend the Almonds: In a blender, combine 1 cup of the soaked almonds with 3 cups of fresh water. Blend on high speed for approximately 30 seconds. If your blender is smaller, you may need to do this in batches. Remember the ratio: for every 1 cup of almonds, use 3 cups of water.
-
Strain the Mixture: Place a large cheesecloth or nut milk bag over a pitcher or jar. Carefully pour the blended almond mixture into the cheesecloth. Gather the edges of the cheesecloth and gently squeeze out as much milk as possible from the almond pulp. The more you squeeze, the more milk you’ll extract. Don’t throw away the pulp! This is what we’ll use to make almond flour.
-
Sweeten (Optional): If you prefer sweetened almond milk, pour the strained milk back into the blender. Add 1 tablespoon of your chosen sweetener (honey, maple syrup, or agave work well) and blend on high for another 15 seconds to incorporate the sweetener evenly. Taste and adjust the sweetness as desired.
-
Refrigerate: Pour the almond milk into a clean pitcher or jar and refrigerate. Keep in mind that homemade almond milk will naturally separate as it sits. This is perfectly normal – just stir it well before use.
-
Prepare the Almond Flour: Preheat your oven to 200 degrees F (93 degrees C). Spread the saved almond pulp evenly onto an ungreased baking sheet. It’s important to spread it in a thin layer to ensure even drying.
-
Dry the Pulp: Place the baking sheet with the almond pulp in the preheated oven and dry for approximately 2 hours, or until the pulp is completely dry. To promote even drying, use a fork to sift or stir the pulp every 30 minutes. The goal is to dry the pulp, not bake it, so keep a close eye on it.
-
Grind into Flour: Once the almond pulp is thoroughly dry, scoop it into the blender. Grind for about 30 seconds, or until it reaches a fine, flour-like consistency. You may need to scrape down the sides of the blender a few times to ensure everything is evenly ground.
-
Store the Flour: Dump your freshly made almond flour into a container with a tight-fitting lid. Store it at room temperature. When stored properly, almond flour can last for at least 2 months.
Expert Tips & Tricks
- Soaking is Key: Don’t skip the soaking step! It not only softens the almonds but also improves their digestibility and removes compounds that can inhibit nutrient absorption.
- Creamier Milk: For extra creamy almond milk, try adding a tablespoon of coconut oil or cashew nuts to the blender along with the almonds and water.
- Flavor Variations: Experiment with different flavorings. Add a pinch of vanilla extract, a dash of cinnamon, or a few drops of almond extract to the blender for a unique twist.
- Pulp Drying Time: The drying time for the almond pulp can vary depending on your oven and the initial moisture content of the pulp. Keep a close eye on it and adjust the time as needed.
- Fine Flour: For the finest almond flour, you can sift the ground flour through a fine-mesh sieve to remove any larger particles.
Serving & Storage Suggestions
Almond Milk: Serve your homemade almond milk chilled. It’s delicious on its own, in smoothies, over cereal, or in coffee. Store the almond milk in the refrigerator for up to 3-5 days. Remember to stir it well before each use.
Almond Flour: Use your homemade almond flour in a variety of baked goods, such as muffins, cakes, cookies, and bread. It’s a great gluten-free alternative to wheat flour. Store the almond flour in an airtight container at room temperature for up to 2 months, or in the refrigerator for longer storage.
Nutritional Information
Note: Nutritional information is an estimate and may vary based on specific ingredients and serving sizes.
| Nutrient | Amount per Serving (1 cup milk / ¼ cup flour) | % Daily Value |
|---|---|---|
| Calories | 80 kcal / 120 kcal | 4% / 6% |
| Total Fat | 6g / 10g | 8% / 15% |
| Saturated Fat | 0.5g / 1g | 3% / 5% |
| Cholesterol | 0mg / 0mg | 0% / 0% |
| Sodium | 0mg / 0mg | 0% / 0% |
| Total Carbohydrate | 3g / 5g | 1% / 2% |
| Dietary Fiber | 1g / 2g | 4% / 8% |
| Sugars | 1g / 1g | 2% / 2% |
| Protein | 3g / 4g | 6% / 8% |
Variations & Substitutions
- Sweeteners: Experiment with different sweeteners like dates, stevia, or erythritol, adjusting the amount to your preference.
- Flavored Almond Milk: Add a teaspoon of vanilla extract, a pinch of cinnamon, or a tablespoon of cocoa powder to the blender for flavored almond milk.
- Spiced Almond Flour: Mix the almond flour with spices like cinnamon, nutmeg, or cardamom for flavorful baked goods.
- Nut Blend: Combine almonds with other nuts like cashews or macadamia nuts for a richer, more complex flavor.
- Dairy-Free Creamer: Use the almond milk as a dairy-free creamer for coffee or tea.
FAQs (Frequently Asked Questions)
Q: Why do I need to soak the almonds?
A: Soaking softens the almonds, making them easier to blend. It also helps to remove phytic acid, which can inhibit nutrient absorption.
Q: How long does homemade almond milk last?
A: Homemade almond milk typically lasts for 3-5 days in the refrigerator.
Q: Can I use roasted almonds?
A: It’s best to use raw, unroasted almonds for the best flavor and texture. Roasted almonds can result in a slightly bitter taste.
Q: My almond milk separated. Is it still good?
A: Yes, separation is perfectly normal for homemade almond milk. Just stir it well before using.
Q: What can I use almond flour for?
A: Almond flour can be used in a variety of baked goods, such as muffins, cakes, cookies, bread, and pancakes. It’s a great gluten-free alternative to wheat flour.
Final Thoughts
Making your own almond milk and almond flour is a rewarding experience. Not only is it healthier and more economical than buying store-bought versions, but it also allows you to customize the flavors and textures to your liking. Don’t be intimidated – the process is surprisingly simple, and the results are well worth the effort. Give it a try, and I bet you’ll be amazed at how easy it is to create these pantry staples from scratch! I can’t wait to hear about your creations!