
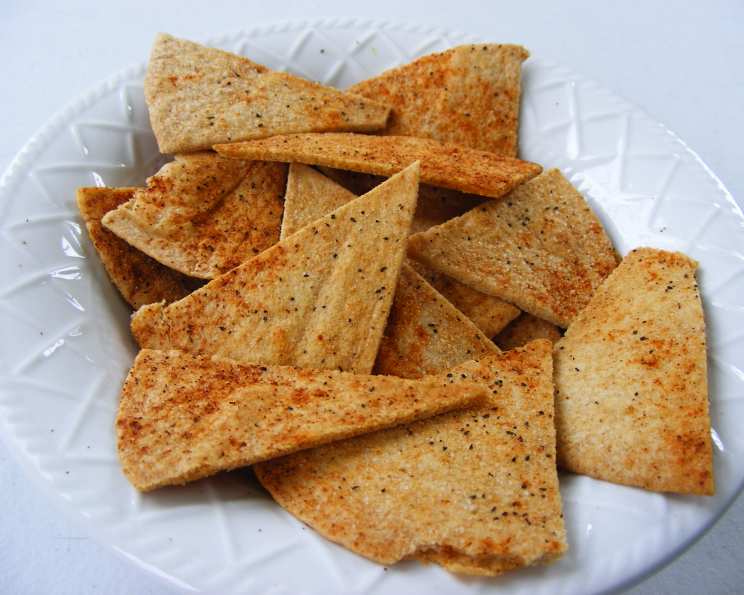
The Irresistible Crunch of Homemade Baked Chips
The first time I tasted truly incredible homemade chips, I was a struggling culinary student, perpetually short on cash and time. My roommate, bless her resourceful soul, whipped up a batch of tortilla chips from leftover tortillas and a spritz of oil. The smell alone, toasting in the oven with a sprinkle of chili powder, was intoxicating. But the taste? Forget store-bought. These were perfectly crisp, subtly savory, and completely addictive. From that moment on, I knew the secret to delicious snacking was often simpler than I imagined.
Recipe Overview
- Prep Time: 5 minutes
- Cook Time: 6 minutes
- Total Time: 11 minutes
- Yields: 80-96 chips
- Dietary Type: Vegetarian
Ingredients
- 10 -12 flour tortillas
- Vegetable oil (or spray)
- Spices (salt, seasoned salt, chili powder, cinnamon sugar, etc.)
Equipment Needed
- Baking Sheet
- Pastry Brush or Oil Sprayer
- Pizza Cutter or Knife
Instructions
-
Preheat your oven to 325°F (160°C). This lower temperature is key for achieving a crispy chip without burning.
-
Cut the tortillas into wedges. The easiest way to do this is to stack a few tortillas on top of each other (3-4 at a time works well). Then, using a pizza cutter or a sharp knife, cut the stack in half, then in half again, and then one more time through each quarter, creating 8 wedges per tortilla. For smaller chips, cut each tortilla into 10 or even 12 wedges.
-
Prepare the baking sheet. Lightly brush or spray your baking sheet with vegetable oil. This prevents the chips from sticking and helps them brown evenly. Make sure to use a baking sheet with no sides for the best heat circulation.
-
Arrange the tortilla wedges on the baking sheet in a single layer. Avoid overcrowding the pan, as this will cause the chips to steam instead of bake, resulting in a soggy texture. If necessary, bake in multiple batches.
-
Lightly brush or spray the tortilla wedges with vegetable oil. This step is crucial for achieving that golden-brown color and crispy texture. Be careful not to oversaturate the chips with oil; a light coating is all you need.
-
Sprinkle with your desired seasonings. Get creative here! For savory chips, try salt, seasoned salt, chili powder, garlic powder, onion powder, or a combination of your favorite spices. For sweet chips, cinnamon sugar is a classic and delicious choice. Consider adding a pinch of nutmeg or cardamom for a more complex flavor.
-
Bake at 325°F (160°C) until crisp and lightly browned, approximately 10 minutes. Keep a close eye on the chips, as baking times may vary depending on your oven. The chips are done when they are golden brown and firm to the touch. If some chips are browning faster than others, you can remove them from the oven and continue baking the remaining chips.
-
Remove from the oven and let cool slightly on the baking sheet. The chips will continue to crisp up as they cool. Once they are cool enough to handle, transfer them to a wire rack to cool completely. This will prevent them from becoming soggy.
Expert Tips & Tricks
- Don’t be afraid to experiment with different types of tortillas. Whole wheat tortillas, corn tortillas, or even flavored tortillas (such as spinach or sun-dried tomato) can be used to create unique and delicious chips.
- For extra crispy chips, try baking them on a wire rack placed on top of the baking sheet. This allows for better air circulation and helps the chips crisp up more evenly.
- If you want to make a large batch of chips, you can prepare the tortillas and seasonings ahead of time and store them in an airtight container until you’re ready to bake them.
- To revive slightly softened chips, simply pop them back in the oven for a few minutes until they crisp up again.
- Consider using flavored oils for a more intense flavor. Chili-infused oil or garlic-infused oil can add a delicious depth of flavor to your chips.
- A little lemon or lime zest can really brighten up the flavor of your chips, especially when paired with chili powder or other savory spices.
- For perfectly even seasoning, use a fine-mesh sieve to sprinkle the spices over the chips. This will prevent clumping and ensure that each chip is evenly coated.
- If you’re using corn tortillas, you may need to bake them for a slightly longer time, as they tend to be thicker than flour tortillas.
Serving & Storage Suggestions
Serve your homemade baked chips immediately for the best taste and texture. They are fantastic with salsa, guacamole, hummus, or any of your favorite dips. You can also use them to make nachos, top salads, or simply enjoy them as a snack on their own.
Store leftover chips in an airtight container at room temperature. They will stay fresh for up to 3-4 days. If they lose their crispness, you can re-crisp them in a low oven for a few minutes. Avoid storing them in the refrigerator, as this will make them soggy.
Nutritional Information
(Estimated nutritional information per serving, based on 1/10 of the recipe using flour tortillas and vegetable oil spray, excluding added spices)
| Nutrient | Amount per Serving | % Daily Value |
|---|---|---|
| Calories | 80 kcal | 4% |
| Total Fat | 3g | 4% |
| Saturated Fat | 0.5g | 3% |
| Cholesterol | 0mg | 0% |
| Sodium | 100mg | 4% |
| Total Carbohydrate | 12g | 4% |
| Dietary Fiber | 1g | 4% |
| Sugars | 1g | 2% |
| Protein | 2g | 4% |
Variations & Substitutions
- Pita Chips: Substitute pita bread for tortillas for a heartier, more substantial chip. Simply split the pita rounds in half, then into wedges, and bake as directed.
- Corn Tortilla Chips: Use corn tortillas for a gluten-free option. Corn tortillas tend to be a bit denser, so you may need to adjust the baking time slightly.
- Sweet Potato Chips: For a sweeter and more nutritious chip, try using sweet potato tortillas.
- Spicy Chips: Add a pinch of cayenne pepper or a dash of hot sauce to your spice blend for a spicy kick.
- Herb Chips: Incorporate dried herbs such as rosemary, thyme, or oregano for a more aromatic and flavorful chip.
- Cheese Chips: Sprinkle a little grated Parmesan cheese or Cotija cheese over the chips before baking for a cheesy treat.
FAQs (Frequently Asked Questions)
Q: Can I use olive oil instead of vegetable oil?
A: Yes, you can use olive oil, but be aware that it has a lower smoke point than vegetable oil, so you’ll need to watch the chips carefully to prevent them from burning.
Q: Can I make these in an air fryer?
A: Absolutely! Air frying is a great way to make these chips. Simply arrange the tortilla wedges in a single layer in the air fryer basket and cook at 350°F (175°C) for 4-5 minutes, or until golden brown and crispy.
Q: How do I prevent the chips from becoming soggy?
A: Make sure to bake the chips in a single layer and avoid overcrowding the baking sheet. Also, don’t oversaturate them with oil. Letting them cool completely on a wire rack will also help prevent them from becoming soggy.
Q: Can I use spray butter instead of oil?
A: Yes, but the flavor will be different, and they may not get as crispy. If using butter spray, be sure to watch them closely as they can burn more easily.
Q: Can I use gluten-free tortillas for this recipe?
A: Yes, gluten-free tortillas work well, but the baking time may vary depending on the brand and ingredients. Keep a close eye on them to prevent burning.
Final Thoughts
Now it’s your turn to experience the simple joy of homemade baked chips! This recipe is endlessly adaptable, so don’t be afraid to experiment with different flavors and seasonings. Whether you’re craving a savory snack or a sweet treat, these chips are sure to satisfy. Gather your ingredients, preheat your oven, and get ready to enjoy the irresistible crunch of homemade goodness. And, please, share your chip creations and flavor combinations – I’m always looking for new inspiration!