
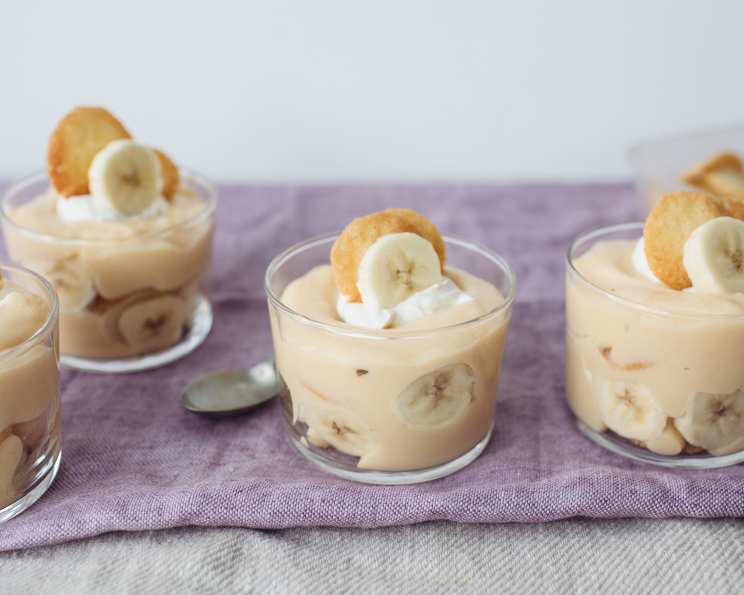
Granny Renfro’s Homemade Banana Pudding: A Taste of Nostalgia
My earliest memories are filled with the scent of ripening bananas and the gentle hum of my Granny Renfro’s kitchen. She always seemed to be whipping up something delicious, but her banana pudding was legendary. It wasn’t just dessert; it was a love language, a comforting hug in a bowl that transcended generations. Every spoonful takes me back to her sun-drenched porch, surrounded by family, sharing stories, and savoring the simple joys of life.
Recipe Overview
- Prep Time: 15 minutes
- Cook Time: 10-15 minutes
- Total Time: 30 minutes (plus chilling time)
- Servings: 6
- Yield: Approximately 6 cups
- Dietary Type: Vegetarian (can be adapted for dairy-free with substitutions)
Ingredients
- 3/4 cup sugar
- 1/3 cup flour
- 1/4 teaspoon salt
- 2 egg yolks
- 2 cups milk (whole milk recommended for richness)
- 3 bananas, sliced
- 1/2 teaspoon vanilla extract
- 1 – 1 1/2 cups vanilla wafers
Equipment Needed
- Medium saucepan
- Whisk
- Mixing bowl
- Measuring cups and spoons
- Serving bowl or individual dessert cups
Instructions
-
In a medium saucepan, thoroughly combine the sugar, flour, and salt. This dry mixture forms the base of your pudding. Whisk well to ensure there are no lumps of flour remaining.
-
In a separate mixing bowl, whisk together the egg yolks and milk until well combined. This mixture will add richness and body to the pudding.
-
Gradually add the egg yolk and milk mixture to the saucepan with the dry ingredients, whisking constantly to prevent lumps from forming. It’s important to temper the eggs by slowly adding the warm milk mixture, preventing them from scrambling.
-
Cook the mixture over medium heat, stirring constantly with a whisk or spatula. Be diligent and scrape the bottom and sides of the pan to prevent sticking or scorching. The mixture will gradually thicken as it cooks.
-
Continue to cook, stirring constantly, until the pudding is thick enough to coat the back of a spoon. This typically takes about 10-15 minutes. The pudding should be smooth and creamy.
-
Once the pudding has reached the desired consistency, remove the saucepan from the heat.
-
Gently stir in the sliced bananas and vanilla extract. Fold them in carefully to avoid breaking up the banana slices too much.
-
Line the bottom of a serving bowl or individual dessert cups with a layer of vanilla wafers. This creates a delicious crust-like base for the pudding.
-
Pour the banana pudding mixture over the layer of vanilla wafers.
-
For a beautiful presentation and added flavor, you can add another layer of vanilla wafers on top of the pudding.
-
Cover the bowl or individual cups with plastic wrap, pressing it directly onto the surface of the pudding to prevent a skin from forming.
-
Refrigerate for at least 2 hours, or preferably longer, to allow the pudding to chill completely and the flavors to meld together. The longer it chills, the better the flavors will develop.
-
Serve cold and enjoy!
Expert Tips & Tricks
- Preventing a Skin: To prevent a skin from forming on the surface of the pudding while it chills, press a piece of plastic wrap directly onto the surface. This creates a barrier against the air.
- Perfecting the Texture: For an extra-smooth pudding, you can strain the cooked pudding through a fine-mesh sieve before adding the bananas and vanilla. This removes any potential lumps or imperfections.
- Banana Ripeness: Use ripe but firm bananas for the best flavor and texture. Overripe bananas will become mushy and can make the pudding too sweet.
- Wafer Placement: Consider dipping the vanilla wafers in milk before layering them. This softens them slightly and makes them even more delicious.
- Enhanced Flavor: For an extra layer of flavor, add a tablespoon of butter to the pudding after removing it from the heat. This adds richness and a subtle nutty flavor.
- Make-Ahead Tip: The pudding can be made a day or two in advance. Just store it in the refrigerator and add the sliced bananas just before serving to prevent them from browning.
Serving & Storage Suggestions
Serve this delicious homemade banana pudding chilled. You can garnish it with extra vanilla wafers, a sprinkle of cinnamon, or a dollop of whipped cream for a more decadent presentation.
Leftovers should be stored in an airtight container in the refrigerator. It will last for up to 3 days. The bananas may darken slightly over time, but the flavor will still be delicious. It is not recommended to freeze banana pudding, as the texture of the pudding and bananas will change upon thawing.
Nutritional Information
Estimated nutritional information per serving:
| Nutrient | Amount per Serving | % Daily Value |
|---|---|---|
| Calories | 320 kcal | 16% |
| Total Fat | 10g | 15% |
| Saturated Fat | 6g | 30% |
| Cholesterol | 70mg | 23% |
| Sodium | 150mg | 7% |
| Total Carbohydrate | 55g | 18% |
| Dietary Fiber | 2g | 8% |
| Sugars | 35g | N/A |
| Protein | 5g | 10% |
Variations & Substitutions
- Dairy-Free Banana Pudding: Substitute the milk with almond milk, soy milk, or coconut milk. Ensure the vanilla wafers are also dairy-free.
- Gluten-Free Banana Pudding: Use gluten-free vanilla wafers and substitute the flour with a gluten-free all-purpose flour blend or cornstarch.
- Chocolate Banana Pudding: Add 2 tablespoons of cocoa powder to the dry ingredients for a chocolatey twist.
- Bourbon Banana Pudding: Add a tablespoon of bourbon to the pudding after removing it from the heat for a more sophisticated flavor.
- Coconut Banana Pudding: Use coconut milk instead of regular milk and add shredded coconut to the pudding for a tropical twist.
- Caramel Swirl: Drizzle caramel sauce between the layers of pudding and wafers for added sweetness and richness.
FAQs (Frequently Asked Questions)
Q: Why is my pudding lumpy?
A: Lumps usually form from improper whisking or cooking the pudding over too high of heat. Whisk constantly and make sure to cook over medium heat, scraping the bottom and sides of the pan to prevent sticking.
Q: Can I use a pudding mix instead of making it from scratch?
A: While you can use a pudding mix for convenience, making it from scratch allows for better flavor control and a more authentic taste.
Q: How can I prevent the bananas from browning?
A: Adding the bananas just before serving helps prevent browning. You can also toss the banana slices with a little lemon juice to slow down oxidation.
Q: Can I use a different type of cookie instead of vanilla wafers?
A: Absolutely! Nilla wafers are traditional, but you can also use shortbread cookies, graham crackers, or even gingersnaps for a unique flavor.
Q: Is it necessary to chill the pudding for 2 hours?
A: Chilling the pudding allows the flavors to meld together and the pudding to set properly. While you can eat it sooner, the flavor and texture will be significantly better after at least 2 hours in the refrigerator.
Final Thoughts
Granny Renfro’s homemade banana pudding is more than just a dessert; it’s a symbol of family, love, and cherished memories. This recipe is a heartfelt invitation to recreate a taste of nostalgia in your own kitchen. Gather your ingredients, follow the steps, and prepare to be transported back to a simpler time. Don’t hesitate to experiment with variations and make it your own. I encourage you to share this recipe with your loved ones and create your own sweet memories. Enjoy!