
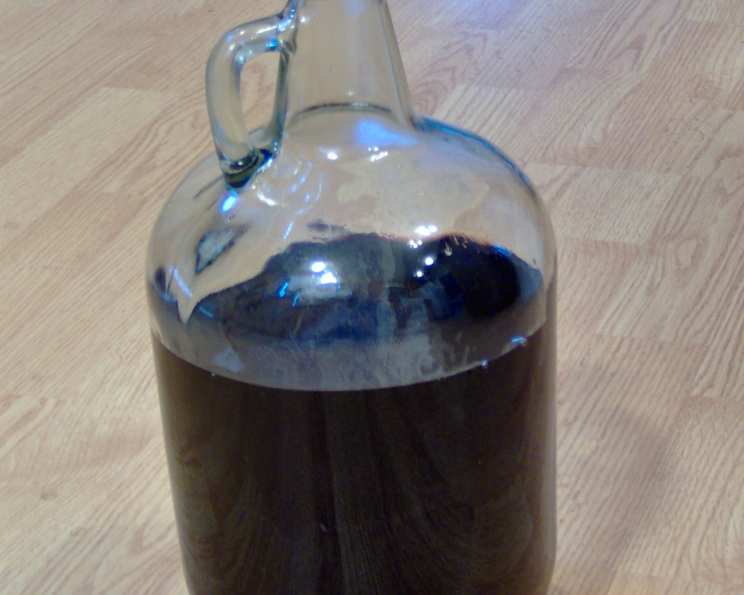
Homemade Blackberry Wine: A Taste of Summer in Every Sip
The memory is etched in my mind: summer afternoons spent with my grandmother, venturing into the thorny embrace of wild blackberry bushes. Her laughter echoed through the fields as we carefully plucked the plump, juicy berries, their deep purple staining our fingers a badge of honor. We weren’t just gathering fruit; we were collecting sunshine, bottling the very essence of summer. While many of those berries went straight into pies and jams, a special batch was always destined for her prized blackberry wine, a taste of which transported me back to those sun-drenched days with every sip.
Recipe Overview
- Prep Time: 30 minutes
- Cook Time: 0 minutes (excluding fermentation and aging)
- Total Time: 9 days (plus fermentation and aging)
- Yields: Approximately 1 1/2 gallons
- Serves: 48
- Dietary Type: Vegan
Ingredients
- 4 quarts blackberry juice (freshly squeezed or store-bought, unsweetened)
- 6 cups water
- 6 cups granulated sugar
- 1/2 cup brandy (optional, for fortifying)
Equipment Needed
- Large container (food-grade plastic or glass, at least 2-gallon capacity)
- Clean cloth (old T-shirt or sheet)
- Tape
- Bottles (for final storage, sterilized)
Instructions
-
In your large container, thoroughly mix together the blackberry juice, water, and sugar. Stir until the sugar is completely dissolved. This is crucial for proper fermentation.
-
Cover the top of the container with your clean cloth. Ensure the cloth isn’t touching the liquid, as it will act as a wick and draw the wine out. Secure the cloth in place with tape, making sure it’s taut and won’t sag into the wine. The purpose of the cloth is to allow air to escape during fermentation while preventing fruit flies and other unwanted guests from entering.
-
Place the container in a cool, dark place (ideally around 65-70°F or 18-21°C) and let it rest undisturbed for 3 days. This is the initial stage of fermentation.
-
After 3 days, you will notice a layer of sediment or “junk” forming on the surface. Gently skim this off as carefully as possible. Use a clean spoon or ladle to avoid introducing any unwanted bacteria.
-
Recover the container with the cloth, secure it again with tape, and leave it to rest for another 6 days in the same cool, dark place.
-
After the additional 6 days, skim off any further sediment or debris that has accumulated on the surface. Again, be gentle and use a clean utensil.
-
Now, it’s time to add the brandy (if using). The brandy acts as a fortifying agent, increasing the alcohol content and helping to preserve the wine. If you prefer a lighter wine, you can skip this step.
-
Cover the container tightly with an airtight lid or a secure covering to prevent air from entering. This is essential to prevent oxidation, which can spoil the wine.
-
Let the wine rest for 2 days. During this time, more sediment will settle at the bottom of the container.
-
After the 2-day rest, you’ll notice a significant amount of sediment settled at the bottom. At this point, you have a choice: you can either leave the sediment in the wine (which will add a slightly yeasty flavor) or carefully ladle the wine into another container, leaving the sediment behind. If you choose to remove the sediment, do so gently to avoid disturbing it and clouding the wine.
-
Finally, pour the wine into sterilized bottles and seal them tightly. Use corks or screw-top caps to ensure an airtight seal.
-
The blackberry wine will improve with age. Store the bottles in a cool, dark place for at least a few months, or even longer, for the best flavor.
Expert Tips & Tricks
- Use the best blackberries you can find. The quality of the berries directly impacts the flavor of the wine. Ripe, juicy berries will produce the sweetest and most flavorful wine.
- Sterilize everything! Ensuring all equipment and bottles are properly sterilized is crucial to prevent unwanted bacteria from spoiling your wine.
- Be patient. Winemaking is a process that takes time. Don’t rush the fermentation or aging process. The longer you let the wine age, the better it will taste.
- Adjust the sweetness to your liking. If you prefer a less sweet wine, you can reduce the amount of sugar used. Conversely, if you prefer a sweeter wine, you can add more sugar. However, be careful not to add too much sugar, as this can inhibit fermentation.
- Experiment with different types of brandy. Different brandies will impart different flavors to the wine. Try using a fruit brandy or a spiced brandy for a unique twist.
- Consider adding other fruits. A small amount of raspberries or strawberries added to the mix can really enhance the flavor of your wine.
- Degas the wine after fermentation. This removes excess carbon dioxide and prevents the wine from being fizzy. You can purchase a wine degassing wand online.
Serving & Storage Suggestions
Serve your homemade blackberry wine chilled, in wine glasses or cordial glasses. It pairs well with desserts, cheeses, and fruit. It’s also a delightful aperitif.
Store the bottled wine in a cool, dark place, ideally a wine cellar or basement. Properly sealed, it can last for several years, improving in flavor with age. Once opened, store the bottle in the refrigerator and consume within a week.
Nutritional Information
Note: The following is an estimate and may vary based on specific ingredients and process.
| Nutrient | Amount per Serving (1 fl oz) | % Daily Value |
|---|---|---|
| Calories | 65 kcal | 3% |
| Total Fat | 0g | 0% |
| Saturated Fat | 0g | 0% |
| Cholesterol | 0mg | 0% |
| Sodium | 0.1mg | 0% |
| Total Carbohydrate | 7g | 2% |
| Dietary Fiber | 0g | 0% |
| Sugars | 7g | 14% |
| Protein | 0g | 0% |
Variations & Substitutions
- Different Berries: Feel free to substitute or combine blackberries with other berries like raspberries, blueberries, or strawberries. Each berry will impart its unique flavor profile to the wine.
- Honey instead of Sugar: For a more natural sweetener and a slightly different flavor, try substituting honey for granulated sugar. Use an equal amount of honey by volume.
- Spice Infusion: Add a cinnamon stick, a vanilla bean, or a few cloves during the fermentation process to infuse the wine with warm, aromatic flavors.
- Dry Wine: To make a drier wine, reduce the amount of sugar used. This will result in a less sweet, more tart wine.
FAQs (Frequently Asked Questions)
Q: How long does it take for the blackberry wine to be ready to drink?
A: While technically you can drink the wine after the initial fermentation process, it’s best to let it age for at least a few months to allow the flavors to develop and mellow.
Q: Can I use frozen blackberries to make wine?
A: Yes, you can use frozen blackberries. Just make sure to thaw them completely before juicing.
Q: My wine is cloudy. Is that normal?
A: Cloudiness is common, especially in young wines. It’s often caused by sediment or yeast particles. Time and racking (carefully transferring the wine to a new container, leaving the sediment behind) will usually clear it up.
Q: My wine isn’t fermenting. What should I do?
A: Ensure the temperature is within the optimal range (65-70°F or 18-21°C). You might also need to add a wine yeast starter to kickstart the fermentation process.
Q: How do I know when the fermentation is complete?
A: Fermentation is complete when you no longer see bubbles forming in the wine, and the specific gravity (measured with a hydrometer) has reached a stable point.
Final Thoughts
Making your own blackberry wine is a truly rewarding experience. It’s a connection to nature, a celebration of the seasons, and a delicious way to enjoy the fruits of your labor (literally!). Don’t be intimidated by the process; with a little patience and attention to detail, you can create a wine that you’ll be proud to share with friends and family. So go ahead, give this recipe a try, and let the taste of summer linger on your palate all year round. Cheers to homemade goodness!