
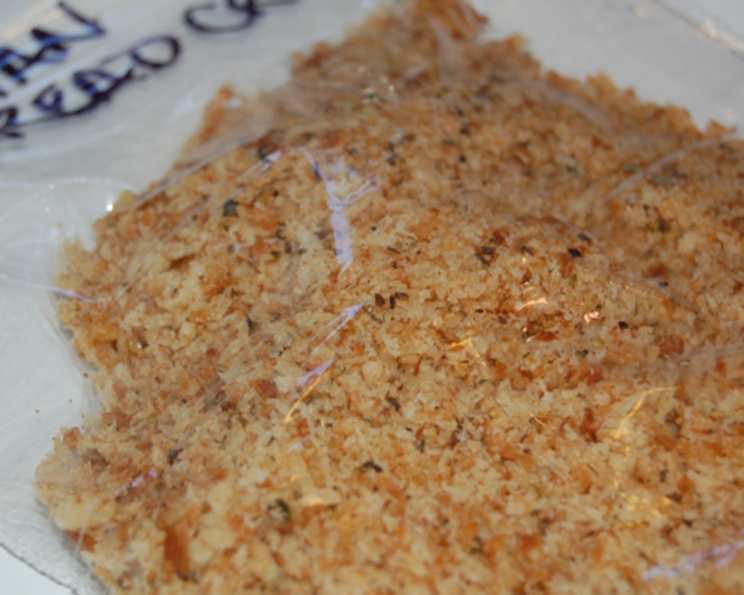
The Golden Standard: Homemade Bread Crumbs
I can still picture my grandmother, her hands dusted with flour, meticulously tearing stale bread into chunks. The rhythmic whir of her ancient food processor filled her tiny kitchen, a comforting sound that promised deliciousness to come. Those weren’t just bread crumbs; they were the foundation of countless family meals – the crispy topping on her famous macaroni and cheese, the savory binder in her perfectly seasoned meatloaf, and the golden crust that enveloped her fried chicken. To this day, the aroma of toasted bread crumbs evokes the warmth and love of her kitchen, and it’s a tradition I’m honored to carry on.
Recipe Overview
- Prep Time: 15 minutes
- Cook Time: 10-20 minutes
- Total Time: 25-35 minutes
- Yield: Depends on the size of the loaves (approximately 6-8 cups)
- Dietary Type: Vegetarian (can be made Vegan using vegan butter)
Ingredients
- 2 loaves firm-textured white bread, several days old
- 1 cup butter (salted or unsalted, your preference)
- Salt & freshly ground black pepper to taste
Equipment Needed
- Food processor or blender
- Large skillet or frying pan
- Spatula or wooden spoon
- Heavy-duty plastic bags with zipper seals
Instructions
-
Begin by preparing the bread. The key to fantastic bread crumbs is using bread that’s slightly stale. This allows it to dry out more effectively during the toasting process, resulting in crisper crumbs. If your bread is fresh, you can speed up the drying process by slicing it and leaving it out uncovered overnight.
-
Next, break the bread into smaller pieces, roughly 1-inch cubes. This will make it easier for your food processor or blender to handle.
-
Now, it’s time to transform the bread into crumbs. Using your food processor or blender, process the bread cubes in batches until they are evenly crumbed. The texture you’re aiming for is not as fine as sand; you want to retain some texture. Over-processing will result in a powdery consistency that won’t offer the same satisfying crunch. Pulse the bread in short bursts, checking frequently to avoid over-processing.
-
In a large skillet or frying pan, melt the butter over medium heat. Ensure the pan is large enough to accommodate all of the bread crumbs comfortably.
-
Add the bread crumbs, salt, and pepper to the melted butter. Stir constantly to evenly coat the crumbs with the butter. Season generously – remember, these crumbs will be added to other dishes, so they need to hold their own in terms of flavor.
-
Continue stirring the bread crumbs over medium heat, paying close attention to prevent burning. The goal is to toast the crumbs until they are golden brown and crispy. As they toast, they will begin to sound like sand as you stir them against the bottom of the pan – this is a good indicator that they are nearing completion. This process can take anywhere from 10 to 20 minutes, depending on the heat of your stove and the moisture content of the bread. Reduce the heat if the crumbs are browning too quickly.
-
Once the bread crumbs are toasted to a golden brown and sound sandy, remove the pan from the heat. Spread the crumbs out on a baking sheet or large plate to cool completely. This is a crucial step – if you pack them away while they’re still warm, they will trap moisture and become soggy.
-
After the bread crumbs have cooled thoroughly, transfer them to heavy-duty plastic bags with zipper seals. Press out any excess air before sealing the bags tightly.
-
Store the bread crumbs in a cabinet or pantry for up to six months. Do not refrigerate them, as this can introduce moisture and shorten their shelf life.
Expert Tips & Tricks
- Garlic Infusion: For an extra layer of flavor, mince a clove or two of garlic and sauté it in the butter before adding the bread crumbs.
- Herbaceous Delight: Stir in dried herbs such as Italian seasoning, thyme, rosemary, or oregano along with the salt and pepper for a savory twist.
- Cheese Please: Add grated Parmesan or Pecorino Romano cheese to the crumbs during the last few minutes of toasting for a cheesy, umami-rich flavor.
- Spice it Up: A pinch of red pepper flakes can add a delightful kick to your bread crumbs.
- Toasting in the Oven: If you prefer, you can toast the bread crumbs in the oven. Spread them in a single layer on a baking sheet and bake at 300°F (150°C) for 15-20 minutes, stirring occasionally, until golden brown and crispy.
Serving & Storage Suggestions
Homemade bread crumbs are incredibly versatile and can be used in a wide variety of dishes. Sprinkle them over pasta dishes, casseroles, and salads for added texture and flavor. Use them as a coating for chicken, fish, or vegetables before baking or frying. They’re also a fantastic addition to stuffing, meatloaf, and crab cakes.
Store your homemade bread crumbs in a cool, dry place, such as a pantry or cabinet, for up to six months. Properly stored, they will maintain their crispy texture and fresh flavor. Avoid storing them in the refrigerator, as the moisture can cause them to become soggy. If you want to extend their shelf life even further, you can freeze them in an airtight container for up to a year.
Nutritional Information
| Nutrient | Amount per Serving (estimated) | % Daily Value* |
|---|---|---|
| Calories | 250 kcal | 13% |
| Total Fat | 15g | 23% |
| Saturated Fat | 9g | 45% |
| Cholesterol | 40mg | 13% |
| Sodium | 400mg | 17% |
| Total Carbohydrate | 25g | 8% |
| Dietary Fiber | 2g | 8% |
| Sugars | 2g | – |
| Protein | 5g | 10% |
*Percentage Daily Values are based on a 2,000 calorie diet. Your daily values may be higher or lower depending on your calorie needs. Values are estimates only.
Variations & Substitutions
- Gluten-Free Bread Crumbs: Use gluten-free bread to make gluten-free bread crumbs.
- Whole Wheat Bread Crumbs: Substitute whole wheat bread for white bread for a nuttier flavor and added fiber.
- Panko Bread Crumbs: While technically not “homemade” from scratch, you can lightly toast store-bought panko bread crumbs with butter and seasonings for a super-crispy alternative.
- Vegan Bread Crumbs: Use vegan butter or olive oil in place of dairy butter.
FAQs (Frequently Asked Questions)
Q: Can I use fresh bread to make bread crumbs?
A: While you can use fresh bread, it’s best to use bread that’s a few days old or slightly stale. This will result in crisper bread crumbs. If using fresh bread, consider toasting it lightly in the oven before processing it into crumbs.
Q: How do I prevent the bread crumbs from burning while toasting?
A: The key is to stir them frequently and keep the heat at medium. If they start to brown too quickly, reduce the heat. Watch them carefully, as they can go from golden brown to burnt very quickly.
Q: Can I freeze bread crumbs?
A: Yes, you can freeze bread crumbs in an airtight container for up to a year. This is a great way to extend their shelf life.
Q: What’s the best way to store bread crumbs?
A: Store them in an airtight container in a cool, dry place, such as a pantry or cabinet. Avoid storing them in the refrigerator, as this can cause them to become soggy.
Q: Can I use different types of bread?
A: Absolutely! Experiment with different types of bread to create unique flavor profiles. Sourdough, rye, and multigrain bread all make delicious and interesting bread crumbs.
Final Thoughts
Making your own bread crumbs is not only incredibly easy, but it also elevates your cooking to a whole new level. The taste and texture far surpass anything you can buy in a store, and the possibilities for customization are endless. So, gather your slightly stale bread, melt some butter, and get ready to create a culinary staple that will transform your favorite dishes. Don’t be afraid to experiment with different seasonings and flavors – and most importantly, enjoy the process! I encourage you to try this recipe and share your creations with friends and family. And if you’re looking for a dish to showcase your homemade bread crumbs, try topping a classic baked macaroni and cheese for a truly unforgettable comfort food experience.