
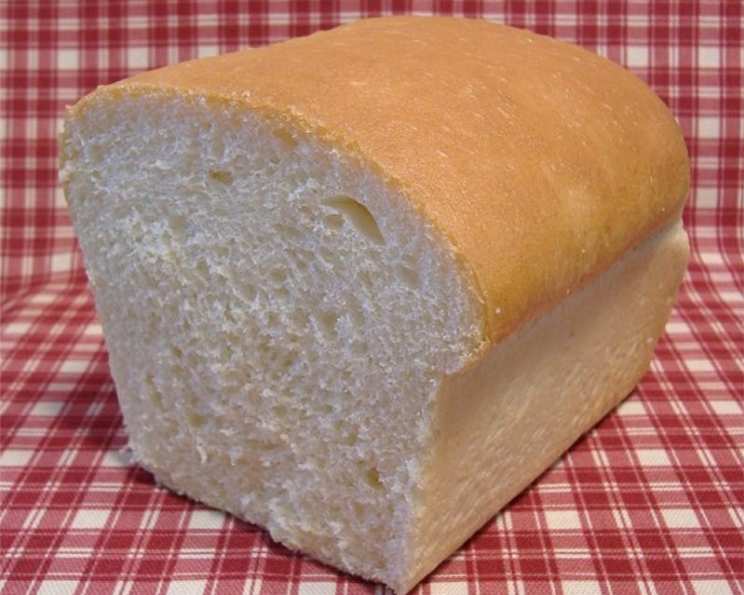
The Soulful Simplicity of Homemade Bread
There’s something undeniably comforting about the aroma of bread baking in the oven. It takes me back to my childhood, to my grandmother’s kitchen, where the scent of yeast and warm flour was a constant presence. She always seemed to be pulling a loaf, still steaming, from her ancient oven. That first slice, slathered with butter that melted instantly into the soft crumb, remains one of my most treasured food memories. It was more than just food; it was love, warmth, and a connection to generations past, all baked into a single, simple loaf. This recipe is my attempt to recreate that feeling for you.
Recipe Overview
- Prep Time: 1 hour 30 minutes
- Cook Time: 40 minutes
- Total Time: 3 hours 5 minutes
- Yields: 2 loaves
- Serves: 12
- Dietary Type: Vegetarian
Ingredients
- 1 tablespoon active dry yeast
- 2 cups very warm water
- 6 cups bread flour
- 2/3 cup dry milk
- 2 1/2 teaspoons baking powder
- 1 1/2 teaspoons salt
- 1/2 cup sugar
- 1/2 cup oil
Equipment Needed
- Large mixing bowl
- Measuring cups and spoons
- Dough hook (optional, for stand mixer)
- Two 9×5 inch loaf pans
- Oven
Instructions
-
Begin by activating the yeast. In a small bowl, combine the active dry yeast and very warm water. Ensure the water isn’t too hot, or it will kill the yeast; aim for around 105-115°F (40-46°C). Mix well and set aside for about 5-10 minutes until the mixture becomes foamy. This indicates that the yeast is active and ready to go.
-
In a very large bowl, combine all the dry ingredients: bread flour, dry milk, baking powder, salt, and sugar. Whisk or stir well to ensure the ingredients are evenly distributed. This step is crucial for a consistent rise and flavor throughout the bread.
-
Add the oil and the yeast mixture to the dry ingredients.
-
Mix well with your hands or in a mixer fitted with a dough hook. If using a mixer, start on low speed and gradually increase to medium. If mixing by hand, use a sturdy spoon or your hands to bring the dough together.
-
Work the dough until it becomes smooth and elastic. This may take 5-10 minutes in a mixer or slightly longer by hand. The dough should pull away from the sides of the bowl and form a cohesive mass. If the dough is too sticky, add a tablespoon of flour at a time until it reaches the desired consistency.
-
Place the dough in a lightly oiled bowl, turning to coat all sides. Cover the bowl with a clean kitchen towel or plastic wrap and let it rise in a warm place for about 45 minutes, or until doubled in size. The ideal temperature for rising is around 75-80°F (24-27°C). A slightly warm oven (turned off) or a sunny spot in your kitchen can provide the perfect environment.
-
Once the dough has doubled, punch it down gently to release the air. Turn the dough out onto a lightly floured surface.
-
Knead the dough for 5-10 minutes to redistribute the yeast and develop the gluten further. This will result in a lighter, more evenly textured bread.
-
Repeat the rising process. Place the kneaded dough back into the oiled bowl, cover, and let rise for another 45 minutes, or until doubled in size. This second rise contributes to the final texture and flavor of the bread.
-
Prepare your baking pans by spraying them with cooking spray or lightly oiling them. This will prevent the bread from sticking and ensure easy removal after baking.
-
Divide the dough in half and shape each half into a loaf. Place the loaves into the prepared baking pans. Alternatively, you can divide the dough into 12 portions to make large dinner rolls, or use the dough to create 12 large cinnamon rolls.
-
Cover the pans with a clean kitchen towel and let the dough rise for 30-45 minutes before baking. This final rise, known as proofing, is essential for achieving a light and airy loaf.
-
Bake in a preheated oven at 325 degrees Fahrenheit (163 degrees Celsius) for approximately 40 minutes, or until the bread is golden brown and sounds hollow when tapped on the bottom. The baking time may vary depending on your oven, so keep a close eye on the bread and adjust accordingly.
-
Once the bread is done, remove it from the oven and let it cool in the pans for a few minutes before transferring it to a wire rack to cool completely.
-
While the bread is still warm, you can brush the tops with melted butter for added flavor and shine (optional).
Expert Tips & Tricks
- For a richer flavor, try using melted butter or olive oil instead of vegetable oil.
- If your kitchen is cold, you can speed up the rising process by placing the dough in a slightly warmed oven (turned off) or in a bowl set over a pan of warm water.
- To prevent the crust from getting too dark, you can tent the bread with aluminum foil during the last 15 minutes of baking.
- Don’t overbake the bread, as this can result in a dry and crumbly texture.
- For extra flavor, add herbs, seeds, or spices to the dough during the kneading process.
Serving & Storage Suggestions
Serve the warm, freshly baked bread sliced with butter, jam, or your favorite spreads. It’s also delicious used for sandwiches, toast, or croutons.
To store, let the bread cool completely before wrapping it tightly in plastic wrap or placing it in an airtight container. At room temperature, it will stay fresh for 2-3 days. In the refrigerator, it will last for up to a week. For longer storage, you can freeze the bread for up to 2-3 months. To reheat frozen bread, thaw it overnight in the refrigerator and then warm it in a low oven or toaster oven.
Nutritional Information
Nutritional information is an estimate and can vary based on specific ingredients and portion sizes.
| Nutrient | Amount per Serving | % Daily Value |
|---|---|---|
| Calories | 379 kcal | 19% |
| Total Fat | 12 g | 18% |
| Saturated Fat | 3 g | 13% |
| Cholesterol | 7 mg | 2% |
| Sodium | 395 mg | 17% |
| Total Carbohydrate | 59 g | 20% |
| Dietary Fiber | 2 g | 8% |
| Sugars | 11 g | 45% |
| Protein | 9 g | 18% |
Variations & Substitutions
- Whole Wheat Bread: Substitute up to half of the bread flour with whole wheat flour for a nuttier flavor and added fiber.
- Dairy-Free Bread: Replace the dry milk with a dairy-free milk powder or omit it entirely. You may need to adjust the amount of water slightly to achieve the desired dough consistency.
- Sweet Bread: Increase the amount of sugar for a sweeter loaf that’s perfect for French toast or desserts.
- Herb Bread: Add 1-2 tablespoons of dried herbs like rosemary, thyme, or oregano to the dough for a savory flavor.
- Seeded Bread: Incorporate 1/4-1/2 cup of seeds like sesame, poppy, or sunflower seeds into the dough for added texture and nutrition.
FAQs (Frequently Asked Questions)
Q: Can I use all-purpose flour instead of bread flour?
A: Yes, you can, but the bread may not have as much structure and rise as well. Bread flour has a higher protein content, which helps develop gluten for a chewier texture.
Q: Why is my bread dense and heavy?
A: This could be due to several factors, including not using enough yeast, not letting the dough rise long enough, or using too much flour. Make sure to follow the recipe carefully and use fresh yeast.
Q: How do I know when the bread is done baking?
A: The bread is done when it’s golden brown and sounds hollow when tapped on the bottom. You can also use a thermometer to check the internal temperature; it should be around 200-210°F (93-99°C).
Q: Can I freeze the dough instead of baking it right away?
A: Yes, you can freeze the dough after the first rise. Shape it into loaves, wrap them tightly in plastic wrap, and then freeze them. When ready to bake, thaw the dough overnight in the refrigerator and let it rise again before baking as directed.
Q: What if my yeast doesn’t foam when I mix it with water?
A: This usually means your yeast is old or inactive. Purchase a new package of yeast and try again.
Final Thoughts
I hope this recipe inspires you to experience the simple joy of baking your own bread. It’s a process that requires a little time and patience, but the reward is a loaf of warm, fragrant bread that’s far superior to anything you can buy in a store. Don’t be afraid to experiment with different flavors and variations to create your own signature loaf. And most importantly, share it with loved ones – because nothing brings people together quite like a freshly baked loaf of homemade bread.