
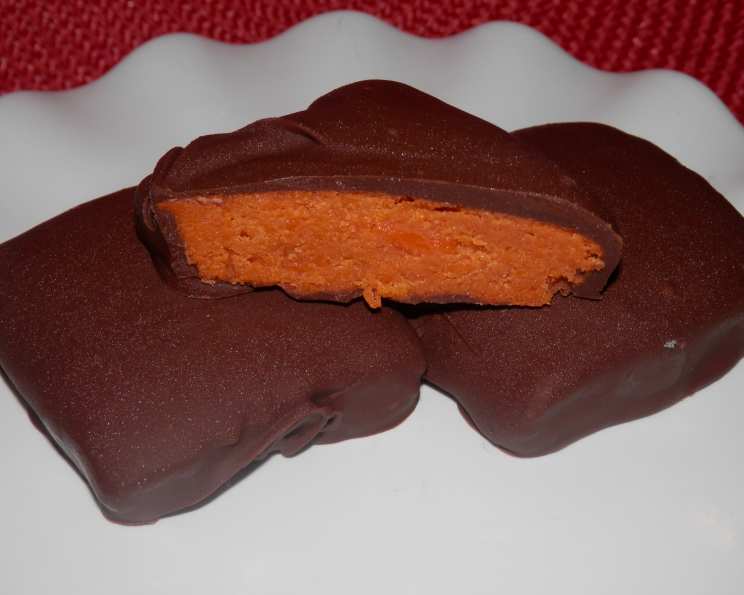
Homemade Butterfingers: A Childhood Dream Come True
I remember those Halloween nights vividly. The crisp autumn air, the thrill of trick-or-treating, and the sheer joy of dumping my loot onto the living room floor. Amidst the chocolate bars and sugary sweets, there was always one that stood out: the Butterfinger. That uniquely textured, peanut-buttery, candy-corn-colored delight was always my most prized possession. Now, years later, I’ve discovered a way to recreate that iconic candy at home, with a surprisingly simple recipe. Prepare to relive your childhood, one delicious bite at a time!
Recipe Overview
- Prep Time: 15 minutes
- Cook Time: 5 minutes
- Freeze Time: 30 minutes
- Servings: 16-24 pieces
- Yield: 1 pan (9×9 inches)
- Dietary Type: Vegetarian
Ingredients
- 1 lb candy corn
- 1 (12 ounce) bag milk chocolate chips
- 1 (16-18 ounce) jar peanut butter, creamy
Equipment Needed
- 9×9 inch pan
- Wax paper
- Microwave-safe bowls
- Spatula
- Fork
Instructions
-
Begin by lining your 9×9 inch pan with wax paper. This will ensure easy removal of the candy later on. Make sure the wax paper overhangs the sides of the pan, creating “handles” for lifting.
-
Next, melt the candy corn. Place the entire pound of candy corn into a medium, microwave-safe bowl. Microwave in 30-second intervals, stirring every 30 seconds, until completely melted and smooth. Be patient, as candy corn can take a bit to melt fully. Watch carefully to prevent burning.
-
Once the candy corn is melted, immediately stir in the peanut butter. Add the entire jar (16-18 ounces) of creamy peanut butter to the melted candy corn and mix thoroughly until well combined. The mixture may appear lumpy and not completely smooth, and that’s perfectly fine. The texture adds to the authentic Butterfinger experience!
-
Pour the peanut butter and candy corn mixture into the wax paper lined pan. Spread evenly across the bottom of the pan using a spatula or the back of a spoon.
-
Place the pan in the freezer for 10-20 minutes, or until firm. This step is crucial for easy cutting and dipping. Don’t leave it in too long, or it will become difficult to cut.
-
Once the mixture is firm, remove it from the pan using the wax paper overhang. Carefully peel away the wax paper and place the candy block on a cutting board.
-
Cut the candy into bite-sized pieces. The size is entirely up to you! Aim for a size similar to a miniature Butterfinger bar, or adjust to your preference.
-
Now, melt the milk chocolate chips. Place the entire bag of milk chocolate chips in a microwave-safe bowl. Microwave in 30-second intervals, stirring every 30 seconds, until completely melted and smooth. Again, be careful not to overheat the chocolate, as it can burn easily.
-
Use a fork to dip each candy bar into the melted chocolate. Coat all sides of the candy with chocolate, then gently tap the fork against the edge of the bowl to remove any excess chocolate.
-
Place the chocolate-covered bars onto a wax paper lined sheet. This prevents sticking and makes for easy removal later.
-
Once all the candy bars have been dipped and placed on the sheet, return them to the freezer for about 10 minutes, or until the chocolate is firm. This will set the chocolate coating and give the bars a nice snap.
-
Remove from the freezer and enjoy!
Expert Tips & Tricks
- Melting Chocolate: Use a double boiler or a heat-safe bowl set over a simmering pot of water for the best results when melting the chocolate. This indirect heat prevents scorching.
- Peanut Butter Variation: For a slightly different flavor profile, try using a natural peanut butter. Just be sure to stir it well before adding it to the melted candy corn, as the oil tends to separate.
- Achieving the Perfect Texture: The texture of the homemade Butterfingers will be slightly different from the store-bought version, but it’s still incredibly satisfying. For a crumblier texture, slightly under-melt the candy corn, leaving a few small lumps.
- Chocolate Options: You can use dark chocolate or white chocolate instead of milk chocolate to make different versions of the treat.
- Adding Salt: Sprinkle a pinch of sea salt on the chocolate covered bars before they set to enhance the sweet and savory flavor.
Serving & Storage Suggestions
These homemade Butterfingers are best served chilled, straight from the freezer or refrigerator. They can be stored in an airtight container in the refrigerator for up to a week or in the freezer for up to a month. If freezing, wrap them individually in plastic wrap to prevent freezer burn. There’s no need to reheat them; simply grab one from the fridge or freezer and enjoy! They also make fantastic gifts for friends and family. Wrap them in festive paper or place them in a decorative tin.
Nutritional Information
Here’s an estimated nutritional breakdown per serving (serving size: 1 piece):
| Nutrient | Amount per Serving | % Daily Value |
|---|---|---|
| Calories | 280 kcal | N/A |
| Total Fat | 20.6g | 31% |
| Saturated Fat | 6.9g | 34% |
| Cholesterol | 4.9mg | 1% |
| Sodium | 146.9mg | 6% |
| Total Carbohydrate | 18.2g | 6% |
| Dietary Fiber | 2.4g | 9% |
| Sugars | 13.6g | N/A |
| Protein | 8.7g | 17% |
Note: Nutritional information is an estimate and may vary based on specific ingredients used.
Variations & Substitutions
- Peanut-Free Option: Substitute the peanut butter with sunflower seed butter (sunbutter) for a nut-free alternative.
- Crunchy Texture: Add crushed pretzels or rice cereal to the peanut butter and candy corn mixture for added crunch.
- Chocolate Drizzle: Instead of fully dipping the bars in chocolate, drizzle melted chocolate over the top for a more rustic look.
- Spiced Butterfingers: Add a pinch of cinnamon or nutmeg to the peanut butter mixture for a warm, spiced flavor.
- White Chocolate Peppermint: Use white chocolate for coating and sprinkle crushed peppermint candies on top for a festive holiday treat.
FAQs (Frequently Asked Questions)
Q: Why is my peanut butter and candy corn mixture lumpy?
A: It’s perfectly normal for the mixture to be slightly lumpy. The texture adds to the homemade Butterfinger experience.
Q: Can I use a different type of chocolate?
A: Absolutely! Dark chocolate, white chocolate, or even a combination of different chocolates can be used.
Q: How long do these last?
A: Stored properly in an airtight container, these homemade Butterfingers will last up to a week in the refrigerator or up to a month in the freezer.
Q: My chocolate is seizing up when I melt it. What am I doing wrong?
A: Chocolate can seize up if it comes into contact with even a small amount of water. Make sure your bowl and utensils are completely dry, and avoid overheating the chocolate.
Q: Can I make these without a microwave?
A: Yes, you can melt the candy corn and chocolate in a double boiler or a heat-safe bowl set over a simmering pot of water.
Final Thoughts
There you have it – a simple yet satisfying recipe for homemade Butterfingers that will transport you back to your childhood. This recipe is surprisingly easy, and the results are incredibly rewarding. Don’t be afraid to experiment with variations and make it your own! I encourage you to give this recipe a try and share your creations with friends and family. They’re guaranteed to be a hit! Happy candy-making!