
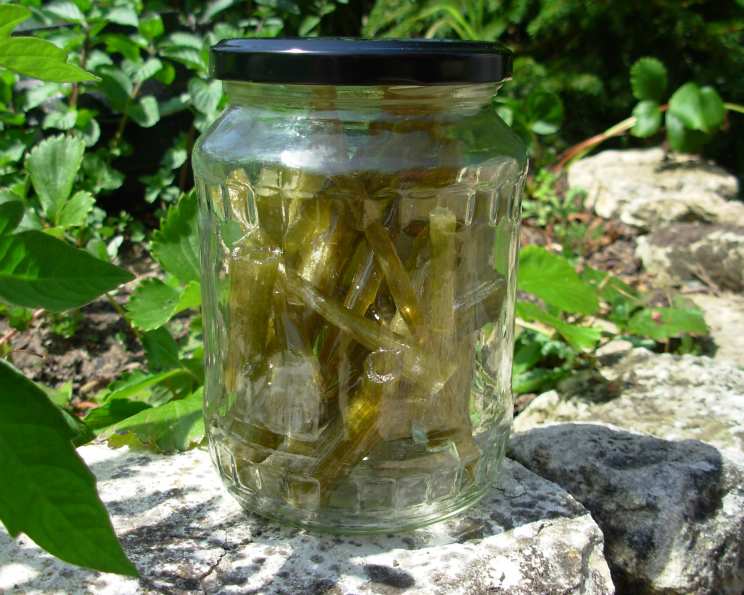
Homemade Candied Angelica – for Cakes, Bakes and Desserts
The first time I encountered candied angelica, it was perched atop a towering Battenberg cake at my grandmother’s. The bright green slivers, so perfectly uniform, seemed impossibly elegant against the marzipan. I remember thinking it must be some exotic confection, flown in from a faraway land. The delicate sweetness, tinged with a subtle herbal note, was a revelation, and it sparked a lifelong fascination with this often-overlooked ingredient. Now, years later, I grow my own angelica, and the aroma that fills my kitchen as I candy the stems takes me right back to that cozy afternoon with my grandmother.
Recipe Overview
- Prep Time: 24 hours
- Cook Time: 4 days (recurring)
- Total Time: 120 hours
- Servings: 8-16
- Yield: Variable, depending on the number of stems
- Dietary Type: Vegetarian
Ingredients
- 3-4 sprigs angelica, at least 2 years old
- 1 cup caster sugar
- 1 tablespoon baking soda
- Caster sugar, for sprinkling (optional)
- Water
Equipment Needed
- Large pot
- Small saucepan
- Sharp knife or vegetable peeler
- Slotted spoon
- Wire rack or screen
Instructions
-
Harvest your angelica stalks in their second year, selecting the large, still-green stems (avoiding any with purple or white tinges). These larger stalks, unlike many other plants, offer the best texture for candying.
-
De-leaf the stems, removing the leaf stalks entirely. Cut the main stems into pieces approximately 6 inches long. Place these prepared pieces in a bowl and soak them in cold water for about 8 hours. This helps to rehydrate the stems and prepare them for the boiling process.
-
Bring a pot of water to a rolling boil. Plunge the soaked angelica stalks into the boiling water. The amount of water should be enough to fully submerge the stalks.
-
Boil the stalks until they begin to soften. To maintain the vivid green color associated with traditionally made candied angelica, add about ½ teaspoon of baking soda per pint of water. The baking soda also aids in softening the stems.
-
Once the stalks are sufficiently softened, cool them immediately under running water. This stops the cooking process and helps preserve their color. Drain the cooled stalks thoroughly.
-
Using a sharp knife or vegetable peeler, carefully peel away the long, stringy parts on the outside of the stalks. This step is crucial for achieving the desired tender texture in the final candied product.
-
Prepare a simple syrup by combining 1 cup of caster sugar and 1 cup of water in a small saucepan. Heat over medium heat, stirring until the sugar is completely dissolved.
-
Place the peeled angelica stems into the prepared syrup and allow them to soak for 24 hours. This initial soak allows the stems to begin absorbing the sweetness of the syrup.
-
Gently cook the angelica stems in the syrup. Repeat this process once a day for four consecutive days. During each cooking session, ensure the stems are simmering gently, allowing the sugar to penetrate fully without causing them to break down. By the end of the four days, the angelica should be translucent without losing its shape. This indicates that the candying process is complete.
-
Carefully remove the candied angelica stems from the pan using a slotted spoon. Allow the excess syrup to drain off.
-
Place the drained stems on a covered wire rack or screen to dry. Ensure they are arranged in a single layer to allow for proper air circulation. Continue drying until the stems are dry to the touch and glossy in appearance. This may take several days, depending on the humidity levels.
-
(Optional) If desired, you can roll the stems in caster sugar before drying them on the rack or screen. This adds an extra layer of sweetness and a visually appealing frosted finish.
-
Once fully dried, store the candied angelica in an airtight tin or jar, in a cool, dark place. Under the right storage conditions, they will last for up to 2 years, ready to add a touch of elegance to your culinary creations.
-
To use, cut the stems into appropriate lengths and use to decorate cakes, trifles, desserts, or ice cream sundaes.
Expert Tips & Tricks
- Don’t discard the leftover syrup! It’s intensely flavored and can be used to sweeten teas, cocktails, or even drizzled over pancakes.
- If your angelica stems are particularly thick, you may need to increase the cooking time slightly during the repeated simmering process.
- For a more intense flavor, try adding a vanilla bean or citrus zest to the syrup during the candying process.
- The drying process is crucial for achieving the right texture. Be patient and ensure the stems are completely dry before storing them. If they are still sticky, they may become moldy.
Serving & Storage Suggestions
Candied angelica is best used as a decorative element and flavor enhancer. Its subtle sweetness and herbal notes make it a perfect complement to rich cakes, creamy trifles, and decadent desserts. Store your homemade candied angelica in an airtight container in a cool, dark place. Properly stored, it will retain its flavor and texture for up to 2 years. There is no need to refrigerate or freeze candied angelica.
Nutritional Information
| Nutrient | Amount per Serving | % Daily Value |
|---|---|---|
| Calories | 97 kcal | 5% |
| Total Fat | 0g | 0% |
| Saturated Fat | 0g | 0% |
| Cholesterol | 0mg | 0% |
| Sodium | 470mg | 20% |
| Total Carbohydrate | 25g | 9% |
| Dietary Fiber | 0g | 0% |
| Sugars | 25g | 50% |
| Protein | 0g | 0% |
Note: Nutritional information is an estimate and may vary based on specific ingredients and preparation methods.
Variations & Substitutions
- Citrus Infusion: Add strips of lemon, orange, or grapefruit zest to the sugar syrup during the candying process for a citrusy twist.
- Spiced Angelica: Infuse the syrup with warm spices like cardamom pods, star anise, or cinnamon sticks.
- Angelica Extract: If you don’t have access to fresh angelica, you can use a few drops of angelica extract in the syrup for a similar flavor, although the texture will be different.
- Other Herbs: Experiment with candying other herbs like rosemary, thyme, or mint for unique flavor combinations. However, angelica has a very particular structure that makes it ideal for candying, so results may vary.
FAQs (Frequently Asked Questions)
Q: Why do I need to soak the angelica stalks before boiling?
A: Soaking the stalks helps rehydrate them and makes them more pliable, which aids in the peeling process and allows them to absorb the sugar syrup more effectively.
Q: Can I skip the baking soda?
A: While you can skip it, the baking soda helps to preserve the vibrant green color of the angelica during the boiling process. Without it, the angelica may turn a duller shade.
Q: How do I know when the angelica is translucent enough?
A: When the angelica is translucent, it will appear almost glass-like, with light passing through it easily. The interior of the stem will no longer be opaque.
Q: What can I do with the leftover syrup?
A: Don’t discard it! The leftover syrup is intensely flavored and can be used to sweeten teas, cocktails, or drizzled over desserts. You can also reduce it further to create a thicker syrup.
Q: How long does it take for the angelica to dry completely?
A: Drying time can vary depending on humidity levels, but it typically takes several days. The angelica should be completely dry to the touch and glossy before storing.
Final Thoughts
Candied angelica is more than just a decorative garnish; it’s a testament to the patience and artistry of the culinary craft. While the process may seem lengthy, the reward is a truly unique and flavorful ingredient that can elevate your baking and dessert creations to new heights. I encourage you to give this recipe a try and experience the magic of transforming a humble herb into a glistening jewel. Share your creations and feedback – I’d love to hear how your candied angelica turns out! Perhaps pair it with a classic Victoria sponge cake for a truly elegant presentation.