
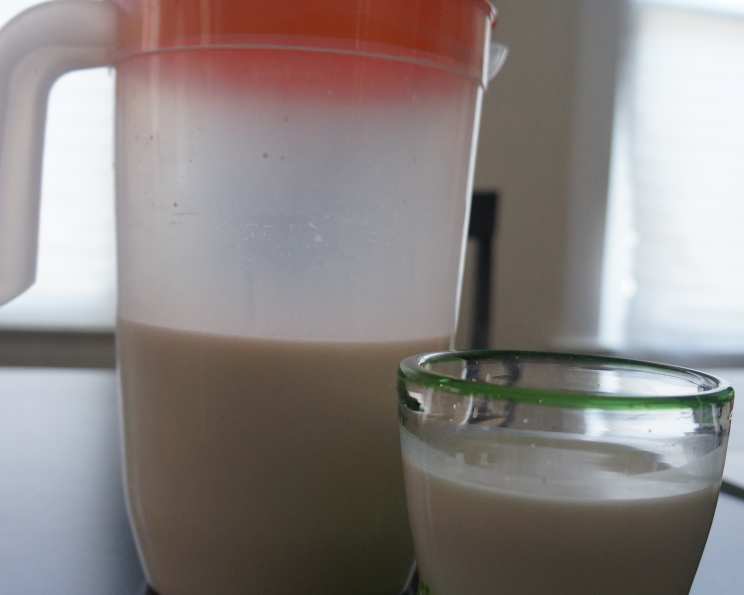
The Creamiest Dream: Homemade Cashew and Almond Milk
I remember the first time I tried making my own nut milk. It was a revelation! Store-bought versions always seemed to have that slightly artificial aftertaste, no matter how “natural” they claimed to be. But that first glass of homemade almond milk – so fresh, subtly sweet, and utterly pure – changed my perspective forever. I’ve experimented with countless variations since then, but the combination of cashews and almonds remains my absolute favorite for its unparalleled creamy texture. It’s a taste of simple luxury, crafted right in my own kitchen.
Recipe Overview
- Prep Time: 5 minutes
- Soak Time: 6 hours (minimum)
- Blend Time: 1 minute
- Total Time: 6 hours 6 minutes
- Yields: Approximately 4 cups
- Dietary Type: Vegan, Dairy-Free, Gluten-Free
Ingredients
- 3 1/2 cups water (or 4 cups if you want it less creamy)
- 1/2 cup almonds
- 1/2 cup cashews
- 1 tablespoon agave nectar (optional)
- 1/2 teaspoon cinnamon
- 1/2 teaspoon vanilla extract
- 1/4 teaspoon nutmeg
Equipment Needed
- High-powered blender
- Fine-mesh strainer
- Cheesecloth, nut milk bag, or clean kitchen towel
- Large bowl or pitcher
Instructions
-
Soak the nuts: In a bowl, submerge the almonds and cashews in enough water to cover them completely. Allow them to soak overnight in the refrigerator, or for at least 6 hours. Soaking softens the nuts, making them easier to blend and resulting in a smoother, creamier milk. This step is crucial!
-
Drain and rinse: After soaking, drain the almonds and cashews thoroughly. Discard the soaking water. Rinse the nuts under cool running water. This removes any residual phytic acid, which can inhibit nutrient absorption.
-
Blend the ingredients: Transfer the drained and rinsed almonds and cashews to a high-powered blender. Add 3 1/2 cups of fresh water (use 4 cups if you prefer a thinner consistency). Add the optional agave nectar for sweetness, the cinnamon, vanilla extract, and nutmeg.
-
Blend until smooth: Blend on high speed for approximately 1 minute, or until the mixture transforms into a white, creamy milk. You should see that most of the nut particles have dissolved. If you don’t have a high-powered blender, you may need to blend for a little longer, scraping down the sides as needed, to achieve the desired consistency.
-
Strain the milk: Place a cheesecloth, nut milk bag, or a clean kitchen towel inside a fine-mesh strainer. Position the strainer over a large bowl or pitcher.
-
Pour and strain: Carefully pour the contents of the blender over the cloth-lined strainer. Allow the milk to drain through naturally.
-
Extract remaining milk: Once most of the liquid has drained through, gather the edges of the cloth or bag and gently squeeze to extract the remaining milk. This ensures you get every last drop of creamy goodness. Don’t be afraid to really squeeze!
-
Discard or repurpose pulp: The remaining nut pulp can be discarded, or saved for use in other recipes. It can be dried and ground into almond flour, added to smoothies for extra fiber, or used as a component in homemade energy bars or crackers.
-
Serve and store: The homemade cashew and almond milk is now ready to drink and enjoy! Store it in an airtight container in the refrigerator for up to 4 days.
Expert Tips & Tricks
- Soaking Secrets: Don’t skip the soaking! It’s essential for a creamy texture. If you forget to soak overnight, you can quick-soak the nuts in boiling water for about an hour. However, an overnight soak yields the best results.
- Sweetness Control: The agave nectar is entirely optional. Start with a small amount and adjust to your preference. You can also use other natural sweeteners like dates (soaked and pitted) or maple syrup.
- Vanilla Bean Boost: For an extra layer of flavor, scrape the seeds from half a vanilla bean into the blender along with the other ingredients.
- Preventing Separation: Homemade nut milk tends to separate upon standing. This is perfectly normal! Simply shake or stir well before serving.
- Flavor Infusions: Experiment with different flavorings! Add a pinch of sea salt to enhance the sweetness, or a few drops of almond extract for a more pronounced almond flavor.
- Adjusting Consistency: If your nut milk is too thick, add more water during the blending process. If it’s too thin, use slightly less water next time, or add an extra tablespoon of cashews or almonds.
- Pulp Power: Don’t underestimate the versatility of the leftover nut pulp! Spread it thinly on a baking sheet and bake at a low temperature (around 200°F or 95°C) until completely dry. Then, grind it into a fine flour for baking.
Serving & Storage Suggestions
Serve your homemade cashew and almond milk chilled, straight from the refrigerator. It’s a delightful beverage on its own, or it can be used in place of dairy milk in coffee, tea, smoothies, cereal, or baking recipes.
Store any leftover milk in an airtight container in the refrigerator. It will keep for up to 4 days. Because it doesn’t contain preservatives, it’s best to use it within this timeframe. It may separate during storage, so be sure to shake it well before serving. Freezing is not generally recommended as it can alter the texture of the milk, making it grainy.
Nutritional Information
(Estimated values per 1 cup serving, using 3.5 cups water and 1 tablespoon agave):
| Nutrient | Amount per Serving | % Daily Value |
|---|---|---|
| Calories | 70 kcal | 4% |
| Total Fat | 5g | 6% |
| Saturated Fat | 0.5g | 3% |
| Cholesterol | 0mg | 0% |
| Sodium | 5mg | 0% |
| Total Carbohydrate | 5g | 2% |
| Dietary Fiber | 1g | 4% |
| Sugars | 2g | – |
| Protein | 2g | 4% |
Variations & Substitutions
- Different Nuts: Feel free to experiment with other nuts like macadamia nuts, pecans, or walnuts. The ratios may need to be adjusted to achieve the desired creaminess.
- Sweetener Alternatives: Instead of agave nectar, use maple syrup, honey (if not vegan), or dates. If using dates, soak them in warm water for about 10 minutes to soften them before blending.
- Spice it Up: Add a pinch of cardamom, ginger, or cloves for a warm, comforting flavor.
- Chocolate Nut Milk: Add 1-2 tablespoons of cocoa powder and a little extra sweetener for a delicious chocolate-flavored nut milk.
- Unsweetened Version: Simply omit the sweetener altogether for a completely unsweetened nut milk.
FAQs (Frequently Asked Questions)
Q: Why do I need to soak the nuts?
A: Soaking softens the nuts, making them easier to blend into a smooth milk. It also helps to reduce phytic acid, which can hinder nutrient absorption.
Q: Can I use a regular blender instead of a high-powered blender?
A: While a high-powered blender is ideal, you can use a regular blender. Just blend for a longer period of time, and you may need to strain the milk through a finer cheesecloth to remove any remaining nut particles.
Q: How long does homemade nut milk last in the refrigerator?
A: Homemade nut milk typically lasts for up to 4 days in the refrigerator. Be sure to store it in an airtight container.
Q: What can I do with the leftover nut pulp?
A: The nut pulp can be dried and ground into almond flour, added to smoothies for extra fiber, or used in homemade energy bars or crackers.
Q: My nut milk separated in the refrigerator. Is it still okay to drink?
A: Yes, separation is normal in homemade nut milk. Simply shake or stir well before serving to re-emulsify the milk.
Final Thoughts
Making your own cashew and almond milk is surprisingly simple and incredibly rewarding. Once you taste the difference between homemade and store-bought, you’ll never go back! Experiment with different flavor combinations and sweeteners to create your perfect blend. Don’t be afraid to get creative in the kitchen, and please share your results! This creamy, delicious milk is perfect on its own, or paired with a warm bowl of oatmeal or a batch of freshly baked cookies. Enjoy the pure, natural taste!