
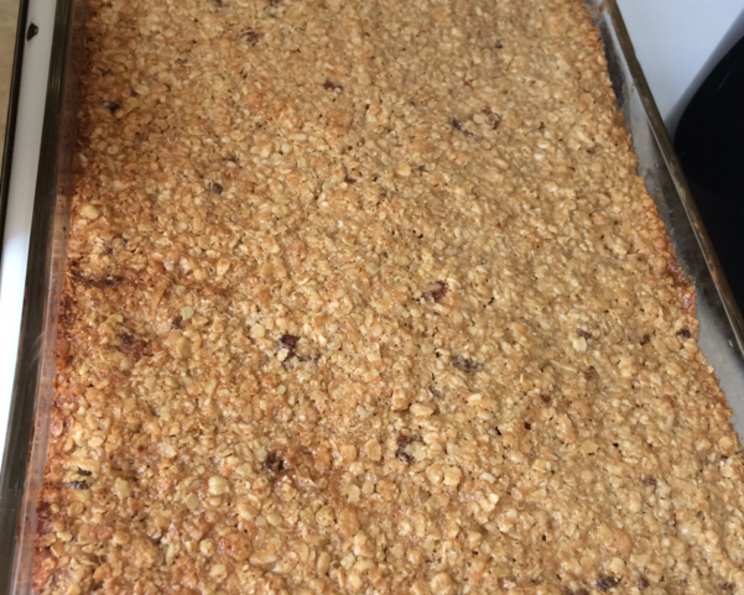
Homemade Chewy Granola Bars: The Perfect Anytime Treat
The scent of baking granola bars always transports me back to my childhood. My grandmother, a woman who believed in the power of a good, wholesome snack, would always have a batch of these ready for us after school. The slightly caramelized edges, the chewy interior bursting with raisins and chocolate chips, and the satisfying crunch of sunflower seeds – it was pure comfort in every bite. To this day, the aroma alone is enough to bring a smile to my face, a sweet reminder of simpler times and the love that went into every single bar.
Recipe Overview
- Prep Time: 15 minutes
- Cook Time: 15-20 minutes
- Total Time: 30-35 minutes
- Yields: 24 bars
- Dietary Type: Vegetarian
Ingredients
- 1 cup firmly packed brown sugar
- 2/3 cup peanut butter
- 1/2 cup light corn syrup
- 1/2 cup butter or margarine, melted
- 2 teaspoons vanilla
- 3 cups quick-cooking rolled oats
- 1/2 cup coconut
- 1/2 cup shelled sunflower seeds
- 1/2 cup raisins
- 1/3 cup wheat germ
- 2 tablespoons sesame seeds
- 1 cup semi-sweet chocolate chips
Equipment Needed
- 13×9-inch pan
- Large mixing bowl
- Measuring cups and spoons
- Spatula or wooden spoon
Instructions
-
Preheat your oven to 350°F (175°C). This is crucial for even baking. Make sure your oven is properly calibrated for best results.
-
Grease a 13×9-inch pan. This will prevent the granola bars from sticking and make them easier to remove after baking. You can use cooking spray, butter, or even line the pan with parchment paper, leaving an overhang for easy lifting.
-
In a large bowl, combine the brown sugar, peanut butter, corn syrup, melted butter (or margarine), and vanilla. Blend these wet ingredients together thoroughly until you achieve a smooth and well-combined mixture. The peanut butter can sometimes be stubborn; warming it slightly beforehand can make it easier to work with.
-
Add the remaining ingredients: rolled oats, coconut, sunflower seeds, raisins, wheat germ, sesame seeds, and chocolate chips. Mix everything very well. Ensure that the dry ingredients are evenly distributed throughout the wet mixture. This step is important for ensuring that every bar has a consistent flavor and texture. The mixture should be quite thick and sticky.
-
Press the mixture evenly into the greased pan. Use the back of a spatula or your hands (lightly dampened) to firmly press the mixture down. A uniform, compact layer is essential for creating bars that hold their shape and don’t crumble easily. Make sure to get into the corners and edges of the pan.
-
Bake at 350°F (175°C) for 15-20 minutes, or until the edges are light golden brown. Keep a close eye on them during the last few minutes of baking to prevent burning. The granola bars should be firm to the touch and slightly browned.
-
Cool completely for at least 1 hour before cutting into bars. Allowing the granola bars to cool completely before cutting is crucial for them to set properly and maintain their shape. If you try to cut them while they’re still warm, they’ll be too soft and will likely crumble.
-
Cut into bars using a sharp knife. For clean cuts, you can chill the bars in the refrigerator for about 30 minutes before cutting. The size and shape of the bars are entirely up to you – feel free to cut them into squares, rectangles, or even triangles.
Expert Tips & Tricks
-
For extra chewy bars: Slightly underbake them. Pull them out of the oven when they are just starting to turn golden brown around the edges.
-
Toast the oats and seeds: For a nuttier, more complex flavor, toast the oats, sunflower seeds, and sesame seeds in a dry skillet over medium heat until lightly golden and fragrant before adding them to the mixture.
-
Customize your bars: Get creative with the mix-ins! Try dried cranberries, chopped nuts (almonds, pecans, walnuts), shredded carrots, different types of chocolate chips (dark, white, butterscotch), or even a sprinkle of sea salt on top before baking.
-
Press firmly: Pressing the mixture firmly and evenly into the pan is crucial for preventing the bars from crumbling. Use the bottom of a measuring cup or a piece of parchment paper to help you achieve a smooth, compact layer.
-
Line the pan: Lining the pan with parchment paper or foil makes it much easier to lift the bars out of the pan after they have cooled. Leave an overhang of parchment paper on two sides of the pan, so you can easily lift out the granola bar slab.
-
Troubleshooting: If the bars are too crumbly, try adding a tablespoon or two of melted butter or corn syrup to the mixture. If they are too soft, bake them for a few more minutes.
Serving & Storage Suggestions
Serve these homemade chewy granola bars as a delicious and convenient snack, breakfast option, or even a light dessert. They are perfect for packing in lunchboxes, taking on hikes, or enjoying with a cup of coffee or tea.
Store the granola bars in an airtight container at room temperature for up to a week. For longer storage, you can freeze them for up to 2 months. Thaw frozen granola bars at room temperature before serving. To prevent sticking when layering in a container, separate the bars with pieces of parchment paper or wax paper.
Nutritional Information
| Nutrient | Amount per Serving | % Daily Value |
|---|---|---|
| Calories | 251.8 kcal | N/A |
| Calories from Fat | N/A | 48% |
| Total Fat | 13.4 g | 20% |
| Saturated Fat | 5.8 g | 28% |
| Cholesterol | 10.2 mg | 3% |
| Sodium | 76.6 mg | 3% |
| Total Carbohydrate | 31.6 g | 10% |
| Dietary Fiber | 2.8 g | 11% |
| Sugars | 17.4 g | 69% |
| Protein | 4.8 g | 9% |
Note: Nutritional information is an estimate and may vary based on specific ingredients and portion sizes.
Variations & Substitutions
-
Nut-Free: Substitute the peanut butter with sunflower seed butter (sunbutter) or tahini.
-
Vegan: Use vegan butter or coconut oil in place of the butter. Ensure the chocolate chips are dairy-free. You can also use maple syrup or agave nectar instead of corn syrup, although this may slightly affect the texture.
-
Gluten-Free: Use certified gluten-free rolled oats to ensure the granola bars are gluten-free.
-
Lower Sugar: Reduce the amount of brown sugar or substitute with a sugar alternative like stevia or monk fruit sweetener (adjust amounts according to package directions).
-
Spice it up: Add a pinch of cinnamon, nutmeg, or ginger to the mixture for a warm and comforting flavor.
-
Citrus Zest: Add the zest of one orange or lemon to brighten the flavor of the bars.
FAQs (Frequently Asked Questions)
Q: Why are my granola bars too hard?
A: Overbaking is the most common cause. Try reducing the baking time by a few minutes or lowering the oven temperature slightly. Also, make sure you’re not pressing the mixture too firmly into the pan.
Q: My granola bars are too crumbly. What did I do wrong?
A: This usually indicates not enough binder. Make sure you’re using enough peanut butter, corn syrup, and melted butter. You can also try adding a tablespoon or two of additional melted butter or corn syrup. Press firmly when setting in the pan.
Q: Can I use steel-cut oats instead of quick-cooking oats?
A: No, steel-cut oats won’t work in this recipe. They require a much longer cooking time and won’t bind the ingredients properly. Stick with quick-cooking rolled oats for the best results.
Q: How do I prevent the chocolate chips from melting too much?
A: To minimize melting, you can add the chocolate chips after the other ingredients have been mixed. Also, be sure not to overbake the granola bars.
Q: Can I add dried fruit other than raisins?
A: Absolutely! Dried cranberries, chopped dates, dried apricots, or chopped figs would all be delicious additions. Just make sure to chop them into smaller pieces if they are large.
Final Thoughts
These homemade chewy granola bars are more than just a snack; they’re a little piece of happiness you can create in your own kitchen. Don’t be afraid to experiment with different ingredients and flavors to make them your own. Whether you’re looking for a healthy breakfast on the go, a satisfying afternoon treat, or a nostalgic reminder of simpler times, these granola bars are sure to hit the spot. So, gather your ingredients, preheat your oven, and get ready to enjoy the delicious aroma and taste of homemade goodness! Share them with your friends, family, or simply savor them yourself – you deserve it!