
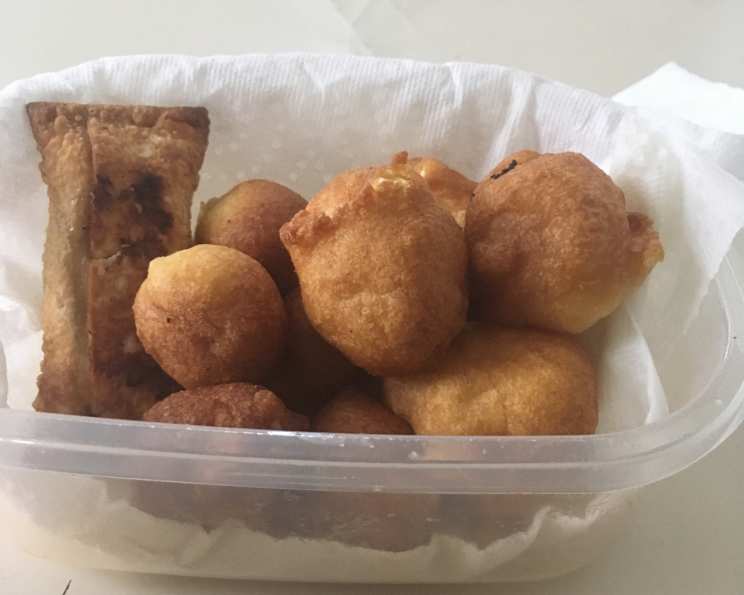
Homemade Chicken Balls from Scratch: A Culinary Classic
The aroma still transports me back to childhood. Every Friday night, our family tradition was Chinese takeout. While my siblings clamored for noodles and fried rice, my heart belonged to the golden orbs of crispy, battered chicken, dunked generously in sweet and sour sauce. Those simple chicken balls were more than just a meal; they were a symbol of family, comfort, and the pure joy of a weekend finally arriving. Today, I’m excited to share my homemade version, a recipe honed over years to recapture that nostalgic magic.
Recipe Overview
- Prep Time: 20 minutes
- Cook Time: 5-8 minutes per batch
- Total Time: 30-40 minutes
- Servings: 6-8
- Yields: Approximately 20 chicken balls
- Dietary Type: Not Gluten-Free, Not Dairy-Free
Ingredients
- 2 lbs boneless, skinless chicken, cubed
- 1 cup flour
- 2 teaspoons baking powder
- 1 teaspoon salt
- 2 eggs
- ⅔ cup milk
- 1 tablespoon oil or 1 tablespoon melted shortening
- Fat, heated for frying (vegetable oil, peanut oil, or canola oil work well)
Equipment Needed
- Large mixing bowl
- Small mixing bowl
- Deep fryer or large pot
- Slotted spoon or spider
- Paper towels
- Thermometer (optional, but recommended)
Instructions
-
Begin by preparing the batter. In a large mixing bowl, sift together the flour, baking powder, and salt. Sifting ensures a lighter batter and helps prevent lumps.
-
In a separate, smaller bowl, beat the eggs until light and frothy. Add the milk and oil (or melted shortening) to the eggs and whisk until well combined. The oil or shortening helps to create a slightly richer and more tender batter.
-
Gradually pour the wet ingredients into the dry ingredients, mixing continuously with a whisk or spoon until a smooth batter forms. Be careful not to overmix, as this can develop the gluten in the flour and result in a tougher chicken ball. A few small lumps are fine.
-
Add the cubed chicken to the batter. Stir gently to ensure that each piece of chicken is fully coated. Allowing the chicken to sit in the batter for a few minutes before frying can help the batter adhere better.
-
Heat the fat in your deep fryer or a large pot to 350°F (175°C). If using a pot, ensure it is deep enough to safely submerge the chicken balls without overflowing. A thermometer is highly recommended to maintain a consistent temperature; otherwise, test the oil by dropping a small amount of batter into it. If it sizzles and browns quickly, the oil is ready.
-
Using a spoon or a small ice cream scoop, drop spoonfuls of the chicken and batter into the hot oil. Work in batches, being careful not to overcrowd the fryer or pot. Overcrowding will lower the oil temperature and result in soggy chicken balls.
-
Fry the chicken balls for approximately 5-8 minutes, or until they are golden brown and cooked through. Use a slotted spoon or spider to turn the chicken balls occasionally to ensure even browning. The internal temperature of the chicken should reach 165°F (74°C) to ensure it is safely cooked.
-
Remove the chicken balls from the oil with a slotted spoon or spider and place them on a bowl lined with paper towels to drain any excess oil.
-
Serve immediately while hot and crispy.
Expert Tips & Tricks
- For extra crispy chicken balls: After frying, place the cooked chicken balls on a wire rack in a preheated oven at 200°F (95°C) for a few minutes. This will help to keep them warm and maintain their crispiness.
- Make-ahead batter: The batter can be prepared up to a few hours in advance and stored in the refrigerator. However, it is best to add the baking powder just before using it to ensure maximum leavening power.
- Preventing soggy chicken balls: Ensure the oil temperature is hot enough (350°F/175°C) and avoid overcrowding the fryer. Also, don’t skip the step of draining the chicken balls on paper towels.
- Flavor boost: Add a pinch of garlic powder, onion powder, or white pepper to the batter for extra flavor.
- Ensure chicken is cooked: Cut one open to check, or use meat thermometer to check internal temperature of 165°F (74°C).
Serving & Storage Suggestions
Serve these delicious chicken balls immediately for the best flavor and texture. They are traditionally served with a sweet and sour sauce, but they also pair well with other dipping sauces like plum sauce, duck sauce, or even a simple honey-garlic glaze. They can be served as an appetizer, a snack, or as part of a larger meal over rice or noodles.
Leftover chicken balls can be stored in an airtight container in the refrigerator for up to 3 days. To reheat, you can use a microwave (though they will lose some crispiness), an oven at 350°F (175°C) for 10-15 minutes, or an air fryer for a few minutes until heated through and crispy. Freezing is not recommended.
Nutritional Information
| Nutrient | Amount per Serving (estimated) | % Daily Value* |
|---|---|---|
| Calories | 350 kcal | 18% |
| Total Fat | 20g | 31% |
| Saturated Fat | 4g | 20% |
| Cholesterol | 150mg | 50% |
| Sodium | 500mg | 22% |
| Total Carbohydrate | 20g | 7% |
| Dietary Fiber | 1g | 4% |
| Sugars | 2g | – |
| Protein | 25g | 50% |
*Based on a 2,000 calorie diet.
Variations & Substitutions
- Gluten-free: Substitute the all-purpose flour with a gluten-free flour blend. Be sure to choose a blend that is designed for baking and contains xanthan gum for binding.
- Dairy-free: Replace the milk with a non-dairy alternative such as almond milk, soy milk, or oat milk.
- Spice it up: Add a pinch of cayenne pepper or a dash of hot sauce to the batter for a spicy kick.
- Vegetable additions: Incorporate finely diced vegetables like bell peppers, onions, or carrots into the chicken mixture for added flavor and nutrients.
FAQs (Frequently Asked Questions)
Q: Can I use chicken thighs instead of chicken breasts?
A: Yes, chicken thighs can be used for a richer flavor. Just be sure to trim any excess fat before cubing them.
Q: How do I prevent the batter from falling off the chicken while frying?
A: Make sure the chicken is dry before coating it in the batter, and that the batter is not too thin. Letting the battered chicken sit for a few minutes before frying can also help the batter adhere better.
Q: Can I bake these instead of frying them?
A: Baking is not recommended, as they won’t achieve the same crispy texture as fried chicken balls.
Q: How long will the oil stay hot enough when adding the chicken?
A: If you overcrowd the pot, the oil temperature will drop significantly. Work in smaller batches to maintain the heat and prevent soggy chicken.
Q: What dipping sauces would be suitable with these chicken balls?
A: Sweet and sour sauce is a classic, but plum sauce, duck sauce, honey-garlic sauce, and even a spicy mayo would also be delicious!
Final Thoughts
Now it’s your turn to create some magic in your own kitchen! Don’t be intimidated; this recipe is surprisingly simple, and the results are incredibly rewarding. Gather your ingredients, put on some good music, and enjoy the process of transforming simple ingredients into a batch of golden, crispy chicken balls that will transport you (and your loved ones) to a place of pure culinary bliss. Please share your creations and feedback, and remember, the most important ingredient is always love! Enjoy!