
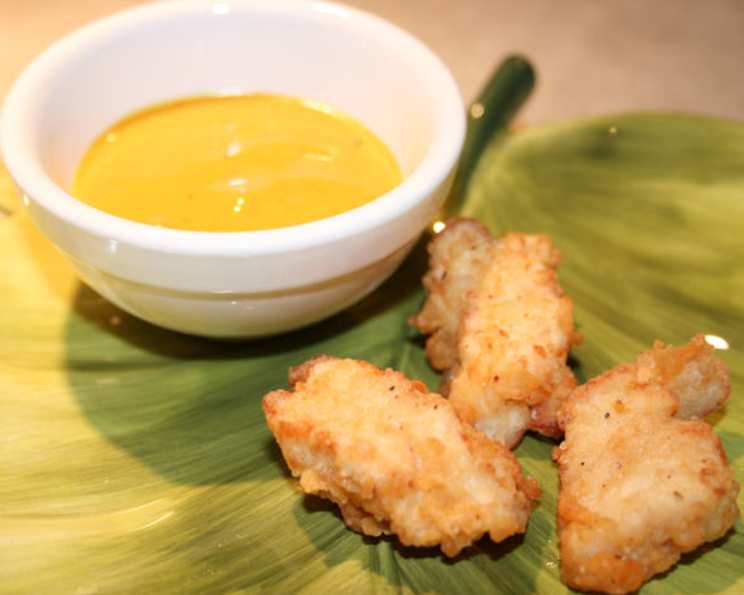
Elevating the Everyday: Homemade Chicken Nuggets
I can still picture myself, a tiny chef-in-training, perched on a stool beside my grandmother, her hands a blur as she deftly cut chicken into bite-sized pieces. The aroma of seasoned flour and gently simmering oil filled her cozy kitchen, a promise of crispy, golden nuggets that tasted like pure love. Those weren’t just chicken nuggets; they were edible sunshine, a comforting treat made with care and the secret ingredient of family. It’s a memory I treasure, and a tradition I’m thrilled to share with you.
Recipe Overview
- Prep Time: 20 minutes
- Cook Time: 40 minutes
- Total Time: 1 hour
- Servings: 6
- Yield: Approximately 30 nuggets
- Dietary Type: Varies depending on oil used
Ingredients
- 3 lbs boneless, skinless chicken breasts, cut into pieces
- 4 eggs
- 1/2 cup milk
- 2 cups flour
- 1 – 1 1/2 teaspoon salt
- 1/4 teaspoon pepper
- Oil, for frying (vegetable, canola, or peanut oil recommended)
Equipment Needed
- Two mixing bowls
- Frying pan
- Paper towels
- 9×13 inch baking dish
Instructions
-
In a mixing bowl, beat together the eggs and milk until well combined. This mixture will serve as the first layer of our breading process, helping the flour adhere to the chicken.
-
Cut the chicken breasts into bite-sized pieces, approximately 1-inch cubes. The size is important for even cooking. If the pieces are too large, they may not cook through completely before the outside browns too much.
-
Dip each piece of chicken into the egg/milk mixture, ensuring it’s fully coated. Allow any excess to drip off. This step is crucial for creating a moist and flavorful nugget.
-
In a separate mixing bowl, combine the flour, salt, and pepper. Mix well to ensure the seasonings are evenly distributed throughout the flour. I recommend starting with 1 teaspoon of salt and tasting a small amount of the flour mixture before adding more, to ensure it doesn’t become overly salty.
-
Coat each piece of chicken thoroughly in the flour mixture, pressing lightly to ensure the flour adheres. Make sure every surface of the chicken is covered. A well-coated nugget is a crispy nugget!
-
Heat approximately 1/4 cup of oil in a frying pan over medium-high heat. The oil should be hot enough to sizzle gently when a small piece of flour is dropped into it. Don’t overcrowd the pan. Work in batches to maintain the oil temperature.
-
Carefully place the coated chicken pieces into the hot oil. Brown the chicken on all sides, approximately 2-3 minutes per side, until golden brown. Keep a close eye on the chicken, as it can burn quickly.
-
Remove the browned chicken nuggets from the frying pan and drain them on paper towels to remove excess oil. This step is crucial for achieving a crispy, non-greasy result.
-
Place the drained chicken nuggets in a 9×13 inch baking dish. Be sure the baking dish is not greased or sprayed with non-stick cooking spray.
-
Cover the baking dish with aluminum foil to help retain moisture and prevent the nuggets from drying out during baking.
-
Bake in a preheated oven at 325°F (160°C) for 30 minutes. The lower temperature and covered baking ensure the chicken cooks through completely and remains tender and juicy.
Expert Tips & Tricks
- Double Dredge: For an extra crispy coating, dip the chicken in the egg mixture, then flour, then back into the egg, and finally back into the flour. This creates a thicker, more flavorful crust.
- Seasoning Blend: Experiment with different seasoning blends in the flour mixture. Garlic powder, onion powder, paprika, or even a pinch of cayenne pepper can add a unique flavor profile.
- Doneness Check: The chicken is done when it reaches an internal temperature of 165°F (74°C). Use a meat thermometer to ensure it’s fully cooked.
- Prevent Soggy Bottoms: Elevate the chicken in the baking dish by placing it on a wire rack. This will allow air to circulate and prevent the bottoms from becoming soggy.
- Freezing for Later: These nuggets freeze beautifully! After baking, let them cool completely, then freeze them in a single layer on a baking sheet. Once frozen, transfer them to a freezer-safe bag or container. To reheat, bake them in a preheated oven at 375°F (190°C) until heated through.
Serving & Storage Suggestions
Serve these golden delights immediately while they are still warm and crispy. They pair perfectly with a variety of dipping sauces, such as ketchup, honey mustard, barbecue sauce, or ranch dressing. Consider serving them alongside classic sides like french fries, mashed potatoes, coleslaw, or a simple green salad.
Leftover chicken nuggets can be stored in an airtight container in the refrigerator for up to 3-4 days. To reheat, bake them in a preheated oven at 350°F (175°C) until heated through. Microwaving is also an option, but the nuggets may become slightly less crispy. For longer storage, freeze the nuggets as described in the “Expert Tips & Tricks” section.
Nutritional Information
| Nutrient | Amount per Serving | % Daily Value |
|---|---|---|
| Calories | 463.6 kcal | N/A |
| Calories from Fat | N/A | 14% |
| Total Fat | 7.3 g | 11% |
| Saturated Fat | 2.3 g | 11% |
| Cholesterol | 275.5 mg | 91% |
| Sodium | 592.6 mg | 24% |
| Total Carbohydrate | 33 g | 11% |
| Dietary Fiber | 1.1 g | 4% |
| Sugars | 0.4 g | 1% |
| Protein | 61.6 g | 123% |
Note: Nutritional information is an estimate and may vary based on specific ingredients and cooking methods.
Variations & Substitutions
- Gluten-Free: Use a gluten-free flour blend instead of all-purpose flour.
- Spicy: Add a pinch of cayenne pepper or red pepper flakes to the flour mixture for a spicy kick.
- Herbed: Incorporate dried herbs like oregano, thyme, or rosemary into the flour mixture.
- Baked Only: For a healthier option, skip the frying step and bake the chicken nuggets directly in the oven at 400°F (200°C) for 20-25 minutes, or until cooked through.
- Air Fryer: Instead of frying or baking, try air frying the nuggets at 400°F (200°C) for 12-15 minutes, flipping halfway through.
FAQs (Frequently Asked Questions)
Q: Can I use chicken thighs instead of chicken breasts?
A: Yes, you can! Chicken thighs will result in a slightly richer and more flavorful nugget. Just be sure to trim any excess fat before cutting them into pieces.
Q: How do I keep the flour from clumping when I’m breading the chicken?
A: A good tip is to use a whisk to fluff the flour mixture occasionally and break up any clumps that may form. You can also use a sifter to ensure the flour is light and airy.
Q: What’s the best oil to use for frying?
A: Vegetable oil, canola oil, or peanut oil are all good choices for frying chicken nuggets. They have high smoke points and neutral flavors that won’t overpower the taste of the chicken.
Q: My chicken nuggets are browning too quickly. What should I do?
A: If the nuggets are browning too quickly, reduce the heat slightly. You may also need to adjust the cooking time to ensure the chicken is cooked through completely without burning.
Q: Can I make these ahead of time?
A: Yes, you can prepare the chicken nuggets up to the point of frying, then store them in the refrigerator for up to 24 hours. Fry them just before serving for the best results.
Final Thoughts
Homemade chicken nuggets are more than just a quick and easy meal; they’re an opportunity to create lasting memories in the kitchen. So gather your ingredients, put on some music, and get ready to embark on a culinary adventure. Don’t be afraid to experiment with different flavors and seasonings to create your own signature nuggets. And most importantly, have fun! I hope this recipe inspires you to ditch the frozen variety and embrace the joy of homemade goodness. Share your creations and variations with me; I can’t wait to see what you come up with!