
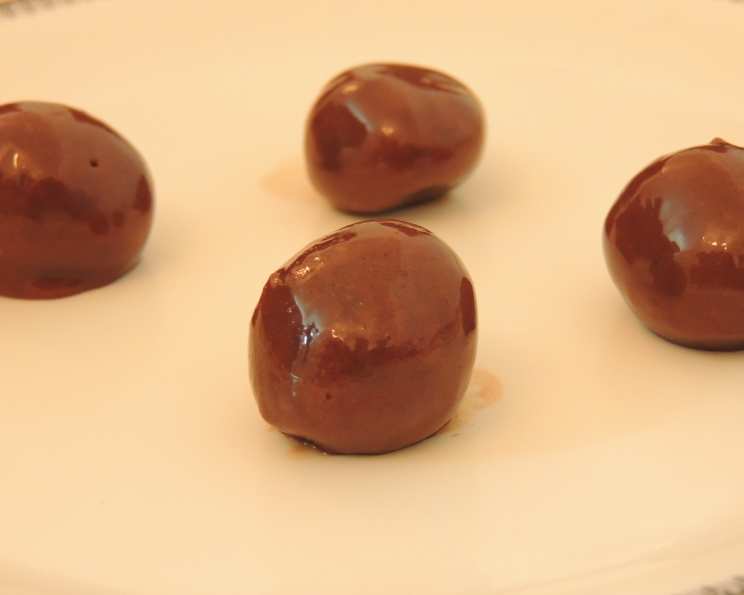
Homemade Chocolate: A Diwali Delight
The aroma of spices, the twinkling of diyas, and the joy of sharing sweets with loved ones – Diwali has always been a symphony of sensory delights for me. But one memory stands out: the year my aunt taught me how to make homemade chocolate. I remember being mesmerized as the simple ingredients transformed into a rich, decadent treat. Each bite was an explosion of flavor, a testament to the magic that happens when love and care are poured into cooking. That year, more than any other, Diwali tasted like pure, unadulterated happiness.
Recipe Overview
- Prep Time: 15 minutes
- Cook Time: 20 minutes
- Total Time: 2 hours 35 minutes (includes cooling time)
- Servings: Varies
- Yield: Approximately 2-3 pounds of chocolate
- Dietary Type: Vegetarian
Ingredients
- 500 g powdered milk
- 50 g cocoa powder
- 200 g white butter or 200 g unsalted butter
- 700 g sugar
- 1 cup water
Equipment Needed
- Large, heavy-bottomed pan
- Wooden spoon or spatula
- Mixing bowls
- Greased baking tray (optional)
Instructions
- Begin by thoroughly combining the powdered milk and cocoa powder in a large mixing bowl. Ensure there are no lumps, as this will guarantee a smooth and even chocolate texture. Sifting the ingredients together can help achieve this.
- In the heavy-bottomed pan, combine the sugar and water. Bring the mixture to a boil over medium heat, stirring constantly until the sugar is completely dissolved.
- Once the sugar has dissolved, reduce the heat to low. Add the white butter (or unsalted butter) to the simmering sugar syrup.
- Continue stirring until the butter is fully melted and incorporated into the syrup. This step is crucial for creating a smooth and velvety chocolate.
- Now comes the delicate part. Gradually add the milk powder and cocoa powder mixture to the butter and sugar syrup, stirring continuously to prevent lumps from forming. Use a wooden spoon or spatula to ensure you scrape the bottom and sides of the pan.
- Keep stirring the mixture over low heat until it begins to pull away from the sides of the pan. This indicates that the chocolate is reaching the right consistency. Be patient, as this may take some time.
- Once the mixture leaves the sides of the pan, immediately reduce the heat to the lowest setting and then turn off the gas. The residual heat will continue to cook the chocolate slightly.
- Allow the mixture to cool completely for 2-3 hours. This cooling period is essential for the chocolate to set properly. You can leave it at room temperature.
- Optional Step: For a more structured chocolate, pour the mixture into a greased baking tray and refrigerate for about an hour. Once chilled, cut the chocolate into your desired shapes, such as squares or rectangles.
- Alternatively, you can roll the cooled mixture into small, nut-sized balls and coat them with flaked coconut or chopped nuts for a delightful variation.
Expert Tips & Tricks
- Lump-Free Guarantee: To prevent lumps from forming when you add the milk powder and cocoa powder, whisk the dry ingredients together beforehand and gradually incorporate them into the wet ingredients while stirring constantly.
- Perfect Consistency: The key to perfect homemade chocolate is achieving the right consistency. The mixture should be thick enough to hold its shape but not so dry that it crumbles. If the chocolate is too dry, you can add a tablespoon of melted butter to moisten it.
- Butter Matters: Using high-quality butter significantly impacts the final flavor of the chocolate. Opt for European-style butter with a higher fat content for a richer, more decadent taste.
- Flavor Infusion: Experiment with different flavor infusions by adding a teaspoon of vanilla extract, almond extract, or a pinch of cinnamon to the mixture during the cooking process.
- Tempering Note: This recipe does not involve tempering the chocolate. Tempering creates a glossy, snap-able finished product, which this will not achieve. This recipe creates a fudgier, more rustic chocolate.
Serving & Storage Suggestions
This homemade chocolate is best enjoyed at room temperature, allowing its flavors to fully develop. You can serve it as part of a dessert platter, alongside other Diwali sweets, or as a standalone treat with a cup of tea or coffee. To store the chocolate, keep it in an airtight container at room temperature for up to a week. If you live in a warmer climate, store it in the refrigerator to prevent it from melting. The chocolate can also be frozen for longer storage, but be aware that the texture may change slightly upon thawing. Let it thaw in the refrigerator overnight before serving.
Nutritional Information
Note: Nutritional information is an estimate and may vary based on specific ingredients and serving size.
| Nutrient | Amount per Serving (estimated) | % Daily Value (estimated) |
|---|---|---|
| Calories | 330 kcal | 17% |
| Total Fat | 15g | 23% |
| Saturated Fat | 9g | 45% |
| Cholesterol | 45mg | 15% |
| Sodium | 165mg | 7% |
| Total Carbohydrate | 46g | 15% |
| Dietary Fiber | 1g | 4% |
| Sugars | 44g | N/A |
| Protein | 7g | 14% |
Variations & Substitutions
- Dairy-Free Delight: While the recipe calls for powdered milk, those seeking a dairy-free version could experiment with a high-quality soy milk powder or coconut milk powder. The flavor and texture will differ, so small batch tests are recommended.
- Nutty Indulgence: Add chopped almonds, cashews, or pistachios to the chocolate mixture for a delightful crunch.
- Spiced Chocolate: Infuse the chocolate with warm spices like cardamom, ginger, or cloves for a festive twist. Add these spices along with the milk powder and cocoa powder.
- Dark Chocolate Variation: Reduce the amount of sugar and increase the amount of cocoa powder for a more intense dark chocolate flavor.
- Peanut Butter Swirl: Swirl a spoonful of peanut butter into the chocolate mixture before it sets for a decadent peanut butter chocolate treat.
FAQs (Frequently Asked Questions)
Q: Why is my chocolate grainy?
A: Grainy chocolate is often caused by undissolved sugar or lumps in the milk powder. Ensure the sugar is fully dissolved in the water and that the milk powder is sifted to remove any lumps.
Q: Can I use regular milk instead of powdered milk?
A: Using regular milk will alter the consistency of the chocolate and is not recommended for this recipe. The high concentration of milk solids in powdered milk is essential for achieving the desired texture.
Q: How do I prevent the chocolate from burning?
A: To prevent burning, use a heavy-bottomed pan and stir the mixture constantly over low heat. This will distribute the heat evenly and prevent the chocolate from sticking to the bottom of the pan.
Q: Can I add chocolate chips to this recipe?
A: Adding chocolate chips will change the consistency of the chocolate. It is not recommended to add chocolate chips to the mixture while it is still cooking. However, you can melt chocolate chips and drizzle them over the cooled chocolate for added decoration.
Q: How long does the chocolate last?
A: This homemade chocolate can last for up to a week at room temperature if stored in an airtight container. In warmer climates, it is best to store it in the refrigerator to prevent it from melting.
Final Thoughts
This homemade chocolate recipe is more than just a set of instructions; it’s an invitation to create memories, share joy, and savor the simple pleasures of life. Gather your loved ones, roll up your sleeves, and let the aroma of cocoa fill your kitchen. Don’t be afraid to experiment with variations, add your own personal touch, and most importantly, have fun! I encourage you to try this recipe and share your creations with me. What spices will you add? What shapes will you create? The possibilities are endless! Enjoy!