
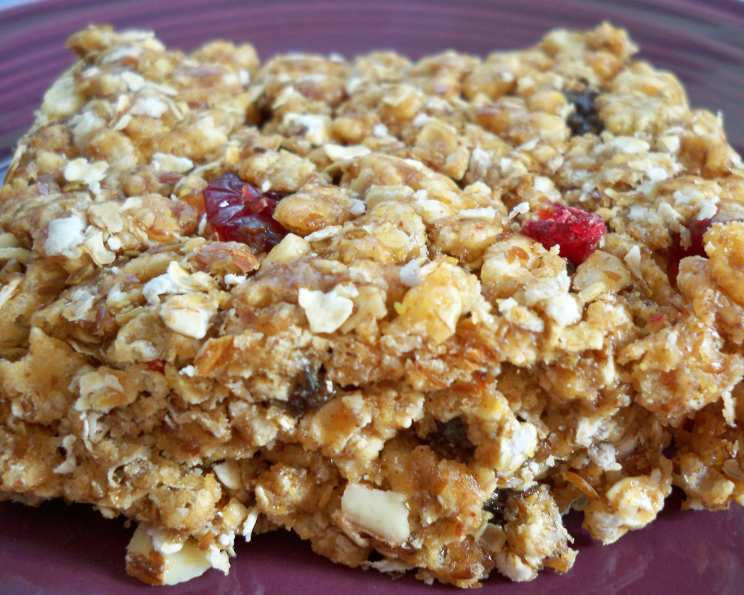
Fuel Your Adventures: No-Bake Homemade Cliff Bars
I remember countless childhood hikes with my family, the scent of pine needles heavy in the air and the crunch of gravel under our boots. And I vividly remember the moment my dad would pull out a Cliff Bar from his backpack – it was the ultimate reward for conquering a tough trail! The chewy texture, the burst of energy, and the feeling of accomplishment were all wrapped up in that single bar. Now, years later, I love recreating that experience with my own homemade version, perfect for fueling my own adventures, both big and small. These no-bake bars capture that same deliciousness and convenient energy boost, but with the added satisfaction of knowing exactly what’s going into them.
Recipe Overview
- Prep Time: 15 minutes
- Cook Time: 0 minutes
- Total Time: 15 minutes
- Servings: 12
- Yield: 12 bars
- Dietary Type: Vegetarian (easily adaptable to vegan)
Ingredients
- 1 1⁄4 cups crisp rice cereal (e.g., Rice Krispies)
- 1 cup uncooked quick-cooking oats
- 3 tablespoons ground flax seeds
- 1⁄4 cup finely chopped dried fruit (e.g., raisins, dried cranberries, dried cherries, etc.)
- 1⁄4 cup finely chopped nuts (preferably roasted or toasted)
- 1⁄4 cup brown rice syrup (or honey, maple syrup, or light molasses)
- 2 tablespoons dark brown sugar
- 1⁄3 cup nut butter (e.g., peanut, almond, cashew, soynut)
- 1 teaspoon vanilla extract
- Optional: 1⁄2 teaspoon ground cinnamon (optional)
Equipment Needed
- Large bowl
- Small saucepan
- 8-inch square pan
- Nonstick cooking spray
- Wax paper
Instructions
- In a large bowl, combine the crisp rice cereal, quick-cooking oats, ground flax seeds, dried fruit, and nuts. Ensure the ingredients are evenly distributed throughout the bowl. This mixture forms the base of your energy bars, providing a variety of textures and flavors.
- In a small saucepan over medium-high heat, bring the brown rice syrup (or your chosen alternative) and dark brown sugar to a boil, stirring constantly. Continuous stirring is crucial to prevent the sugar from burning and ensuring it dissolves evenly into the syrup. Once boiling, immediately remove the saucepan from the heat.
- Stir in the nut butter and vanilla extract until thoroughly blended. This mixture is the binding agent that holds the bars together, so ensure the nut butter is fully incorporated for a smooth and consistent texture. The vanilla extract adds a subtle sweetness and enhances the overall flavor profile.
- Pour the nut butter mixture over the cereal mixture, stirring until everything is completely coated. This step requires a bit of elbow grease, as the mixture will be quite stiff. Ensure that all the dry ingredients are evenly coated with the syrup mixture to ensure the bars hold together properly.
- Press the mixture firmly into an 8-inch square pan that has been sprayed with nonstick cooking spray. Use a large square of wax paper to help you press the mixture evenly into the pan. Applying even pressure is key for achieving a uniform thickness in your finished bars.
- Cool in the pan on a wire rack. Allowing the bars to cool completely is essential for them to firm up properly. This cooling process allows the nut butter mixture to solidify, holding the bars together.
- Once cooled, cut into 12 bars. Use a sharp knife to ensure clean cuts and prevent the bars from crumbling.
- Wrap bars tightly in plastic wrap and store in the refrigerator. Storing the bars in the refrigerator will help them maintain their shape and freshness.
Expert Tips & Tricks
- Toast your nuts! Toasting nuts before adding them to the mixture amplifies their flavor and adds a delightful crunch. Spread them on a baking sheet and toast in a 350°F oven for about 5-7 minutes, keeping a close eye to prevent burning.
- Warm the nut butter: If your nut butter is particularly thick or stiff, microwave it for a few seconds to soften it slightly before adding it to the syrup mixture. This will make it easier to stir and ensure it blends evenly.
- Adjust sweetness to taste: If you prefer a less sweet bar, reduce the amount of brown sugar slightly. You can also experiment with different sweeteners like coconut sugar or stevia.
- Get creative with mix-ins: Don’t be afraid to experiment with different dried fruits, nuts, seeds, or even chocolate chips to customize the flavor to your liking.
- Pressing power: Using the wax paper really does help evenly distribute the force when pressing the bars into the pan. You can even use the bottom of a measuring cup for even more force.
Serving & Storage Suggestions
These no-bake bars are perfect as a pre-workout snack, a midday energy boost, or a healthy dessert. They are best served chilled or at room temperature.
Store the bars tightly wrapped in plastic wrap or in an airtight container in the refrigerator for up to one week. For longer storage, you can freeze them for up to two months. Thaw in the refrigerator before serving.
Nutritional Information
| Nutrient | Amount per Serving | % Daily Value* |
|---|---|---|
| Calories | 83 kcal | N/A |
| Calories from Fat | 24 g | 29% |
| Total Fat | 2.7 g | 4% |
| Saturated Fat | 0.3 g | 1% |
| Cholesterol | 0 mg | 0% |
| Sodium | 43.8 mg | 1% |
| Total Carbohydrate | 13.5 g | 4% |
| Dietary Fiber | 1.8 g | 7% |
| Sugars | 2.7 g | 10% |
| Protein | 2 g | 4% |
*Percent Daily Values are based on a 2,000 calorie diet. Your daily values may be higher or lower depending on your calorie needs.
Variations & Substitutions
- Vegan: Use maple syrup or light molasses instead of honey. Ensure your nut butter is also vegan-friendly (some contain honey).
- Gluten-Free: Ensure your oats are certified gluten-free.
- Chocolate Chip Cookie: Replace the dried fruit with an equal amount of semisweet miniature chocolate chips (or carob chips). Combine the cereal mixture with the syrup mixture, then let the combined mixture stand 10 minutes before adding the chips.
- Peanut Butter Cookie: Use chopped dates for the dried fruit and dry roasted peanuts for the nuts. Use honey, or half honey-half molasses for the syrup and peanut butter for the nut butter.
- Will You Cherry Me? Use chopped dried tart cherries for the fruit and lightly salted roasted almonds for the nuts. Use any nut butter (almond butter is great, but I know, very expensive), and add 1/4 teaspoon almond extract.
- Apple Pie: Use chopped dried apples for the fruit and rice syrup or honey for the syrup. Be sure to add the cinnamon option, and use toasted walnuts or pecans for the nuts.
FAQs (Frequently Asked Questions)
Q: Can I use regular rolled oats instead of quick-cooking oats?
A: Quick-cooking oats work best for this recipe because they are finer and help bind the bars together. If you only have rolled oats, you can pulse them in a food processor a few times to break them down slightly.
Q: My bars are too crumbly. What did I do wrong?
A: This is likely due to not enough of the syrup mixture. Ensure you’re using the correct measurements, and that you’re pressing the mixture firmly enough into the pan. You can also try adding a tablespoon more of nut butter to help bind the ingredients.
Q: Can I use different types of nut butter?
A: Absolutely! Peanut butter, almond butter, cashew butter, and even sunflower seed butter all work well in this recipe. Just keep in mind that the flavor will change depending on the type of nut butter you use.
Q: How long do these bars last?
A: These bars will last for up to one week when stored in an airtight container in the refrigerator. You can also freeze them for up to two months.
Q: Can I add protein powder to these bars?
A: Yes, you can add a scoop of protein powder to the dry ingredients. This will increase the protein content of the bars, making them an even more satisfying snack.
Final Thoughts
So ditch the store-bought energy bars filled with mystery ingredients and whip up a batch of these homemade Cliff Bars instead! They’re packed with wholesome goodness, customizable to your taste preferences, and incredibly easy to make. Whether you’re hitting the trails, tackling a busy workday, or simply craving a healthy treat, these bars are the perfect solution. I encourage you to try this recipe, experiment with different flavors, and let me know what creative combinations you come up with. Share your creations with friends and family, and fuel your adventures with these delicious and nutritious no-bake bars!