
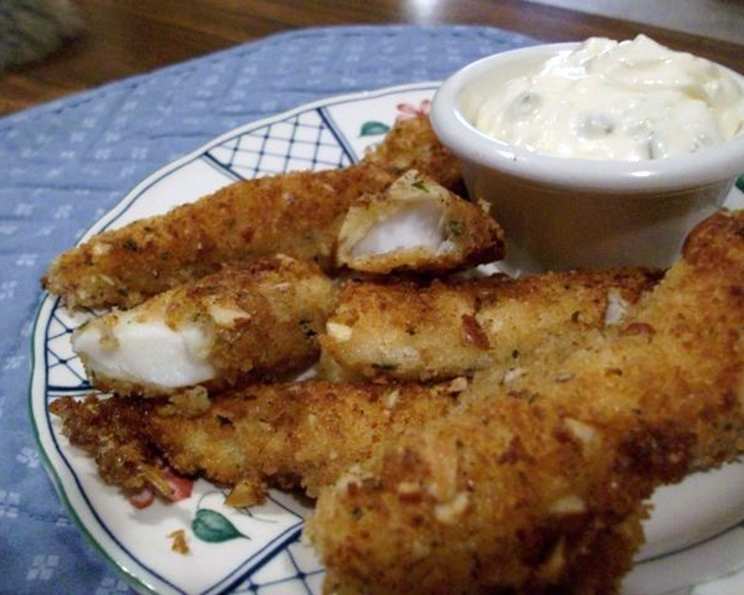
Homemade Cod Fish Sticks: A Culinary Classic, Elevated
I remember being a child, and the sheer excitement that coursed through me when fish sticks were on the menu for dinner. There was something about those crispy, golden batons that just screamed “comfort food.” While the frozen variety certainly had its charm, nothing compares to the satisfaction of biting into a homemade fish stick, knowing exactly what ingredients went into making it – and tasting the incredible difference freshness makes. This recipe elevates that nostalgic favorite to a gourmet experience, while still keeping the simple joy of the original intact.
Recipe Overview
- Prep Time: 20 minutes
- Cook Time: 8-16 minutes
- Total Time: 28-36 minutes
- Servings: 4
- Yield: Approximately 20 fish sticks
- Dietary Type: Pescatarian
Ingredients
- 1 lb cod fish fillet, skinless
- 1/4 teaspoon salt
- 1/4 teaspoon black pepper
- 1/2 teaspoon cayenne pepper, or to taste
- 2 cups seasoned breadcrumbs or panko breadcrumbs
- 1/4 cup finely chopped almonds (optional, adds a great nutty crunch)
- Flour, for dredging
- 1 egg, lightly beaten
- 2 tablespoons water (for the egg wash)
- 4 tablespoons butter
- 1/4 cup olive oil
Equipment Needed
- Cutting board
- Sharp knife
- 3 shallow dishes or pans
- Whisk
- Large skillet
- Waxed paper or parchment paper
- Sheet pan
- Paper towels
Instructions
-
Prepare the Cod: Begin by thoroughly rinsing the cod fillet under cold water and patting it dry with paper towels. Place the fillet on a cutting board and, using a sharp knife, carefully cut it into strips approximately 1/2-inch thick and 2-3 inches long. These will be your fish stick shapes.
-
Season the Cod: In a medium bowl, season the cod strips with salt, black pepper, and cayenne pepper. The amount of cayenne pepper can be adjusted to your liking, depending on how much heat you desire. Gently toss the fish to ensure that all sides are evenly coated with the seasoning. Set aside while you prepare the breading station.
-
Set Up the Breading Station: This is where the magic happens. You’ll need three shallow dishes or pans for the breading process. In the first dish, place the flour for dredging. In the second dish, prepare the egg wash by whisking together the egg and water until well combined. In the third dish, combine the breadcrumbs (either seasoned or panko) with the finely chopped almonds (if using). Mix well to ensure the almonds are evenly distributed throughout the breadcrumbs.
-
Bread the Fish Sticks: Now, one by one, dredge each cod strip in the flour, making sure to coat it completely. Shake off any excess flour. Next, dip the floured strip into the egg wash, ensuring it’s fully coated. Finally, transfer the egg-washed strip into the breadcrumb mixture. Gently press the fish into the breadcrumbs to ensure they adhere properly on all sides. Place the breaded fish sticks on a sheet pan lined with waxed paper or parchment paper.
-
Cook the Fish Sticks: In a large skillet, heat the butter and olive oil over medium heat. The combination of butter and olive oil adds both flavor and prevents the butter from burning. Once the butter is melted and the oil is shimmering, carefully add the breaded fish sticks to the skillet in a single layer, being careful not to overcrowd the pan. You may need to work in batches to avoid overcrowding.
-
Cook to Golden Perfection: Cook the fish sticks for approximately 2-4 minutes per side, or until they are golden brown and cooked through. The exact cooking time will depend on the thickness of the fish strips and the heat of your stove. Be sure to monitor them closely to prevent burning. A good indication that the fish is done is when it flakes easily with a fork.
-
Drain and Serve: Once the fish sticks are cooked, transfer them to a plate lined with paper towels to drain any excess oil. This will help keep them crispy. Serve immediately with your favorite dipping sauces.
Expert Tips & Tricks
- Panko vs. Seasoned Breadcrumbs: For a lighter, crispier coating, use panko breadcrumbs. For a more traditional flavor, opt for seasoned breadcrumbs. You can also create your own seasoned breadcrumbs by adding herbs like dried parsley, dill, or garlic powder to plain breadcrumbs.
- Prevent Soggy Fish Sticks: Ensure the fish is thoroughly dry before dredging it in flour. This will help the breading adhere properly and prevent it from becoming soggy. Also, don’t overcrowd the pan when cooking the fish sticks. This will lower the temperature of the oil and result in steamed, rather than crispy, fish sticks.
- Baking Option: For a healthier alternative, you can bake the breaded fish sticks instead of frying them. Preheat your oven to 400°F (200°C). Place the breaded fish sticks on a baking sheet lined with parchment paper and bake for 12-15 minutes, or until golden brown and cooked through, flipping halfway through.
- Spice it Up: Add a pinch of smoked paprika or garlic powder to the breadcrumb mixture for an extra layer of flavor.
- Make Ahead: Bread the fish sticks ahead of time and store them in the refrigerator for up to 2 hours before cooking.
Serving & Storage Suggestions
Serve these homemade cod fish sticks hot and crispy with your favorite dipping sauces. Classic options include tartar sauce, ketchup, or lemon wedges. For a complete meal, pair them with coleslaw, french fries, or a simple salad.
Leftover fish sticks can be stored in an airtight container in the refrigerator for up to 3 days. To reheat, bake them in a preheated oven at 350°F (175°C) for 5-10 minutes, or until heated through and crispy. You can also reheat them in a skillet over medium heat, but be careful not to burn them. Reheating in the microwave is not recommended as it will make them soggy. Fish sticks are best eaten fresh and aren’t recommended for freezing after cooking.
Nutritional Information
| Nutrient | Amount per Serving | % Daily Value |
|---|---|---|
| Calories | 400 kcal | 20% |
| Total Fat | 25g | 38% |
| Saturated Fat | 12g | 60% |
| Cholesterol | 100mg | 33% |
| Sodium | 500mg | 22% |
| Total Carbohydrate | 30g | 10% |
| Dietary Fiber | 2g | 8% |
| Sugars | 2g | N/A |
| Protein | 20g | 40% |
Nutritional information is an estimate and may vary based on specific ingredients and cooking methods.
Variations & Substitutions
- Gluten-Free: Use gluten-free flour and gluten-free breadcrumbs to make this recipe gluten-free. Almond flour also works well for dredging.
- Dairy-Free: Substitute the butter with olive oil or coconut oil for a dairy-free option.
- Different Fish: While cod is the classic choice, you can also use other white fish fillets, such as haddock, pollock, or tilapia.
- Herb Crusted: Add finely chopped fresh herbs like parsley, dill, or chives to the breadcrumb mixture for a fresh, herby flavor.
- Spicy Fish Sticks: Increase the amount of cayenne pepper or add a pinch of red pepper flakes to the breadcrumb mixture for a spicier kick.
- Lemon Pepper: Season the cod with lemon pepper seasoning for a zesty twist.
FAQs (Frequently Asked Questions)
Q: Can I use frozen cod fillets for this recipe?
A: Yes, you can use frozen cod fillets, but make sure to thaw them completely before starting the recipe. Pat them dry with paper towels to remove any excess moisture.
Q: How can I tell if the fish sticks are cooked through?
A: The fish is cooked through when it flakes easily with a fork and is no longer translucent in the center.
Q: Can I bake these fish sticks instead of frying them?
A: Yes, you can bake them. Preheat your oven to 400°F (200°C) and bake for 12-15 minutes, flipping halfway through, until golden brown and cooked through.
Q: Can I make these fish sticks ahead of time?
A: You can bread the fish sticks ahead of time and store them in the refrigerator for up to 2 hours before cooking.
Q: What are some good dipping sauces to serve with these fish sticks?
A: Classic options include tartar sauce, ketchup, lemon wedges, or a homemade aioli.
Final Thoughts
Homemade cod fish sticks offer a delightful twist on a beloved classic, bringing a touch of gourmet flair to a simple and comforting dish. This recipe is incredibly versatile, allowing you to customize the flavors to your liking, whether you prefer a spicier kick or a herby freshness. So gather your ingredients, preheat your skillet (or oven), and embark on a culinary adventure that will surely bring smiles to your table. I encourage you to try this recipe, experiment with different variations, and share your creations with friends and family. Bon appétit!