
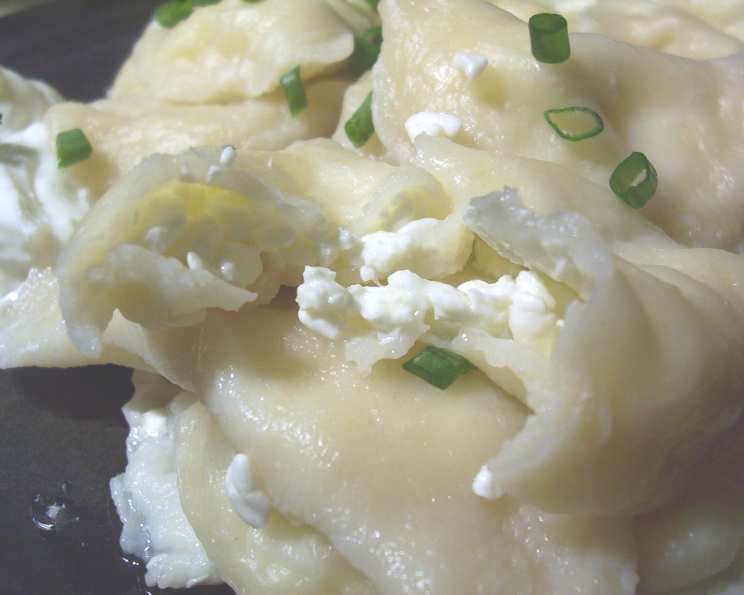
Homemade Cottage Cheese Pierogies: An Old-World Delight
The aroma of buttered onions and sizzling bacon always takes me back to my grandmother’s kitchen. She’d spend hours at her weathered wooden table, her hands expertly shaping pierogies filled with creamy cottage cheese. Each one was a little masterpiece, a testament to her love and a taste of our family’s heritage. To this day, that simple dumpling is more than just food; it’s a warm embrace, a memory etched in my heart, and a tradition I’m honored to continue.
Recipe Overview
- Prep Time: 45 minutes
- Cook Time: 15-20 minutes per batch
- Total Time: 1 hour + resting time
- Servings: About 4-6
- Yield: Approximately 24 pierogies
- Dietary Type: Vegetarian
Ingredients
For the Cottage Cheese Filling:
- 2 cups dry curd cottage cheese
- 1 egg, slightly beaten
- Salt to taste
- Optional: Additional egg or egg yolk or thick sour cream, if the cheese is very dry
For the Pierogie Dough:
- 2 1/2 cups flour
- 1/2 teaspoon salt
- 1 egg
- 2 teaspoons oil
- 3/4 cup warm water
Equipment Needed
- Large mixing bowl
- Rolling pin
- Floured surface
- Large biscuit cutter or drinking glass
- Large pot
- Slotted spoon or skimmer
- Colander
- Tea towels
Instructions
-
Prepare the Cottage Cheese Filling: In a bowl, combine the dry curd cottage cheese with the slightly beaten egg. Season generously with salt to taste.
-
Adjust Consistency (if needed): If your cottage cheese is very dry, don’t hesitate to add an additional egg (or just the yolk) or a dollop of thick sour cream. This will create a smoother, creamier filling that holds its shape well.
-
Make the Dough: In a deep bowl, thoroughly mix the flour with the salt. This ensures even distribution and proper gluten development.
-
Incorporate Wet Ingredients: Add the egg, oil, and warm water to the flour mixture. Begin mixing until a medium-soft dough forms. The water should be warm, not hot, to activate the gluten in the flour.
-
Knead the Dough: Turn the dough out onto a lightly floured board. Knead until it becomes smooth and elastic. Be cautious! Over-kneading can toughen the dough, resulting in a less tender pierogi. Aim for a smooth, pliable texture.
-
Divide and Rest: Divide the dough into two equal parts. Cover each part with a clean tea towel or plastic wrap to prevent drying out. Let the dough rest for at least 10 minutes. This resting period allows the gluten to relax, making the dough easier to roll.
-
Roll Out the Dough: On a lightly floured surface, roll out one portion of the dough quite thinly. The thinner the dough, the more delicate your pierogies will be. Aim for about 1/8 inch thickness.
-
Cut the Rounds: Use a large biscuit cutter or the open end of a glass (about 3 inches in diameter) to cut out rounds from the rolled dough. This is where those old-world grandmothers’ tricks come in handy!
-
Assemble the Pierogies: Hold a dough round in the palm of your hand. Place a spoonful of the cottage cheese filling in the center. Be generous, but don’t overfill, or the pierogi will be difficult to seal.
-
Fold and Seal: Fold the dough over to form a half-circle, encasing the filling. Press the edges together firmly with your fingers to seal. Ensure the edges are completely free of filling for a secure closure. A fork can also be used to crimp the edges for a decorative and extra-secure seal.
-
Prevent Drying: Place the assembled pierogies on a lightly floured board or tea towel. Cover them with another tea towel to prevent them from drying out while you continue assembling the rest.
-
Cooking the Pierogies: Bring a large pot of salted water to a rapid boil. The amount of salt should be generous, similar to pasta water, to season the pierogies from the inside out.
-
Boil in Batches: Gently drop a few pierogies into the boiling water. Do not overcrowd the pot, as this will lower the water temperature and cause the pierogies to stick together.
-
Stir Gently: Stir the pierogies very gently with a wooden spoon to separate them and prevent them from sticking to the bottom of the pot.
-
Cook Until Puffed: Continue boiling for 3-4 minutes. The cooking time will depend on the size of your pierogies, the thickness of the dough, and the consistency of the filling. They are ready when they puff up and float to the surface.
-
Drain Thoroughly: Remove the cooked pierogies with a perforated spoon or skimmer and transfer them to a colander to drain thoroughly. This is crucial to prevent soggy pierogies.
-
Butter and Keep Warm: Place the drained pierogies in a deep dish and sprinkle them generously with melted butter. This prevents them from sticking together and adds richness. Cover the dish to keep the pierogies hot until all are cooked.
-
Serve and Enjoy: Serve the pierogies in a large dish, avoiding overcrowding. Top with melted butter, chopped crisp bacon, and/or chopped onions lightly browned in butter. These classic toppings enhance the flavor and add a satisfying crunch.
Expert Tips & Tricks
- Make Ahead: The dough can be made a day in advance and stored in the refrigerator. This actually improves its texture! Just be sure to bring it to room temperature before rolling.
- Freezing: Pierogies freeze beautifully. Arrange them in a single layer on a baking sheet and freeze until solid. Then, transfer them to a freezer bag for longer storage.
- Dough Too Sticky? If your dough is too sticky, add a little flour, one tablespoon at a time, until it becomes manageable.
- Filling Too Runny? If your cottage cheese filling is too runny, drain it through a cheesecloth-lined sieve for a few hours before using.
- Alternative Fillings: While this recipe focuses on classic cottage cheese, feel free to experiment with other fillings like potato and cheese, sauerkraut, or even fruit!
Serving & Storage Suggestions
Serve your homemade cottage cheese pierogies immediately for the best flavor and texture. They are delicious as a main course or a side dish. Leftovers can be stored in an airtight container in the refrigerator for up to 3 days.
Reheating Options:
- Pan-frying: Pan-fry pierogies in butter or bacon fat until golden brown and crispy. This is a popular way to reheat them and adds a delicious caramelized flavor.
- Double Boiler/Oven: Heat the pierogies in the top of a double boiler or in the oven until they are hot and plump. This is a gentler method that helps retain moisture.
- Deep-frying: Deep-fry the pierogies for a crispy, golden-brown exterior. This is a less traditional method, but it’s perfect for a quick and indulgent treat.
Nutritional Information
(Please note that these values are approximate and can vary depending on specific ingredients and serving sizes.)
| Nutrient | Amount per Serving | % Daily Value |
|---|---|---|
| Calories | 350 kcal | 18% |
| Total Fat | 15g | 23% |
| Saturated Fat | 5g | 25% |
| Cholesterol | 100mg | 33% |
| Sodium | 400mg | 17% |
| Total Carbohydrate | 40g | 13% |
| Dietary Fiber | 2g | 8% |
| Sugars | 2g | – |
| Protein | 20g | 40% |
Variations & Substitutions
- Gluten-Free Pierogies: Use a gluten-free flour blend to make gluten-free pierogies. You may need to add a binder like xanthan gum to improve the texture.
- Vegan Pierogies: Substitute the egg in the dough with a flax egg (1 tablespoon ground flaxseed mixed with 3 tablespoons water). Use a vegan cottage cheese alternative or create a potato-based filling.
- Savory Pierogies: Add sautéed onions and garlic to the dough for a savory flavor.
- Sweet Pierogies: Fill the pierogies with fruit preserves or sweetened farmer cheese for a delicious dessert.
- Regional Variations: Adapt the filling to reflect your regional cuisine. For example, in some regions, pierogies are filled with sauerkraut and mushrooms.
FAQs (Frequently Asked Questions)
Q: Can I use store-bought pierogi dough?
A: While homemade dough is recommended for the best flavor and texture, you can use store-bought wonton wrappers or pasta dough as a shortcut. Adjust cooking time accordingly.
Q: How do I prevent the pierogies from sticking to the bottom of the pot?
A: Be sure to use a large pot with plenty of water. Stir the pierogies gently and frequently with a wooden spoon, especially during the first few minutes of cooking.
Q: How can I tell if the pierogies are cooked through?
A: The pierogies are cooked when they float to the surface and are puffed up. You can also test one by cutting it open to ensure the dough is cooked and the filling is hot.
Q: Can I bake the pierogies instead of boiling them?
A: Yes, you can bake the pierogies! Brush them with melted butter and bake at 375°F (190°C) for about 20-25 minutes, or until golden brown.
Q: What are some other toppings for pierogies?
A: The possibilities are endless! Try sour cream, caramelized onions, sautéed mushrooms, gravy, or even a sprinkle of fresh herbs.
Final Thoughts
Making homemade cottage cheese pierogies is a labor of love, but the result is well worth the effort. These little dumplings are a comforting and satisfying dish that’s perfect for any occasion. So gather your ingredients, roll up your sleeves, and create a batch of these old-fashioned delights. Don’t be afraid to experiment with different fillings and toppings to create your own signature pierogi recipe. I encourage you to share this recipe with your loved ones and create your own cherished memories around the table. Smacznego!