
The Unexpected Joy of Homemade Cottage Cheese: A Culinary Adventure
I’ll never forget the day my grandmother, a woman who believed everything tasted better homemade, declared she was going to make cottage cheese. As a child, the idea seemed ludicrous – why bother when you could simply buy it at the store? But watching her carefully heat the milk, patiently waiting for the curds to form, and then that first taste of creamy, fresh cottage cheese… it was a revelation. The subtle tang, the delicate texture – nothing like the bland, store-bought version I was used to. It was a culinary magic trick right before my eyes. From then on, I understood the simple pleasure of creating something wonderful from scratch.
Recipe Overview
- Prep Time: 5 minutes
- Cook Time: Approximately 30 minutes
- Total Time: 35 minutes
- Yields: Approximately 1 pot of cottage cheese (about 2 cups)
- Dietary Type: Vegetarian
Ingredients
- 1 gallon 2% milk
- ½ cup vinegar (white vinegar or apple cider vinegar work well)
- 1 teaspoon salt, or to taste
- Optional: A splash of cream for a richer, creamier texture
Equipment Needed
- Large pot
- Thermometer (optional, but recommended for accuracy)
- Colander
- Cheesecloth or fine-mesh sieve
- Large bowl
Instructions
-
Heat the Milk: Pour the milk into the large pot and place it over medium heat. The goal is to bring the milk to 190°F (88°C). If you don’t have a thermometer, watch the milk carefully. Turn off the heat just before it begins to boil; you’ll see small bubbles forming around the edges of the pot and steam rising. Do not let it boil over.
-
Add the Vinegar: Once the milk reaches the correct temperature (or is just about to boil), remove the pot from the heat. Gently pour in the vinegar. You’ll immediately notice the milk beginning to separate into curds and whey.
-
Allow to Cool: Let the mixture cool undisturbed for about 15-20 minutes. This allows the curds to fully form and solidify. You’ll see a clear, yellowish liquid (the whey) separating from the white, solid curds.
-
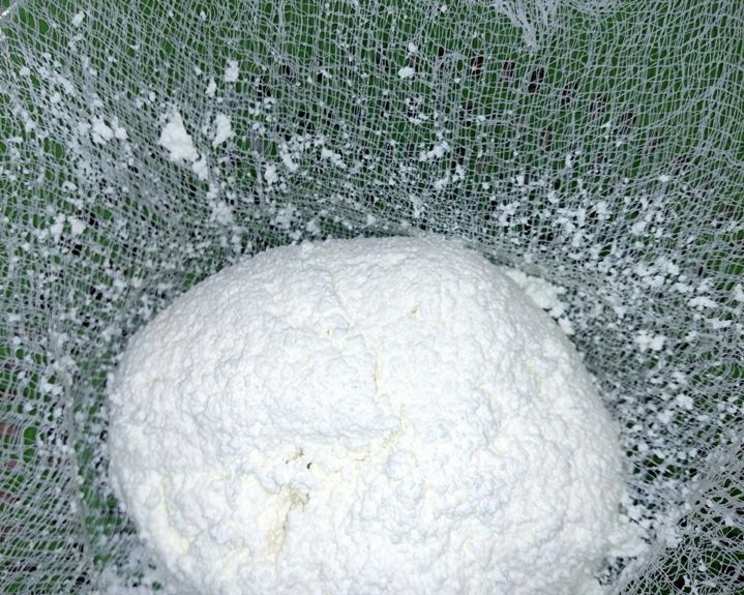
Drain the Whey: Line a colander with several layers of cheesecloth or a fine-mesh sieve. Place the colander over a large bowl to catch the whey. Carefully pour the curd and whey mixture into the lined colander. Allow the whey to drain completely, which should take about 10-15 minutes. You can gently press on the curds with a spoon to expedite the process, but avoid squeezing them too hard, as this can make the cottage cheese dry.
-
Salt and Season: Once the whey has drained, transfer the curds to a clean bowl. Sprinkle on the salt and mix well. Taste and adjust the amount of salt according to your preference. Some people prefer a more pronounced salty flavor, while others prefer a milder taste.
-
Optional Cream Enrichment: For a richer and creamier cottage cheese, you can add a splash of cream (heavy cream, half-and-half, or even milk) to the curds. Start with a small amount and add more until you reach your desired consistency. Mix gently to incorporate the cream evenly.
-
Enjoy! Your homemade cottage cheese is now ready to enjoy. Serve it fresh or use it in your favorite recipes.
Expert Tips & Tricks
- Milk Selection: While this recipe calls for 2% milk, you can experiment with different fat percentages. Whole milk will result in a richer, creamier cottage cheese, while skim milk will yield a drier, less flavorful version.
- Vinegar Alternatives: If you don’t have vinegar, you can substitute it with lemon juice. Use the same amount (½ cup) as the vinegar. The taste will be slightly different, but still delicious.
- Whey Preservation: Don’t discard the whey! It’s a nutritional powerhouse and can be used in a variety of ways. Add it to smoothies, use it as a liquid in bread or pancake recipes, or even use it to water your plants.
- Curd Size: The size of the curds depends on how much you stir the mixture while it’s cooling. Less stirring results in larger curds, while more stirring creates smaller curds.
- Adjusting Acidity: If your cottage cheese tastes too acidic, you can rinse the curds with cold water after draining the whey. This will help to remove some of the excess vinegar.
Serving & Storage Suggestions
Serve your homemade cottage cheese chilled or at room temperature. It’s delicious on its own, as a topping for toast or crackers, mixed into salads, or used in cooked dishes like lasagna.
Store leftover cottage cheese in an airtight container in the refrigerator. It will keep for up to 5 days. Because this cottage cheese lacks preservatives, it will spoil faster than store-bought varieties. Pay attention to the smell and appearance; discard if it develops an off odor or mold.
Freezing cottage cheese is not recommended, as it can change the texture and make it watery upon thawing.
Nutritional Information
(Note: This is an estimate, as the nutritional content will vary depending on the specific ingredients used and the amount of whey drained.)
| Nutrient | Amount per Serving (approx. ½ cup) | % Daily Value* |
|---|---|---|
| Calories | 120 kcal | 6% |
| Total Fat | 5g | 8% |
| Saturated Fat | 3g | 15% |
| Cholesterol | 15mg | 5% |
| Sodium | 150mg | 7% |
| Total Carbohydrate | 5g | 2% |
| Dietary Fiber | 0g | 0% |
| Sugars | 5g | – |
| Protein | 12g | 24% |
| Vitamin A | 150 IU | 3% |
| Calcium | 120mg | 12% |
| Iron | 0.1mg | 1% |
*Percent Daily Values are based on a 2,000 calorie diet.
Variations & Substitutions
- Herb-Infused Cottage Cheese: Mix in fresh herbs like dill, chives, or parsley after draining the whey.
- Garlic and Onion Cottage Cheese: Add minced garlic and finely chopped red onion for a savory twist.
- Sweet Cottage Cheese: Stir in a drizzle of honey or maple syrup and a sprinkle of cinnamon for a sweet treat.
- Spicy Cottage Cheese: Add a pinch of red pepper flakes or a dash of hot sauce for a spicy kick.
- Vegan Cottage Cheese: This recipe cannot be made vegan due to the core ingredient being dairy milk. To create a vegan alternative, you would need to use a base of soaked and blended nuts (like cashews or almonds) or tofu, along with lemon juice or apple cider vinegar for curdling.
FAQs (Frequently Asked Questions)
Q: Why is my cottage cheese not forming curds?
A: Make sure your milk is heated to the correct temperature (190°F or just before boiling). Also, ensure you’re using enough vinegar (½ cup per gallon of milk). Expired vinegar may also be less effective.
Q: Can I use ultra-pasteurized milk?
A: Ultra-pasteurized milk may not curdle as effectively as regular pasteurized milk due to the higher heat treatment. Regular pasteurized milk is recommended for the best results.
Q: My cottage cheese is too dry. What can I do?
A: You may have pressed too much whey out of the curds. Try adding a splash of cream or milk to rehydrate them and achieve a creamier consistency.
Q: How long does homemade cottage cheese last?
A: Homemade cottage cheese typically lasts for up to 5 days in the refrigerator, stored in an airtight container. Since it lacks preservatives, it spoils faster than store-bought versions.
Q: Can I use this cottage cheese in baking?
A: Yes, homemade cottage cheese can be used in baking recipes like cheesecakes, muffins, and breads. It will add moisture and a subtle tangy flavor.
Final Thoughts
Making your own cottage cheese might seem like a daunting task, but it’s surprisingly simple and incredibly rewarding. The taste of freshly made cottage cheese is far superior to anything you can buy in the store. It’s a testament to the magic that can happen when you take simple ingredients and transform them into something truly special. So, gather your ingredients, put on some music, and embark on this culinary adventure. I promise, you won’t be disappointed! Experiment with different flavors and textures, and share your creations with friends and family. And don’t forget to let me know how it turns out – I’d love to hear about your homemade cottage cheese journey!