
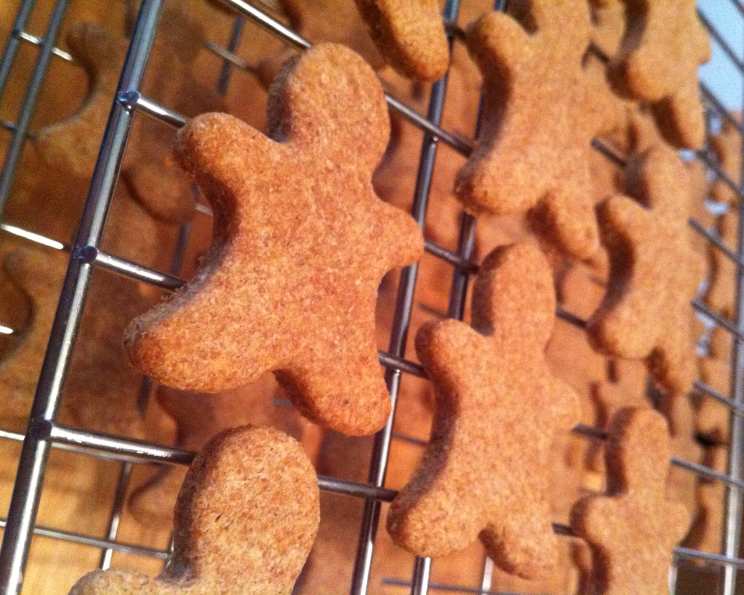
Homemade Dog Biscuits: A Paw-some Treat!
I remember the first time I baked for my golden retriever, Buddy. He was a mischievous pup, always getting into things he shouldn’t. One day, I caught him eyeing a tray of cookies I’d just pulled from the oven. I knew human treats were a no-go, but the look in his eyes sparked an idea. I decided to whip up a batch of dog biscuits just for him, and the tail wags and happy barks that followed were more rewarding than any five-star review. These homemade biscuits have become a staple in our house, and I’m excited to share the recipe with you.
Recipe Overview
- Prep Time: 15 minutes
- Cook Time: 20-25 minutes
- Total Time: 35-40 minutes
- Yields: Approximately 2 dozen biscuits
- Dietary Type: Suitable for most dogs (check for allergies)
Ingredients
- 2 ¾ cups whole wheat flour
- ½ cup powdered milk
- 1 teaspoon salt
- ¼ teaspoon garlic powder
- 1 egg
- 6 tablespoons vegetable oil
- 8 tablespoons water
- 2 jars baby food (meat, beef, any flavor, strained)
Equipment Needed
- Large mixing bowl
- Measuring cups and spoons
- Rolling pin
- Dog bone shaped cookie cutter (or any shape)
- Baking sheet
- Oven
Instructions
-
Preheat your oven to 350 degrees Fahrenheit (175 degrees Celsius).
-
In a large mixing bowl, combine the whole wheat flour, powdered milk, salt, and garlic powder. Whisk these dry ingredients together until they are evenly distributed. This ensures that each biscuit has a consistent flavor profile.
-
Add the egg, vegetable oil, water, and baby food to the dry ingredients. The baby food adds both flavor and moisture to the biscuits, making them more palatable for your furry friend. You can use any flavor of baby food your dog enjoys, but meat-based options like beef or chicken are generally popular.
-
Using your hands or a stand mixer with a dough hook attachment, mix all the ingredients together. Continue mixing until a dough forms. If the dough seems too dry, add a little more water, one tablespoon at a time, until it comes together. If it’s too sticky, add a bit more flour.
-
Once the dough has formed, turn it out onto a lightly floured surface. Knead the dough for about 3 minutes. Kneading helps to develop the gluten in the flour, which will give the biscuits a slightly chewier texture.
-
Using a rolling pin, roll the dough out to approximately 1 inch thick. It’s important to roll the dough to a consistent thickness to ensure that the biscuits bake evenly.
-
Use a dog bone shaped cookie cutter (or any shape you prefer) to cut out the biscuits. Gather the dough scraps, reroll them, and continue cutting out biscuits until all the dough is used. Don’t worry about perfect shapes; your dog won’t mind!
-
Place the biscuits on an ungreased baking sheet. Arranging them with a little space in between will promote even baking.
-
Bake in the preheated oven for 20-25 minutes, or until the biscuits are golden brown and firm to the touch. The exact baking time may vary depending on your oven, so keep a close eye on them. A slightly longer baking time will result in a harder, crunchier biscuit, which can be great for cleaning your dog’s teeth.
-
Once baked, remove the baking sheet from the oven and let the biscuits cool completely on a wire rack before serving them to your dog.
Expert Tips & Tricks
- Flavor Boost: For an extra boost of flavor, consider adding a tablespoon of peanut butter (make sure it’s xylitol-free, as xylitol is toxic to dogs) or a sprinkle of dried parsley to the dough.
- Texture Control: If you want a harder biscuit, bake them for a longer period at a lower temperature (e.g., 325°F for 30 minutes). Conversely, for a softer biscuit, reduce the baking time slightly.
- Batch Freezing: You can easily double or triple this recipe and freeze the unbaked biscuits for later use. Simply place the cut-out biscuits on a baking sheet, freeze until solid, then transfer them to a freezer-safe bag or container. When you’re ready to bake, there’s no need to thaw, just add a few minutes to the baking time.
- Baby Food Alternatives: If you don’t have baby food on hand, you can substitute with pureed sweet potato, pumpkin, or applesauce. Just be sure to use unsweetened versions.
- Dough Consistency: The dough should be firm and not too sticky. If it is too sticky, add more flour, a tablespoon at a time.
Serving & Storage Suggestions
These homemade dog biscuits are best served as a treat or reward for good behavior. They can also be used as a training tool. Store the cooled biscuits in an airtight container at room temperature for up to 2 weeks, or in the refrigerator for up to 1 month. For longer storage, you can freeze them for up to 3 months. Thaw frozen biscuits in the refrigerator before serving. Make sure to always provide fresh water for your dog after giving them a biscuit.
Nutritional Information
Note: Nutritional information is an estimate and may vary based on specific ingredients and portion sizes.
| Nutrient | Amount per Biscuit | % Daily Value (for a medium-sized dog) |
|---|---|---|
| Calories | 45 kcal | 2% |
| Total Fat | 2g | 3% |
| Saturated Fat | 0.5g | 2% |
| Cholesterol | 5mg | 2% |
| Sodium | 55mg | 2% |
| Total Carbohydrate | 5.5g | 2% |
| Dietary Fiber | 0.75g | 3% |
| Sugars | 0.5g | N/A |
| Protein | 1.4g | 3% |
Variations & Substitutions
- Gluten-Free Option: Replace the whole wheat flour with a gluten-free blend of flours, such as oat flour, rice flour, and tapioca starch. You may need to adjust the amount of liquid depending on the flour blend you use.
- Grain-Free Option: Use almond flour or coconut flour as a base, but be aware that these flours absorb more liquid, so you’ll need to adjust the amount of water accordingly.
- Vegetarian/Vegan Option: Ensure the baby food is vegetarian or vegan. The recipe is already mostly plant-based, and the egg can be substituted with a flax egg (1 tablespoon flaxseed meal mixed with 3 tablespoons water, let sit for 5 minutes).
- Pumpkin Spice: Add 1 teaspoon of pumpkin pie spice to the dry ingredients for a festive fall treat.
- Chicken Flavored: Use chicken broth instead of water for a richer flavor.
FAQs (Frequently Asked Questions)
Q: Are these biscuits safe for all dogs?
A: These biscuits are generally safe for most dogs, but it’s important to check for any allergies or sensitivities your dog may have to the ingredients. Always consult with your veterinarian if you have any concerns.
Q: Can I use different types of flour?
A: Yes, you can experiment with different flours such as oat flour or brown rice flour. Keep in mind that different flours may absorb liquids differently, so you may need to adjust the amount of water accordingly.
Q: How long will these biscuits stay fresh?
A: When stored properly in an airtight container, these biscuits will stay fresh for up to 2 weeks at room temperature, 1 month in the refrigerator, or 3 months in the freezer.
Q: My dog is a picky eater. What can I do to make these more appealing?
A: Try adding a small amount of peanut butter, cheese, or cooked bacon to the dough. You can also experiment with different flavors of baby food to find one that your dog enjoys.
Q: Can I make these biscuits smaller for smaller dogs?
A: Absolutely! Simply use a smaller cookie cutter or cut the biscuits into smaller squares before baking. You may need to adjust the baking time slightly depending on the size of the biscuits.
Final Thoughts
These homemade dog biscuits are a simple, healthy, and affordable way to show your furry friend some love. Knowing exactly what goes into their treats gives you peace of mind, and the tail wags and happy barks are the best reward. So, gather your ingredients, preheat your oven, and get ready to bake up a batch of happiness for your beloved companion! I encourage you to try this recipe and share your feedback. Don’t hesitate to get creative with flavors and shapes – your dog will appreciate the effort! Happy baking!