
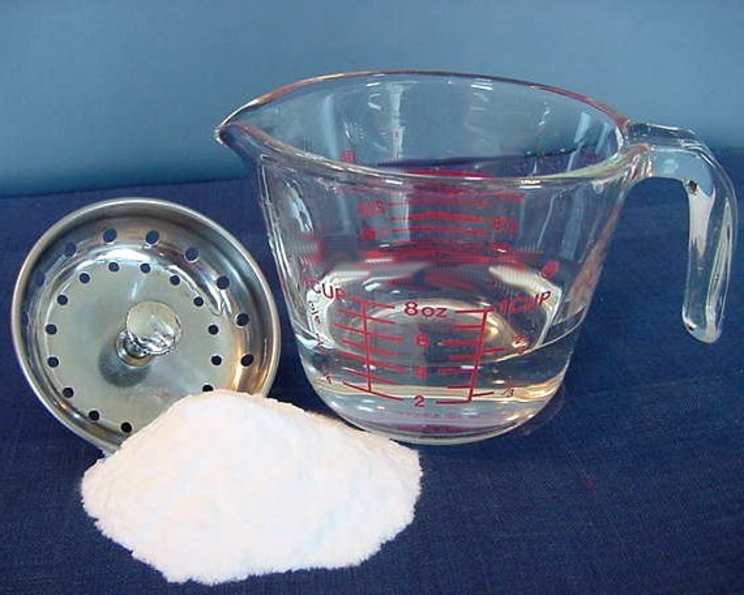
Homemade Drain Cleaner and Declogger
I’ll never forget the day my Aunt Millie called me, practically in tears, about a clogged kitchen sink. Turns out, she’d been pouring all sorts of questionable concoctions down there – store-bought drain cleaners with warning labels the size of billboards. The smell alone was enough to make your eyes water! I knew there had to be a better, safer way. That’s when I shared this simple, yet effective, homemade drain cleaner recipe with her, and she hasn’t looked back since. The best part? It uses ingredients you probably already have in your pantry!
Recipe Overview
- Prep Time: 1 minute
- Total Time: 2 minutes
- Yields: 1 treatment
- Dietary Type: Vegan, Gluten-Free, Dairy-Free, Chemical-Free
Ingredients
- ¼ cup baking soda
- ½ cup vinegar (white or apple cider)
Equipment Needed
- Measuring cups
- Kettle or pot (optional, for hot water rinse)
Instructions
- Carefully pour ¼ cup of baking soda directly into the clogged drain. Try to get as much of it as possible down the drain opening.
- Immediately follow the baking soda with ½ cup of vinegar. You’ll notice a fizzing action as the vinegar reacts with the baking soda. This is exactly what you want!
- Let the mixture sit and work its magic for at least 30 minutes. For stubborn clogs, you can let it sit for several hours, or even overnight. The longer it sits, the more time it has to break down the clog.
- After the waiting period, flush the drain with hot water. If you have a kettle, boil some water and slowly pour it down the drain. Alternatively, run hot water from the tap for several minutes. The hot water will help to clear away any remaining debris and unclog the drain.
Expert Tips & Tricks
- Double the Batch for Tough Clogs: If you’re dealing with a particularly stubborn clog, consider doubling the amount of baking soda and vinegar. Just remember to use a container large enough to accommodate the fizzing reaction without overflowing.
- The Hot Water Rinse is Key: Don’t skip the hot water rinse! This is crucial for washing away the loosened debris and ensuring the drain is fully clear.
- Preventative Maintenance: Use this drain cleaner recipe regularly (e.g., once a month) to prevent clogs from forming in the first place. It’s much easier to prevent a clog than to deal with one that’s already formed.
- Consider Adding Salt: For a more abrasive cleaning action, add ¼ cup of salt (table salt or sea salt) to the baking soda before pouring it down the drain. The salt will help to scrub away any stubborn buildup.
- Use Boiling Water (With Caution): While hot tap water is usually sufficient, for very resistant clogs, you can use boiling water. However, be extremely cautious when pouring boiling water into PVC pipes, as it can potentially soften or damage them. Avoid boiling water if you have plastic pipes.
- Don’t Mix with Commercial Cleaners: Never, ever mix this homemade drain cleaner with commercial drain cleaners. The combination could create dangerous fumes or cause a chemical reaction.
- Plunger Power: After the baking soda and vinegar treatment, and before the hot water rinse, try using a plunger. The added pressure can help dislodge the clog.
Serving & Storage Suggestions
This is a drain cleaner, so there’s no “serving” involved! As for storage, there’s nothing to store. You mix the ingredients fresh each time you need to unclog a drain. The ingredients themselves (baking soda and vinegar) should be stored in airtight containers in a cool, dry place, as you normally would. Baking soda can last indefinitely if stored properly. Vinegar has a very long shelf life as well.
Nutritional Information
Since this recipe is not for consumption, there is no nutritional information to provide.
Variations & Substitutions
- Lemon Juice: If you don’t have vinegar on hand, you can try using lemon juice as a substitute, although vinegar is generally more effective. Use the same amount as you would for vinegar.
- Essential Oils: For a more pleasant scent, you can add a few drops of your favorite essential oil (such as lemon, lavender, or tea tree oil) to the baking soda before pouring it down the drain. Tea tree oil also has antibacterial properties.
- Borax: Add 1/4 cup of borax along with the baking soda and vinegar for a more powerful cleaning effect.
FAQs (Frequently Asked Questions)
Q: Why does the baking soda and vinegar fizz when mixed?
A: The fizzing is a chemical reaction between the baking soda (a base) and the vinegar (an acid). This reaction produces carbon dioxide gas, which helps to loosen and break down the clog.
Q: How often can I use this drain cleaner?
A: You can use this homemade drain cleaner as often as needed, but it’s generally recommended to use it once a month for preventative maintenance.
Q: What types of clogs is this drain cleaner effective against?
A: This drain cleaner is most effective against clogs caused by grease, hair, soap scum, and food particles.
Q: What if the drain is still clogged after using this recipe?
A: If the drain is still clogged after using this recipe, you can try repeating the process. If that doesn’t work, you may need to use a plunger or call a professional plumber.
Q: Is this drain cleaner safe for all types of pipes?
A: This drain cleaner is generally safe for most types of pipes, including PVC and metal pipes. However, as mentioned earlier, be cautious when using boiling water with PVC pipes.
Final Thoughts
So, there you have it – a simple, effective, and eco-friendly way to tackle those pesky clogged drains. It’s amazing what a little baking soda and vinegar can do! Give this recipe a try, and I’m confident you’ll be pleasantly surprised. Plus, you’ll avoid exposing yourself and your family to harsh chemicals. Let me know how it works for you, and don’t hesitate to share your own tips and tricks for keeping those drains clear!